Introduction
Use this guide to replace the broken sliding mechanism of a 2005-2011 Honda Civic center console armrest. The sliding mechanism is the component responsible for connecting the armrest lid to the center console and enables its sliding movement. Due to the broken sliding mechanism inside, the console armrest lid is disconnected from the center console while a portion of the lid still remains attached. Follow this guide for a step-by-step to replace a new sliding mechanism. No special skills are necessary, but having a basic toolkit will be helpful.
Parts
-
-
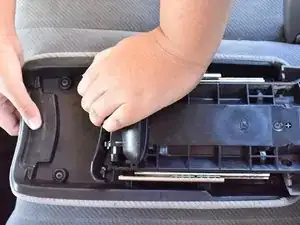
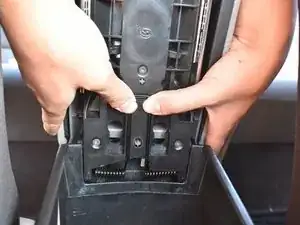
Press down the second-half armrest lid and keep it held in place.
-
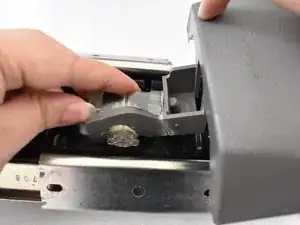
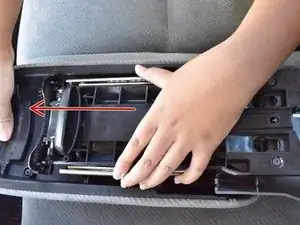
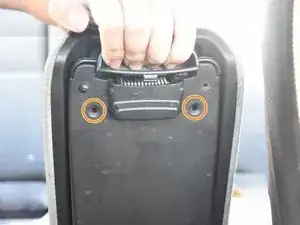
Use a flathead screwdriver or plastic prying tool to pry open the armrest center console back panel.
-
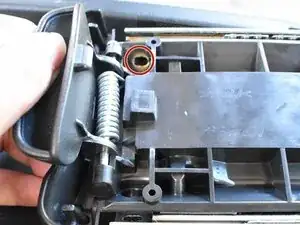
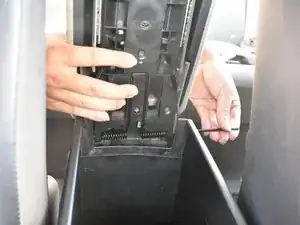
Remove the back panel.
-
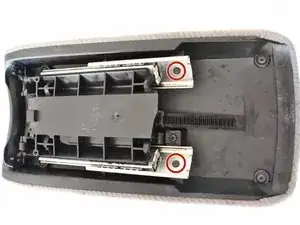
Once you remove the back panel, take notice of the metal pin head on the sides of the armrest center console.
-
-
-
On the interior side of the second-half lid, slide the metal pin outward through the spring coil toward the side of the pin head.
-
Once you see the metal pin pop out from the side of the center console, pull it out.
-
Remove the second-half lid.
-
-
-
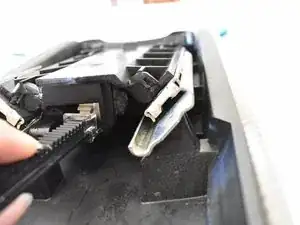
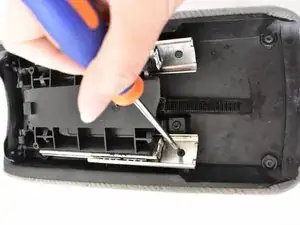
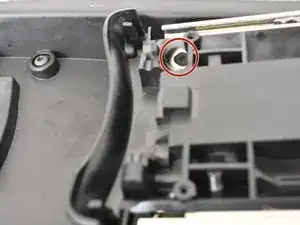
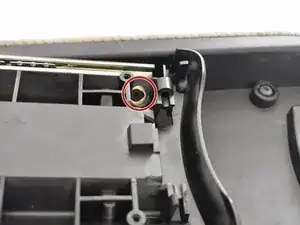
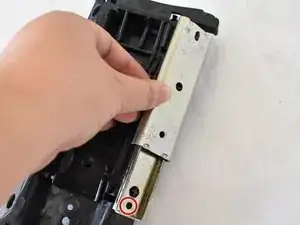
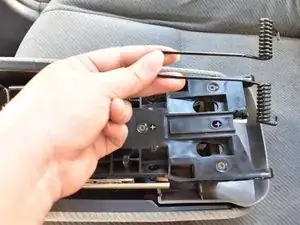
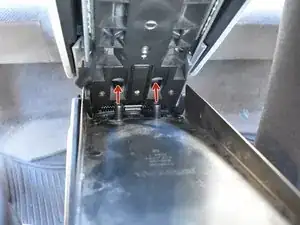
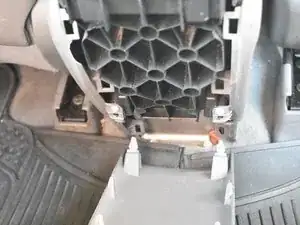
Use a T15 Torx screwdriver to remove the three 12 mm screws that secure the broken sliding mechanism and the second-half lid.
-
Remove the broken sliding mechanism.
-
-
-
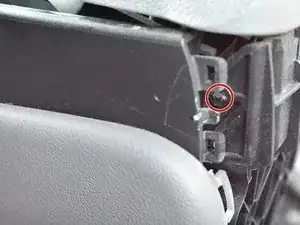
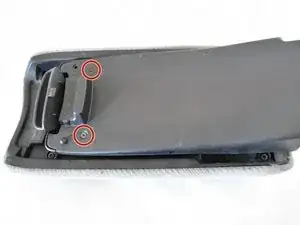
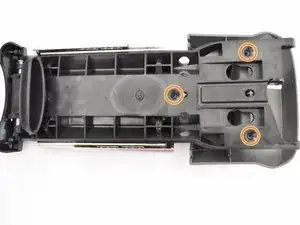
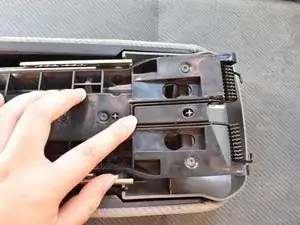
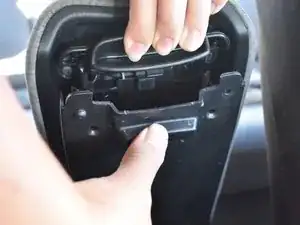
On the interior panel of the armrest lid, there are two screws underneath the latch. Use a T15 Torx screwdriver to remove the two flathead 12 mm T15 Torx screws.
-
Then remove the interior panel.
-
-
-
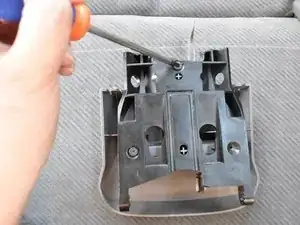
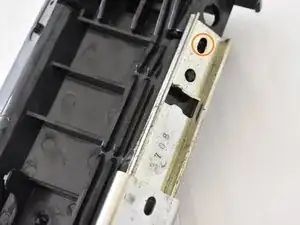
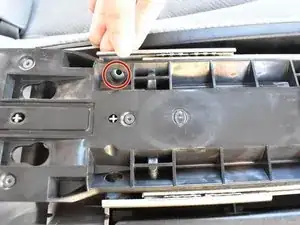
Use a T15 Torx screwdriver to remove the two 12 mm screws that secure the metal plates at the bottom.
-
-
-
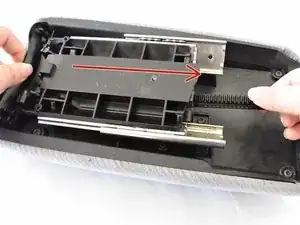
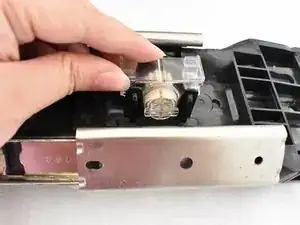
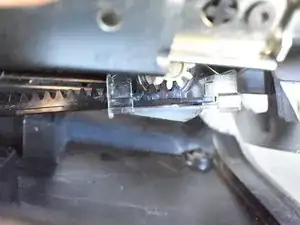
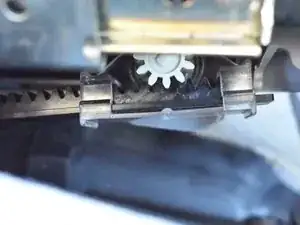
Make sure the pinion gear is in the center of the U-shape bracket, then grab the rack and raise it up to the sliding mechanism.
-
With one hand holding the rack, use your other hand to slowly slide the sliding mechanism backward to get access to the two screws on the metal plates at the top.
-
-
-
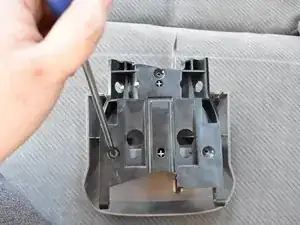
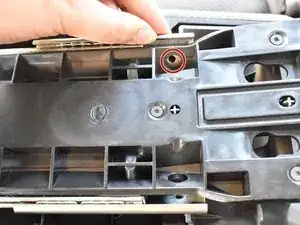
Use a T15 Torx screwdriver to remove the two flathead 12 mm screws that secure the metal plates at the top.
-
-
-
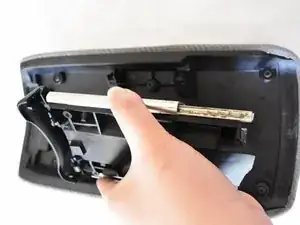
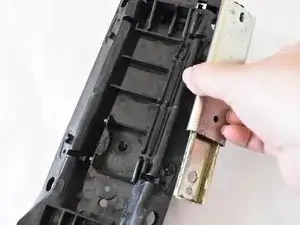
Remove the sliding mechanism.
-
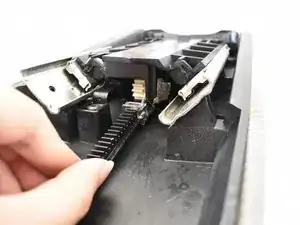
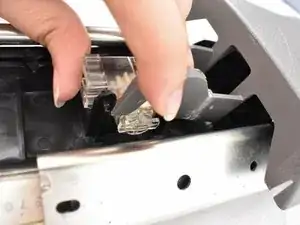
Slide down the pinion gear off the rack and place it somewhere safe for later use in the following steps.
-
-
-
Position the longer metal plate side toward the sliding mechanism.
-
Align the holes on the metal plates with the holes on the sliding mechanism
-
Screw a 12 mm T15 Torx screw into the bottom hole using a T15 Torx screwdriver.
-
Slide down the metal plate and screw in a 12mm T15 Torx screw at the top.
-
Repeat the same process on the other side.
-
-
-
Place the pinion gear in the center of the U-shape bracket of the sliding mechanism, with the pinion gear flat surface on the top and the gear coupling outside the bracket.
-
Take the top second-half lid and place its hook between the gear coupling and the bracket.
-
-
-
Align the three screw bosses on the second-half lid with the small holes on the sliding mechanism.
-
Hold the second-half lid and the sliding mechanism in place. Then, flip over to the other side.
-
Screw the three 12 mm T15 Torx screws into the screw bosses using a T15 Torx screwdriver.
-
-
-
Grab the sliding mechanism and the armrest lid.
-
Slide the rack into the pinion gear and gently slide the sliding mechanism upward.
-
-
-
Align the bottom metal plates with the holes at the edge of the armrest lid.
-
Screw a 12 mm T15 Torx screw into the screw hole on the right side.
-
Repeat the same process on the other side.
-
-
-
Slide the sliding mechanism backward and pull up the latch to access the two screw holes on the metal plates at the top.
-
Screw a 12 mm T15 Torx screw into the screw hole on the right side.
-
Repeat the same process on the other side.
-
-
-
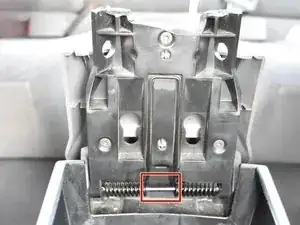
Place the long section of the spring on the rectangle-shape area at the bottom of the sliding mechanism.
-
-
-
While holding the spring in place, position the armrest lid back onto the center console.
-
With one hand holding the armrest lid and spring together, push the metal pin through the hole on the right side of the center console into the spring coils.
-
Use a pliers to push the metal pin all the way into the hole on the left of the center console.
-
-
-
Pull up the latch.
-
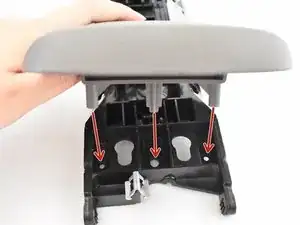
Slide the two small tabs protruding from the interior panel upward into the two large holes at the bottom of the sliding mechanism, then slide them down.
-
Screw the two 12 mm T15 Torx screws into the two screw holes underneath the latch that secure the interior panel.
-


To reassemble your device, follow these instructions in reverse order.