Introduction
Replacing the headlight bulb on your 2007 Toyota 4Runner is a piece of cake and a lot cheaper than a visit to the mechanic. Does your bulb start burning out or have you moved to a brighter version? No matter the reason you need your headlights to work safely and efficiently, this guide will walk you through it step by step so your headlights are ready to light your path ahead. There’s no advanced tools required, and you can finish the job in less than 15 minutes!
Parts
-
-
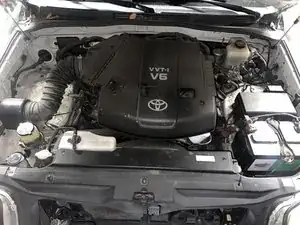
Raise the hood of your 4Runner.
-
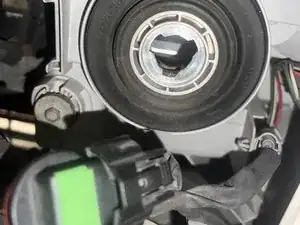
Find the back of the headlight assembly.
-
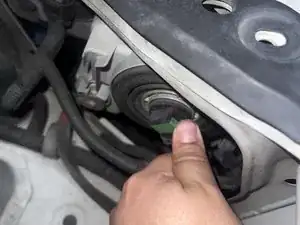
Move the battery or air filter housing, depending on what side you're replacing, to access the bulb more easily.
-
-
-
Find the negative terminal (usually black cable and a “–” sign). Turn the nut of the negative terminal clamp loose with a 10mm wrench or socket. Twist and lift the cable end away from the battery post. Keep moving it aside so it cannot accidentally spring back into contact with the terminal.
-
Usually the positive terminal is red and has a ‘+’. Lift the clamp off the battery post and repeat the same procedure with loosening the nut, as above. When you remove the cable end, make sure it does not touch the battery.
-
Loosen and remove the hold-down bracket and set it aside.
-
If the battery has built in handles, use them. If not, grab the battery from its sides. Just lift it straight up and out of the engine bay. Put it on a safe, level spot.
-
-
-
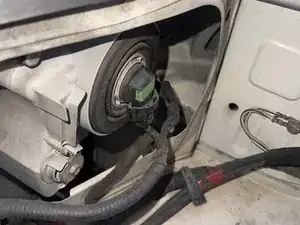
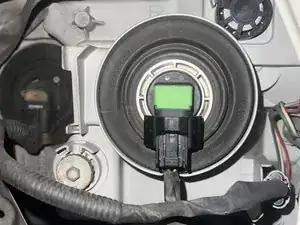
To remove the bulb socket, turn it counterclockwise out of the headlight housing.
-
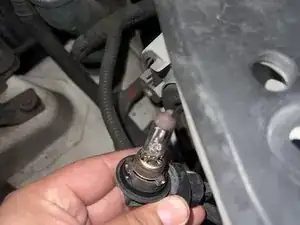
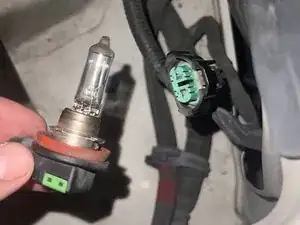
Pull the old bulb out of the socket carefully.
-
-
-
Make sure that the wiring connector clicks back in.
-
Now you're done! Turn on your car and turn on the blinker!
-