Introduction

This guide will detail how to replace the outer casing of a 2007 Toyota Highlander’s key fob, but can be used as a general guide on how to replace the outer casings of most car’s key fobs. Before performing the repair detailed in this guide, you should find the model’s replacement fob casing online. An example search could look like "[car make and model] [car year] key fob case." Make sure to compare measurements of your key case with the product description provided by the seller. Order this case, and when you have the replacement then perform the repair.

  1. odWITGFLDIbghR6e
    • Locate the seam of the casing.

    • The seam might be only available on one side of the key fob. Make sure to look on all sides for the seam.

  2. PZKYQ3ZFeTSYkVa4
    PZKYQ3ZFeTSYkVa4
    J56MNgmGpoTcSUiY
    thlUt4LSEocWUTGW
    • Use a prying tool to pry open the key fob casing.

    • Tools other than a screwdriver can be used, but for safety purposes it is important to use a tool that is small enough to open the seam but not sharp enough to hurt yourself.

    • While it does take a somewhat large amount of force to open the case, it should not take more than you should be able to provide with just a tool. Too much force may damage the components, so be sure to be careful when prying.

  3. rvabywZLVSGlEOkD
    rvabywZLVSGlEOkD
    AolpWmXfi3Dvfld2
    • Remove the electronics from the damaged casing.

    • Be sure to handle the electronics with care, as damaged electronics might lead to a key more damaged than before.

    • The battery may be loose or even fall out. This is ok; simply put the battery back in the slot that it might've fallen out of.

  4. R6ejIqDfu4hiyfsR
    R6ejIqDfu4hiyfsR
    Pj3VWDCNYbGW4xU1
    4x2cq5VZ4wS24VaP
    • Put the electronics into the new case.

    • Again, handle the electronics with care.

    • The electronics need to be placed in the correct side of the key. This side should be the one you took it out of, or commonly the opposite side of the buttons.

  5. QOWIrrjb23dXZIPM
    QOWIrrjb23dXZIPM
    5cQcDGCPZlHoiq1Q
    nJ3TZPOdoLu5wJqU
    • Make sure the buttons and two sides of the casing are lined up.

    • The casings must line up properly for the next step; otherwise the key or its components may be damaged.

  6. TlKHbCPG6Vfeeo3a
    TlKHbCPG6Vfeeo3a
    JZBpKqOpuZo1OccI
    1wukeXPyH1pjB1St
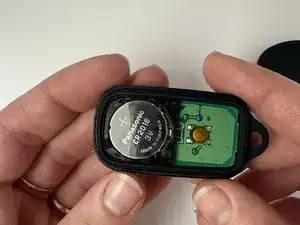
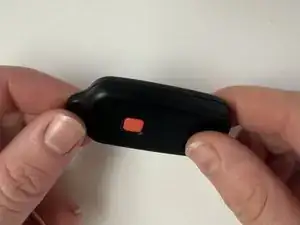
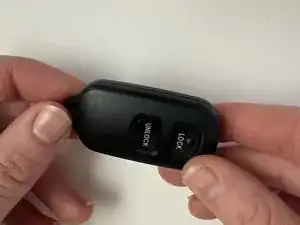
    • Carefully close the new casing and ensure that there is not too much force required to close the case. The two sides should lock with a clicking sound. Make sure to check that the case does not open easily to ensure a successful repair.

    • If the two sides do not properly connect, the key may not be successfully reassembled. Make sure that the key does not reopen and it's reconstructed properly.

Katelyn Rohlwing

Member since: 20/02/24

145 Reputation

0 comments