Introduction
Replacing a headlight on a 2015 Hyundai Elantra is straightforward and requires minimal tools. A Phillips screwdriver and a 12 mm wrench. By following these steps, you’ll restore optimal visibility for safe nighttime driving. The headlight assembly can be accessed from under the hood, and each step will guide you in safely disconnecting and replacing the bulb.
Before you begin, here are some important details:
- Bulb Type: The 2015 Hyundai Elantra uses an H11 bulb. Double-check to ensure compatibility with your specific model.
- Caution: Avoid touching the glass of the new bulb, as oil from your hands can cause it to burn out prematurely.
- Note: Make sure the vehicle is parked on a flat, stable surface with the engine turned off and the parking brake engaged.
- Hazards: If working around electrical components, be mindful of the power cable. Disconnecting the car battery can help reduce the risk of accidental shorts or electrical hazards, though it is not required for this specific repair.
Now that you're prepared, you can proceed through each step to complete the headlight replacement with confidence.
-
-
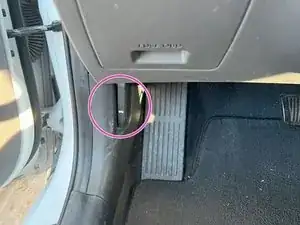
Locate the hood release lever inside the cabin near the driver’s side footwell. Pull the lever to release the hood.
-
-
-
Slide the hood latch above the Hyundai emblem at the front of the vehicle to unlock the hood.
-
Lift the hood and secure it with the hood prop.
-
-
-
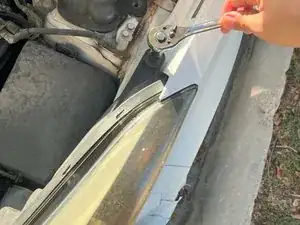
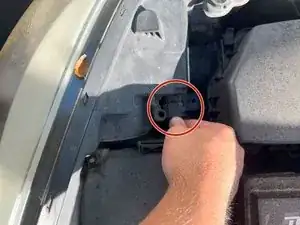
Use a Phillips #2 to remove two 15.0 mm screws securing the headlight assembly.
-
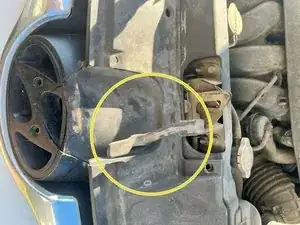
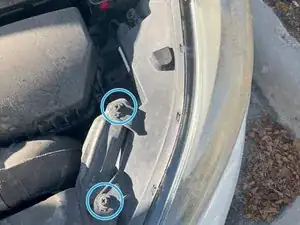
Use a 12 mm wrench to remove the single 12 mm bolt.
-
-
-
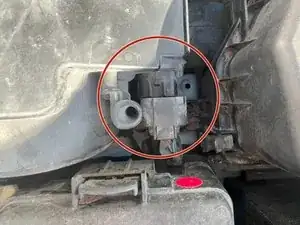
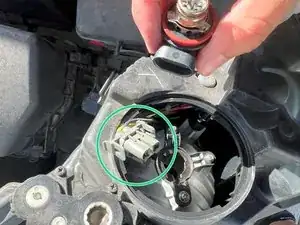
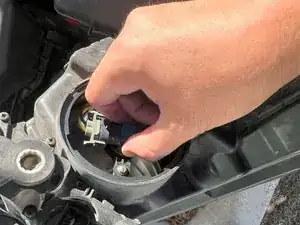
Disconnect the power cable from the back of the headlight.
-
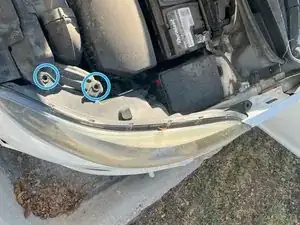
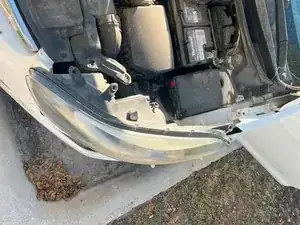
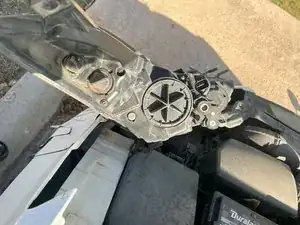
Apply gentle pressure to pull the headlight assembly out from the chassis.
-
-
-
Position the headlight assembly securely.
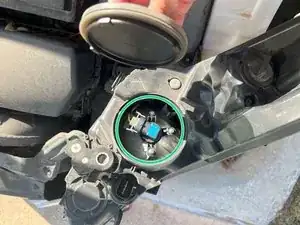
-
Remove the cover protecting the light bulb.
-
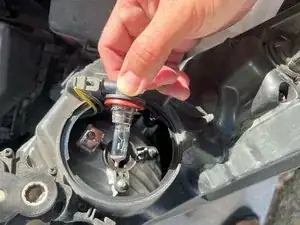
Twist the bulb counterclockwise to release it from the socket.
-
-
-
Insert the new bulb into the connector, ensuring a secure fit before placing it back into the headlight assembly.
-
-
-
Align the headlight assembly with the chassis and reconnect the power connector.
-
Reinsert and tighten the screws and bolt to secure the headlight in place.
-


To reassemble your device, follow these instructions in reverse order.