Introduction
Many owners of motorcycles run into a very simple problem almost every year. The chain usually gets loose after riding season or during and needs to be tightened to keep the bike in good working and riding order. It doesn’t matter if you are a pro or a beginner this is an absolute must for all riders. The chain is essential for all riding as it is what gives the engine the ability to send the power to the rear wheel (wheels if it has more than 2). When a chain gets too loose, it can potentially break, fall off, be uncomfortable, or jam which can be very dangerous especially at high speeds. Proper chain tightness can ensure rider safety and usability with the bike. This guide walks through the tightening of a chain from start to finish pointing out various obstacles and keeping the repair on track, ensuring a problem free fix.
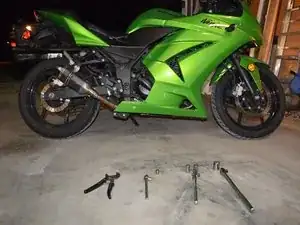
Tools
-
-
Remove any factory or aftermarket chain covers on your bike.
-
Set the cover and bolts aside.
-
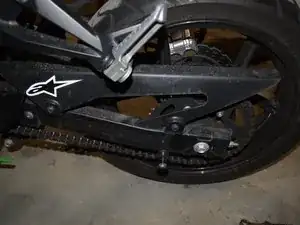
Feel the chain. If there is more than 1 inch of play (movement up or down) then the chain should be tightened.
-
-
-
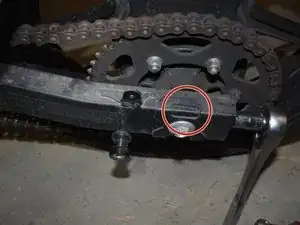
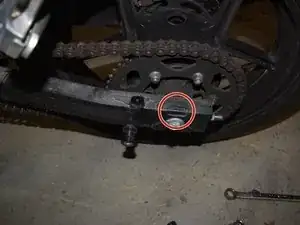
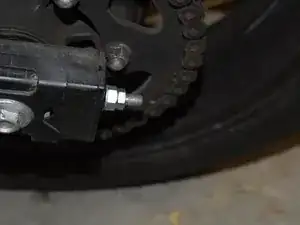
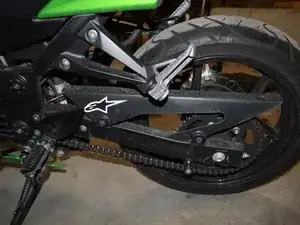
Notice the location of the slider on each side
-
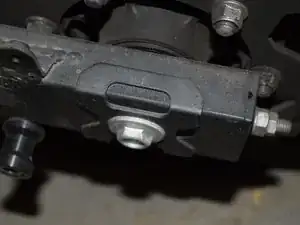
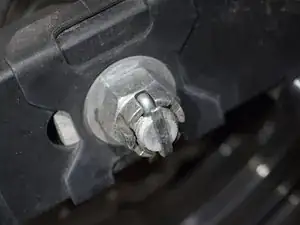
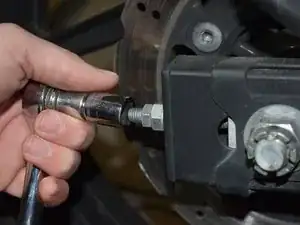
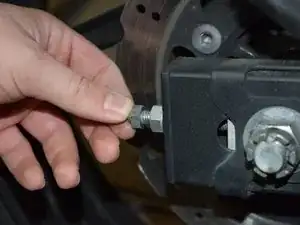
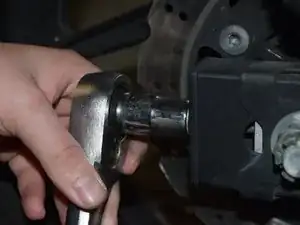
Locate the bolt that travels through the hub of the wheel
-
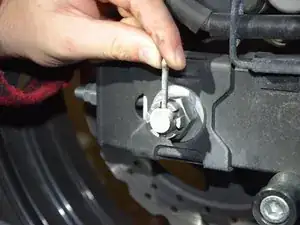
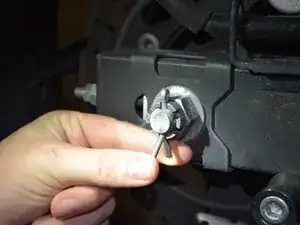
Remove the locking pin holding the nut in place
-
-
-
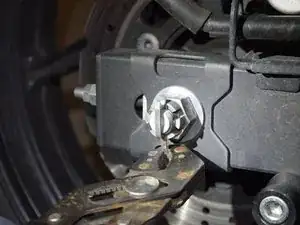
Remove the locking pin
-
Place your 17mm socket on the bolt side and the 1 inch side over the nut
-
Loosen the bolt to about half way
-
-
-
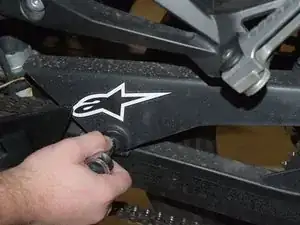
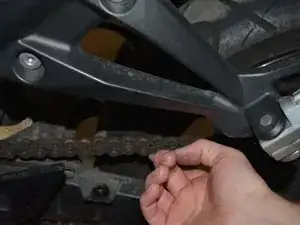
Locate the bolts on each side of the bike sticking out
-
Loosen only the first nut on each side with a 12mm
-
-
-
Begin tightening the second nut on the side with the chain (usually the left side) with a 14mm
-
Tighten to where there is about ½ to ¾ inch of play in the chain.
-
Tighten the opposite side till the slider is in the same position as the first side you tightened
-
-
-
Make sure the chain is tightened to your liking
-
Repeat the tightening process if it is not to your liking
-
-
-
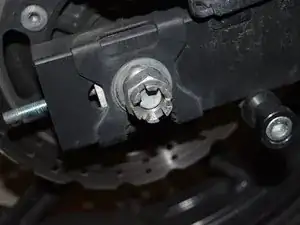
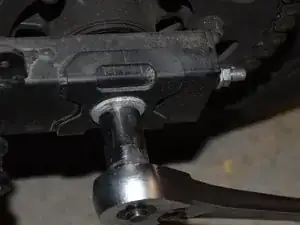
Retighten the main bolt with the 1 inch socket and the 17mm.
-
Reinsert the locking pin once the main bolt is tightened
-


To reassemble, follow these instructions in reverse order.