Introduction
Repairment is an essential part of our collective mission to do things better and protect the environment. Raw materials used in electronics are becoming increasingly scarce, and at the same time waste from obsolete electronics is growing into a bigger and bigger problem every day. It is essential that we make an effort to reuse what we already have and thereby increase the lifetime of every product.
-
-
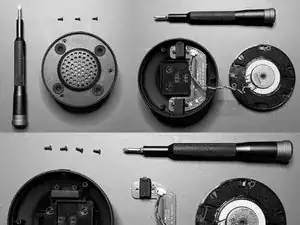
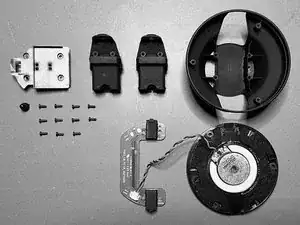
Remove all 3 screws in the speaker plate
-
Carefully take out the speaker plate
-
Remove all 4 screws from the headband-connector plate and place it on the side
-
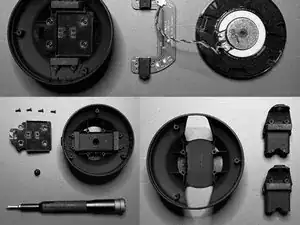
Remove all 4 screws from the pin plate and take out the pin plate and pin
-
Remove the tunnel - they are press fitted, so carefully press the outside of the tunnel to take it out
-
Remove the second tunnel
-
-
-
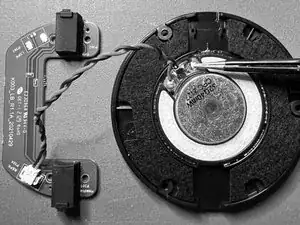
When disassembled, check the two wires on the speaker plate. Are they soldered firmly in place on the speaker driver? If not they can easily be soldered back in place.
-
-
-
If the pin is not working properly make sure the pin and pin plate are installed properly. It often helps disassemble and assemble it again. Usually the problem occurs if the pin plate is loose. Sometimes the screw holes in the housings get torn which makes the screws fall out and loosens the plate. This requires a replacement of the housing.
-
To reassemble your device, follow these instructions in reverse order.