
Introduction
The Acer Aspire 5 A515-56-347N comes with an empty SATA hard-disk drive bay for the installation of a traditional laptop 2.5" hard drive or SSD. This guide will show you how to install a SATA drive for increased storage capacity of your laptop.
Electrostatic discharge (ESD) can irreparably damage the components of your computer. While following this guide, avoid wearing static-prone clothing such as wool or flannel, or working on surfaces such as carpet. Optionally, you may use an ESD bracelet and/or mat to remain grounded throughout the repair process and minimize the risk of ESD damage.
For additional information, you may consult this device's safety guide and user manual (see attachments), or the manufacturer's support page.
-
-
Turn the laptop off, and disconnect the power cable.
-
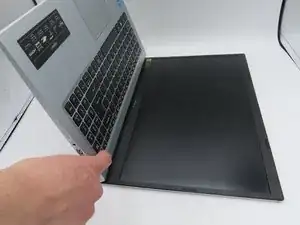
Flip the laptop upside down.
-
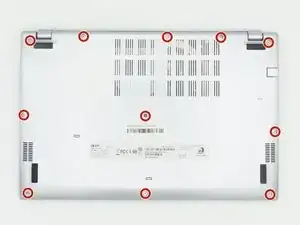
Remove the eleven 6.6 mm Phillips #0 screws from the bottom cover.
-
-
-
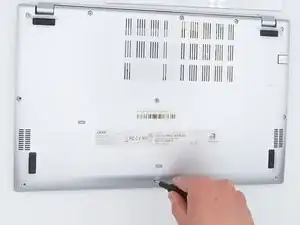
Insert a plastic opening tool into a gap between the case and the bottom cover.
-
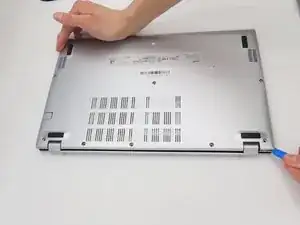
Insert blue plastic picks into the gap between the case and the bottom cover, working around the seam.
-
The bottom cover is now loose. Pull it upwards, away from the laptop, and set it aside.
-
-
-
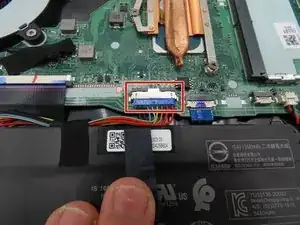
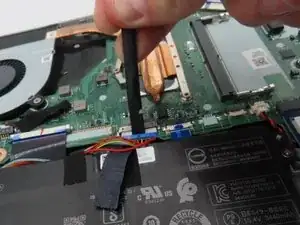
Use a plastic spudger to loosen the black tape around the large battery connector on the motherboard.
-
Once loosened, pull back on the tape to remove it from the connector.
-
Use a plastic spudger to pull the battery connector away from the motherboard.
-
-
-
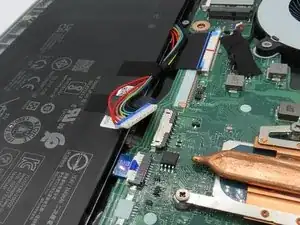
Press and hold the laptop's power button for about five seconds to discharge any remaining power in the system.
-
Leave the battery connector unplugged and out of the way for the rest of the time the laptop is open.
-
-
-
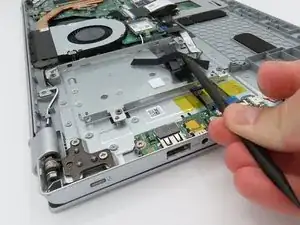
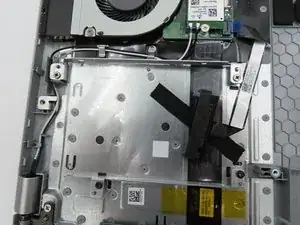
Use a plastic spudger to gently pick off the black tape securing the SATA cable to the drive caddy.
-
-
-
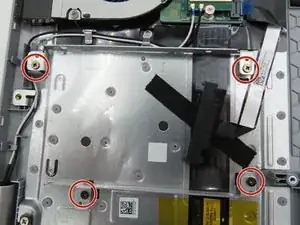
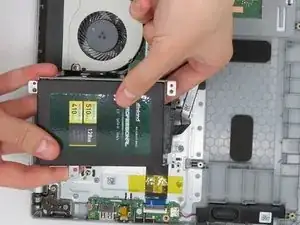
Using a Phillips #0 screwdriver, remove the four 4.7 mm screws that hold the drive caddy to the laptop chassis.
-
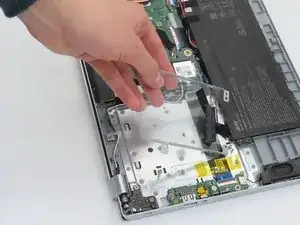
Gently pull the drive caddy out of the laptop.
-
-
-
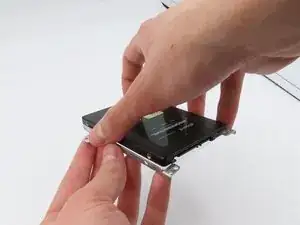
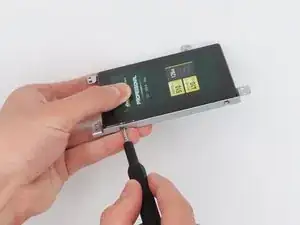
Place the SATA drive into the newly-removed drive caddy.
-
Screw the SATA drive into the caddy.
-
-
-
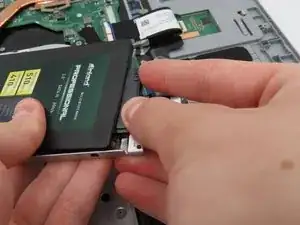
Plug the free SATA cable from the laptop into the SATA connector on your newly-installed drive.
-


To reassemble your device, follow these instructions in reverse order.