Introduction

If you want to upgrade or replace a broken motherboard for your Acer Aspire V5, then this guide will help you do that. Common issues of a damaged motherboard are constant error messages, constant freezing, USB ports not working with devices plugged into them, and the Acer Aspire V5 shutting down or not booting up properly. If you have these issues, then it's best to replace your motherboard so your other components don't get damaged.

You will need an opening tool, a precision bit driver, and a magnetic pickup bit.

Before beginning, make sure to close, power off your laptop completely, and disconnect from any external power source.

  1. kLjSFVW2E1LAIKMN
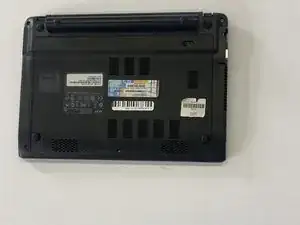
    • Turn the Acer Aspire upside down, with the stickers facing up.

    • Unplug the charger and make sure the device is off.

  2. yvZvcQSIxoK2DNRD
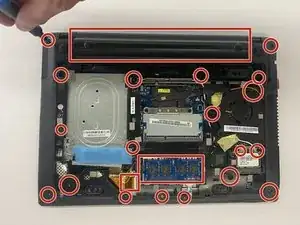
    • Unscrew the twenty M2 x 6 screws using a Phillips #00 screwdriver.

    • Unplug the battery and disconnect all the components connected to the motherboard.

    • Pry open the bottom of the laptop using the opening tool.

  3. IQQouTr5hVZBOlNd
    IQQouTr5hVZBOlNd
    gA5IHgeP1VZ3OSug
    4FKkYglR1EhsxECR
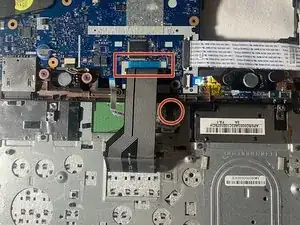
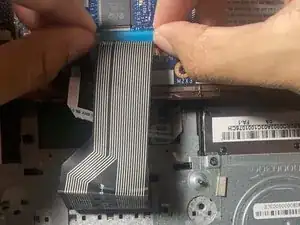
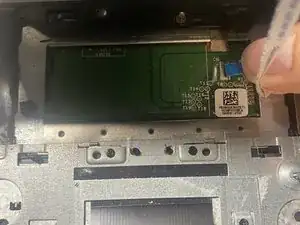
    • Disconnect the two components that are attached to the motherboard and keyboard.

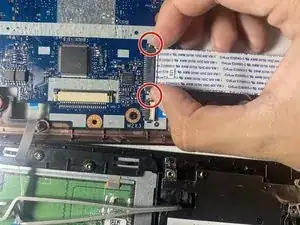
    • The large ribbon cable is disconnected by pulling apart the two white tabs found on each side of the connection and lifting the cable out.

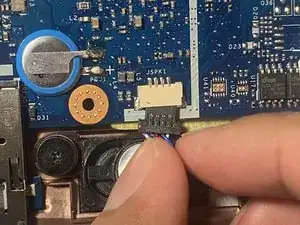
    • The small wire can be removed by simply pulling on the blue tape

  4. TrcglOb66GVjG3Iq
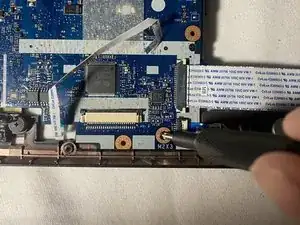
    • Unscrew the three M2 x 3 Phillips screws on the motherboard.

  5. VaOeNCbTrkiam1uY
    VaOeNCbTrkiam1uY
    dIHnbO5shLKFhfPV
    3iY4YmWr5xOB3RbD
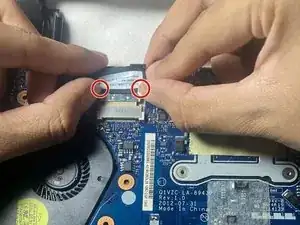
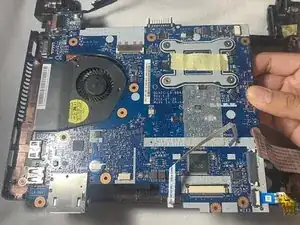
    • Disconnect all the big and small wires connected to the motherboard.

    • The big wires must be squeezed on each side of the connection to release the tabs, then pull the cable out.

    • The small wires can be removed simply by pulling the cable out of the connection

  6. VvFoTn5NETxviQPr
    • Gently pull the motherboard up and to the right at the same time.

  7. JnlnM2NOUJK3QSCy
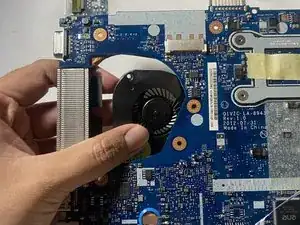
    • Once the motherboard is out, take off the tape that is holding the fan and the motherboard together. Push the fan down and it will come off.

Conclusion

To reassemble your device, follow these instructions in reverse order.
Mauricio Moreno

Member since: 26/09/22

601 Reputation

0 comments