Introduction

Use this guide to remove or replace the interlock assembly in a Clarke Floor Sander 07163A 2017.

  1. aFhxKotnHWEBZUaF
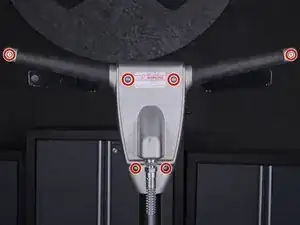
    • Before you begin, make sure the sander is turned off and unplugged.

    • Use a 3/16" hex key or driver bit to remove the six 23.4 mm-long screws holding the two halves of the handle enclosure together.

  2. m6YbyadPYEOkZLHj
    m6YbyadPYEOkZLHj
    x3tSTiMdASFwQZGU
    ANTFssZHCCslnPpL
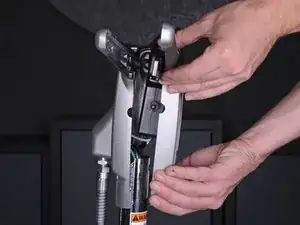
    • The rear half of the enclosure is bolted to the handle support, so the front half will be removed first.

    • Pull the front half of the enclosure straight away from the rear half to separate the enclosure.

    • If the interlock assembly comes out with the front half of the enclosure, detach it and place it back into the rear half.

    • Remove the front half of the handle enclosure.

  3. NqaEgosyISvXxgBf
    NqaEgosyISvXxgBf
    mHUOcgIc4eaYaDun
    4lwclVHGCCAwCmOt
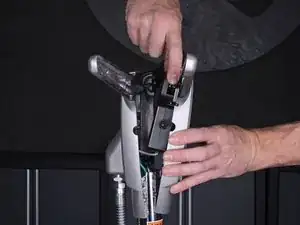
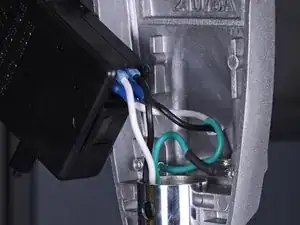
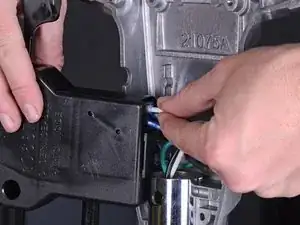
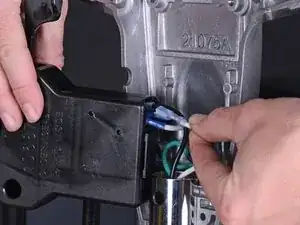
    • Pull the wires connected to the interlock assembly straight out of their connectors.

    • Keep track of where each wire connects on the interlock assembly.

  4. aSnx6F5BJeCjRBhG
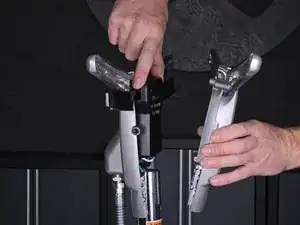
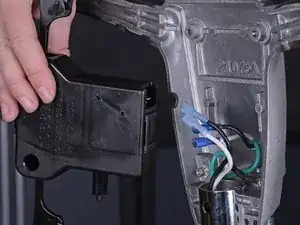
    • After all wires are disconnected from the interlock assembly, remove the interlock assembly from the handle.

    is it possible to look inside the interlock

    Encarnacion Perez -

    i have same similar machine however the interlock handles will not push the on/off switch-just trying to see if i am missing something

    Encarnacion Perez -

Conclusion

To reassemble your device, follow these instructions in reverse order.
Adam O'Camb

Member since: 11/04/15

209611 Reputation

0 comments