Introduction
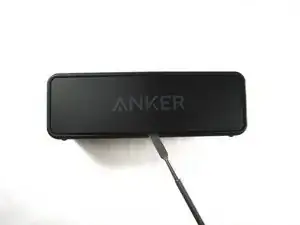
This is a step by step guide to replace the battery in the Anker SoundCore 2.
Before replacing anything, be sure to take a look at the troubleshooting page for this device.
Accessing the battery will involve removing the speakers and motherboard using a Philips #1 screwdriver.
Parts
-
-
Insert a spudger between the front panel and the body of the speaker.
-
Pry around the edges of the front panel with the spudger to pry it away from the speaker body.
-
-
-
Remove eight 10 mm screws from the speaker mount using a Phillips #1 screwdriver (Phillips #0 can strip the screw heads).
-
Insert a spudger in the gap between the speaker mount and speaker body to remove the speaker mount.
-
Be careful not to damage the rubber gasket around the speaker mount plate.
-
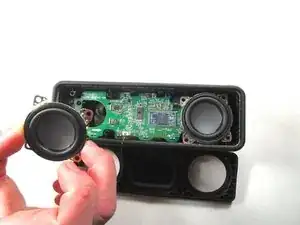
Use your hand to remove the speakers. Some variants have a wire from the speaker to the board, some rest on contact pins.
-
-
-
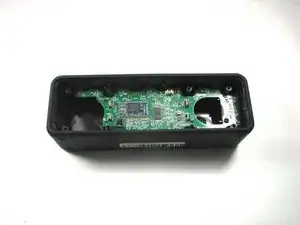
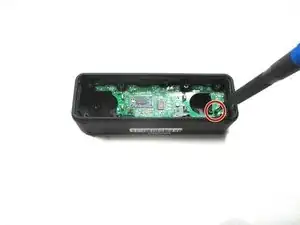
Remove the 10 mm screw that is holding the motherboard in place using a Phillips #1 screwdriver. Some variants have 2 screws.
-
Carefully remove the bluetooth antenna wire from the left of the board. It pulls up without much pressure.
-
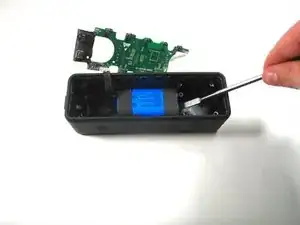
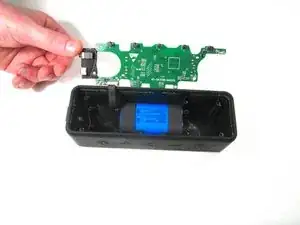
Flip up the motherboard to expose the battery.
-
-
-
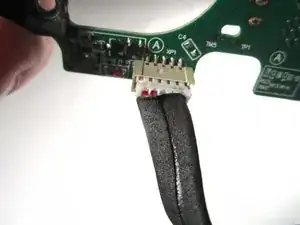
Unplug the wire that connects the battery with the motherboard.
-
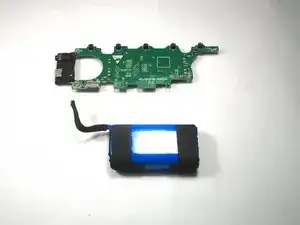
Battery specs: 2 x 18650 2600mAh soldered in series (to bring voltage to 7.4V).
-
Can safely be upgraded to 2 x 18650 3500mAh for additional capacity.
-


To reassemble your device, follow these instructions in reverse order.
7 comments
It would be nice to have the specifications of the battery so availability can be checked before disassembly.
7.2V, 2550 mAh, 18.36 Watt - Hour
Kang Le -
Hey I had a question.So i kind of dipped anker sound core 2 in water eithout the charging cover on and now it wont turn on.Can you Help what might be the problem here?
Kapazität 2600 mAh Leistung 19.24 Wh Spannung 7.4 V Typ Li-ion
How do i put the front plate back on
Hardstarling -