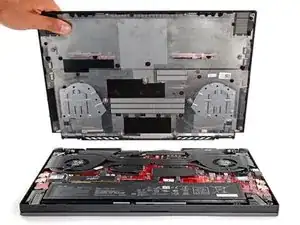
Introduction

This is a prerequisite-only guide! This guide is part of another procedure and isn't meant to be used alone.

  1. MPxbIu6pH5RPCVwV
    MPxbIu6pH5RPCVwV
    OFcOHojfvYt5cSFO
    1TYqHHBsyy16NAON
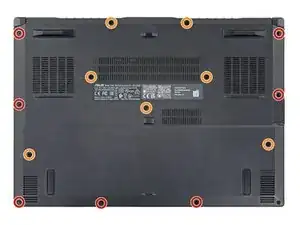
    • Remove the 14 Phillips screws securing the lower case:

    • Seven 8.8 mm screws

    • Seven 10.1 mm screws

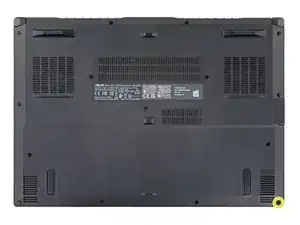
    • Use a Phillips screwdriver to loosen the captive screw.

    • Loosening this captive screw will pop up and separate the bottom-right corner of the back cover from the chassis.

    • During reassembly, tighten the captive screw before the rest of the screws.

  2. XFofCLAAsvvpF2uY
    XFofCLAAsvvpF2uY
    2syAvL4rMRvHb2NN
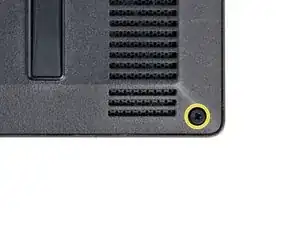
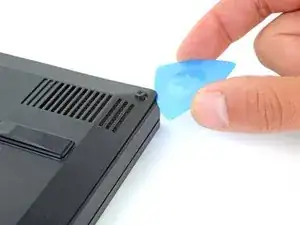
    • Insert an opening pick between the lower case and the chassis on the front right edge near the captive screw.

  3. 4lUyUnrvElKXNeBA
    4lUyUnrvElKXNeBA
    CQOLBQTI1TSjRFdw
    SEdBHgrbtF5Yhjn2
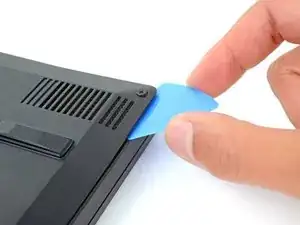
    • Slide the pick along the front edge to release the clips securing the lower case.

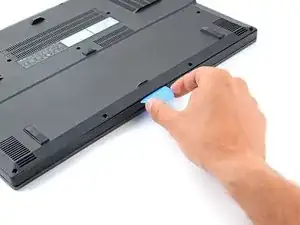
    • Repeat this process along the perimeter of the lower case to release the remaining clips.

  4. FyexCpRUIavUSkvp
    FyexCpRUIavUSkvp
    kfVgPrdA5aPTdZjj
    ePdKl33aSiN2fGaL
    • Lift the lower case from the chassis and remove it.

    • During reassembly, this is a good point to power on your laptop and test all functions before sealing it up. Be sure to power your laptop back down before you continue working.

    do you know how wide is this screw cuz i have a problem with finding them for cheap because on asus site they are 15dollars but the deliviery is 50 dollars and thats kinda much and i also found universal screws for laptop the lenght is good but i dont know how wide they should be

    Natan Jot -

  5. sHbODlfSMardIonf
    sHbODlfSMardIonf
    qywWg5ZTDMRZVmnw
    • Use tweezers or your fingers to peel back the tape on the battery connector.

  6. BwgSR1nOCkMCZUUd
    BwgSR1nOCkMCZUUd
    uGFT1txrcYyycdC3
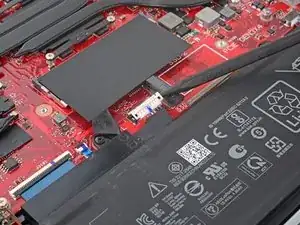
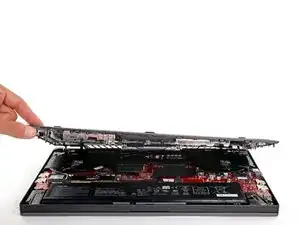
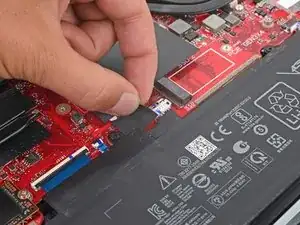
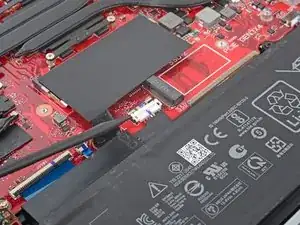
    • Use the flat end of a spudger to gently push the locking bar away from the battery connector.

    • Make sure the locking bar is not covering the battery connector, or you may damage the battery connector's socket in the next step.

  7. gQILwMfB2dZBs3LZ
    gQILwMfB2dZBs3LZ
    SUBRvcsYcP6YkaU5
    QhTBwAALIcPMTCUV
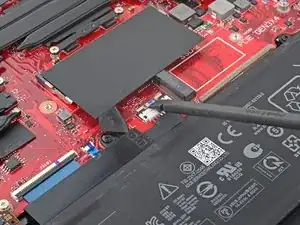
    • Insert the pointed end of a spudger under the battery connector.

    • Pry under the left edge of the battery connector to disconnect the left side of the connector.

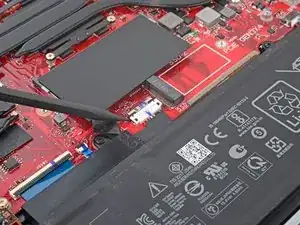
    • Repeat this procedure for the right side of the connector.

Conclusion

To reassemble your device, follow these instructions in reverse order.

Spencer Day

Member since: 14/09/22

95583 Reputation

0 comments