Introduction

In this guide the user will be able to follow a step by step process on how to open the drill and to check on the motor.

  1. jMgkkbpVbII4U1GU
    • For this guide we will need to use a 1.0 mm phillips #1 screw.

    • There are a total of thirteen screws that need to be removed in order to open the drill and access the interior components.

  2. Pd5hCDh3EggjGOIt
    • Remove the four screws on the back top side of the drill.

  3. VUm3BDL165D5QNaF
    • Remove the four screws that connect the chuck to the drill.

  4. 6BlOjfEErWYA4nCH
    • Remove the five screws on the front side of the drill.

  5. 6CMopeSCWC2FqVeF
    • Gently grab both sides of the drill casing, and separate both sides from each other.

  6. GsOhQXeFxOsmAmha
    • At this point you should be able to separate both as illustrated.

  7. nHwoZs2d34ncHoLE
    • Now all the components of the drill are visible and can be accessed.

  8. pGcr3XI5LRAHeQ42
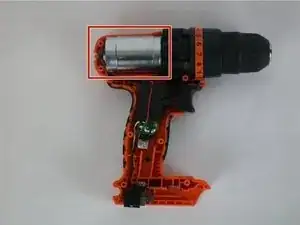
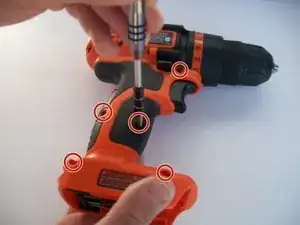
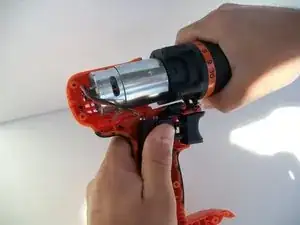
    • After following the prerequisite guide the interior components can now be accessed.

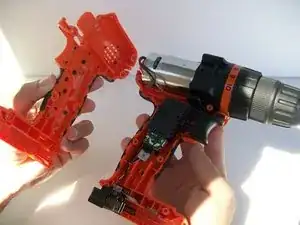
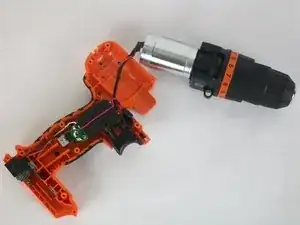
    • The motor is the silver cylinder in the top part of the drill.

    I have an ldx120. There is no “c”, will this motor work with mine?

    Mitch Ward -

  9. l2ECBXdfAU2CZBSo
    • Separate the top from the rest of the components.

  10. VsJUdsAlVEjfEWyt
    • Do this carefully so that no damage is done to the connection.

  11. hjpDuXwVUVsAodRJ
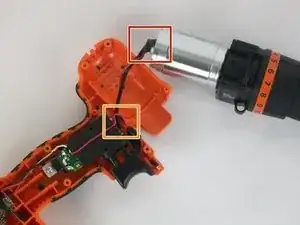
    • Check if the connection from the motor to the trigger is connected.

    • Then check if the connection to the chip is not intact.

    • If the connection is okay then the motor is probably weak and needs to be replaced.

  12. ISFfEbnEl6mpoyhR
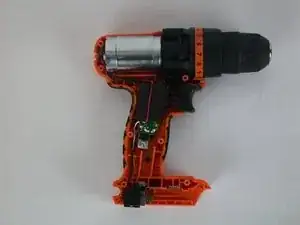
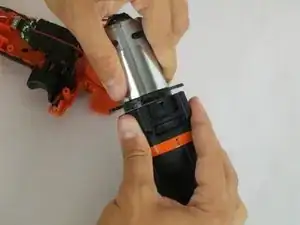
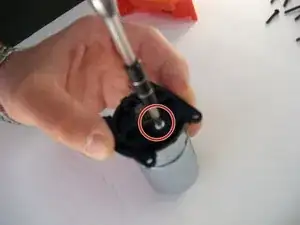
    • To remove the motor simply twist as illustrated in the picture.

    • The way the motor is designed for the LDX 120C is that it is protected inside the aluminum cylinder which works as a magnet.

    • The inside part of the motor can not be accessed, so you will have to replace the entire motor.

  13. mQwmrOd5Qey4grcN
    • Unscrew the black plastic support from the motor.

Conclusion

To reassemble your device, follow these instructions in reverse order.

jeffrey zakka

Member since: 09/02/16

762 Reputation

6 comments

Now What?? I have it apart

Jim -

I own one of these drills while trying to replace the keyless chuck I ruined the shaft it goes on can you tell me How to replace the threaded shaft and where to get replacement parts

irgspllc -

I own one of these drills I need to replace the keyless chuck and the threaded shaft it goes on. Please tell me how and where to find replacement parts

irgspllc -

It would have been "nice" if iFixIt could have provided info (ie. part/model number) for the motor.

Robb Ryan -

Great tutorial on how to take it apart. I'm having trouble finding the exact replacement, at least according to the numbers on the motor. Can someone verify what the correct replacement model number is? Also, is it possible to replace it with a brushless motor?

Nicholas Miller -

I think I found it on the Walmart website for $10. Search for this manufacturer number: a12122500ux0345

Nicholas Miller -