Introduction

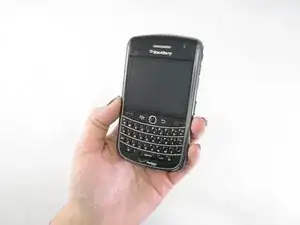
If your screen is cracked or damaged, then you will need to replace your screen. Use these step-by-step instructions to replace your BlackBerry Tour 9630 LCD screen.

  1. GgYbLg2dBmIVRWVJ
    GgYbLg2dBmIVRWVJ
    OqrfTlhkVI2yAiJs
    • Position the phone so that the keyboard is facing down and the back is facing up.

  2. yhSFghavJOOGRAsi
    yhSFghavJOOGRAsi
    HEwvJi5CMeGc4Kyr
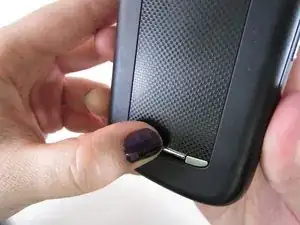
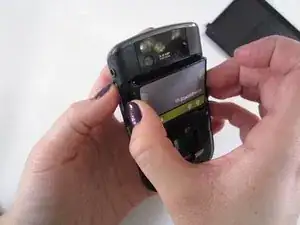
    • Push the center silver button upwards to release the back cover.

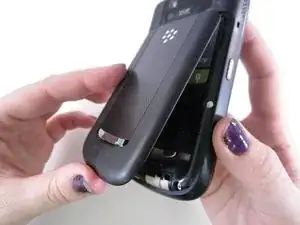
    • Take the back cover off and set it to the side.

  3. JZadApjerFUFvLEM
    JZadApjerFUFvLEM
    oMuPGDNuAR4UWwh5
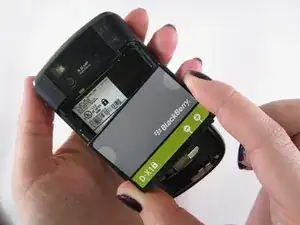
    • Grip the battery where the light grey half circles are located and pull up.

    • Set the removed battery to the side with the back cover.

  4. KDtBkAkvUi6GL2Jm
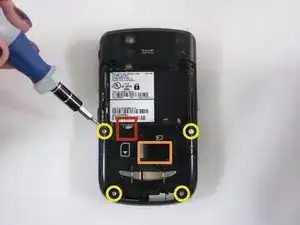
    • If there is an SD card, press gently on the card and slide it up to remove.

    • If there is a SIM card, press gently on the card and slide it left to remove.

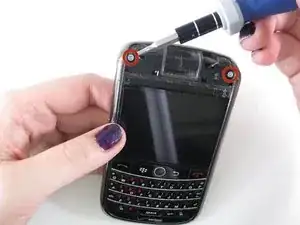
    • Use the T6 Torx screwdriver to remove the four 8.00 mm screws from the back of the phone.

  5. HPIM2Ipx2JcmyXLK
    HPIM2Ipx2JcmyXLK
    G6HQG5tuNMq2GuRd
    • Use an opening tool to pry the top plastic cover off.

    • There is glue securing the top plastic cover. If you have a hard time removing the cover, use the iOpener to warm and loosen the adhesive.

  6. RYxSPWi1KYhUOOkn
    • Use the T6 Torx screwdriver to remove the two 8.00 mm screws from the top of the phone.

  7. 4VI1D14iPYfEaeBX
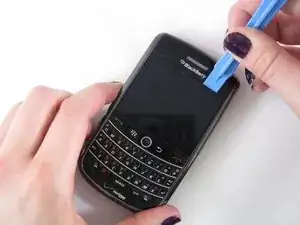
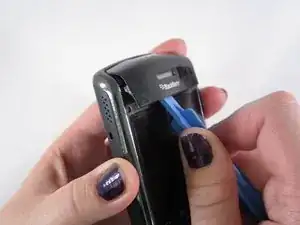
    • Use a spudger to release the clips connecting the front and back case.

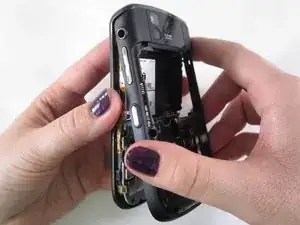
    • Separate the front and back of the device.

  8. l4JD6G2rW1RskKZ2
    l4JD6G2rW1RskKZ2
    OSbL3UhQPWZVJe6A
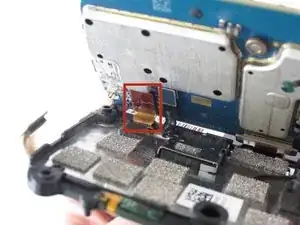
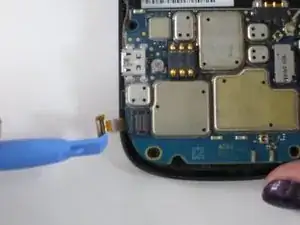
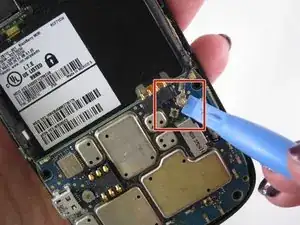
    • Place a spudger or an opening tool under the connector's edge and pry straight up to disconnect it.

    • Make sure to pry under the edge of the connector itself, and not under the socket on the board. Otherwise, you risk permanently damaging the socket.

    • Work carefully: don't pry on or accidentally scrape any small, surface mounted components on the board.

    • To reconnect, align the connector carefully over its socket and press down with your fingertip—first on one side, then the other—until it clicks into place. Don't try to force the connector into place. If you're having trouble, reposition it and try again.

    • Don't press down on the middle of wider connectors until they're fully seated. If misaligned, the connector or the pins underneath can bend or break, causing permanent damage.

  9. QINWuLZXlQGem3lD
    QINWuLZXlQGem3lD
    mti5nINGqKsMcMRv
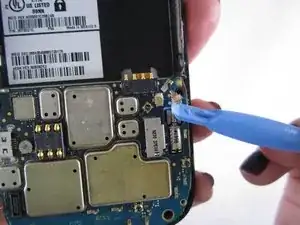
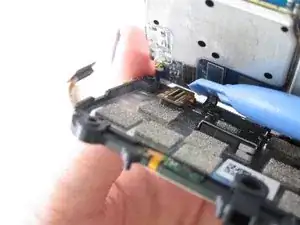
    • Slide a thin, ESD-safe pry tool or angled tweezers under the metal neck of the black and white coaxial connectors (as close to the head as possible) and lift straight up from the board.

    • When working with these connectors, it's key to always lift the head straight up. If pried on at an odd angle, you risk breaking the socket off of the board underneath.

    • Use tweezers to hold the connector in place over its socket and gently press down with your finger or a spudger—the connector should "snap" into place. If you're having trouble, reposition the head and try again.

    • Don't try to force the connector into place or you may permanently damage it.

  10. 2HUhu1lqcg1FTXrB
    • Gently push up on the keyboard from below to remove the front cover frame.

    • Once you remove the front cover, the keypad and trackball will be loose.

  11. mXDwZGs2GXVMmSMT
    • Remove the keypad.

  12. GtJCZCrqEvGPkhPL
    GtJCZCrqEvGPkhPL
    dsvMiVMafGoB1ITq
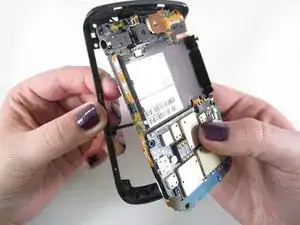
    • Gently lift the motherboard to expose several ribbon cables.

    • Use the small plastic opening tool to disconnect the orange LCD ribbon from the square end of the ribbon cables.

  13. PRRZ4pmCDsXUYE6C
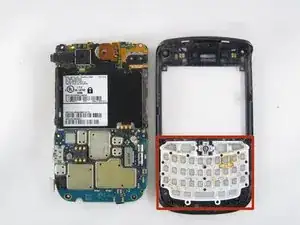
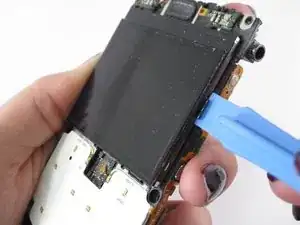
    • Flip the phone over. Using the large plastic opening tool, pry the LCD screen from the motherboard.

    • Replace the LCD screen

    • The LCD screen is held in place with glue.

Conclusion

To reassemble your device, follow these instructions in reverse order.

Mia

Member since: 14/01/15

524 Reputation

0 comments