Introduction

A device's camera may need replacing if the quality changes all of a sudden. This may be due to a software issue or most likely damage in the lens. Before proceeding, clean the camera lens with a soft, lint-free cloth and verify the issue isn’t software-related performing a restart. In most of these steps, a plastic pry tool is used but your finger can work just fine. Use this guide to replace your device's camera.

  1. TIkmTxFhddNYwHMG
    TIkmTxFhddNYwHMG
    eJ6uxCmoXDy1GhUA
    mWsAwfLbghNcT52P
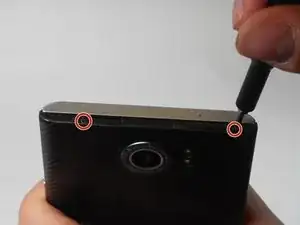
    • Look for the two small holes at the top of your device.

    • Use a SIM eject tool to push down into the holes which lifts the SIM and SD trays.

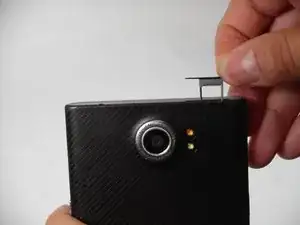
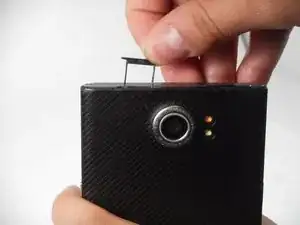
    • Pull the trays up and out of the device.

  2. vOXwCLDuHkS4VNNO
    vOXwCLDuHkS4VNNO
    EPudiLIaLbDtQMZZ
    5lZsq6OdjmlKLuHJ
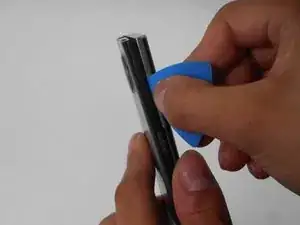
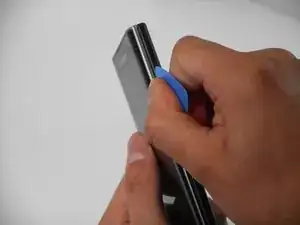
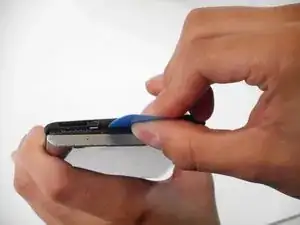
    • Insert an opening pick in the seam between the rear casing and chassis. Apply downward pressure to pry the casing upward.

    • Follow this procedure for only the right, left, and top side of the casing.

  3. HkFXORQsVfosDA4O
    HkFXORQsVfosDA4O
    C1rZmrOXd33RBq32
    cNTRfGIji6SMY3iP
    • Remove the rear casing by sliding the case down and out.

  4. Il5dJcYYVlfIPy4e
    Il5dJcYYVlfIPy4e
    4y1nWfmX4NUPkoMD
    • Remove the two 3.3 mm T4 Torx screws that secure the battery connector.

    • There may be a plastic protector covering the circuit board and battery. Remove the plastic protector to begin.

  5. T1OFxOIqKrgKAgO6
    T1OFxOIqKrgKAgO6
    ywhBFWkP5PddsNjQ
    • Use an opening tool to lift and disconnect the battery connector.

  6. cMWwYFfeDGfRGnEt
    cMWwYFfeDGfRGnEt
    FkNFAbiOFHiOjr4C
    CHEVCkrffFt5F6qB
    • Pull on the plastic tab to remove the battery from the device.

    • For easier removal, use a blow dryer to warm the battery glue.

    • Be careful to not overheat the battery or puncture the battery as lithium batteries are dangerous.

  7. bUpfkMLPU4n3RQJy
    • Remove the seven 3.3 mm T4 Torx screws that secure the motherboard.

  8. 4sPREYlwBOu3kGgn
    4sPREYlwBOu3kGgn
    ujtLjROKCTDVhICU
    pWNdhqvWRQFxbGjU
    • Remove the two 3.3 mm T4 Torx screws that secure the speaker casing.

    • Lift and remove the speaker casing.

  9. 4oituD54xqwStY2U
    4oituD54xqwStY2U
    yTnLXfOJDGHdRRXQ
    pGCyRFejqTTLVTMT
    • Remove the one 3.3 mm T4 Torx screw that secures the headphone jack.

    • Lift and remove the headphone jack.

  10. yZvn13SELdAYppkK
    yZvn13SELdAYppkK
    Uq1lIX4Lya4oMUAN
    H3P12eNb24G1abIi
    • Use an opening tool to lift and disconnect the three press connectors.

  11. lIRxvCC5Hlk1ggED
    lIRxvCC5Hlk1ggED
    DQTDsXGrguPfBIZQ
    himSCY2nBqRVkgXE
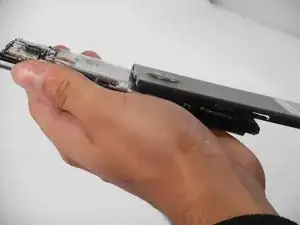
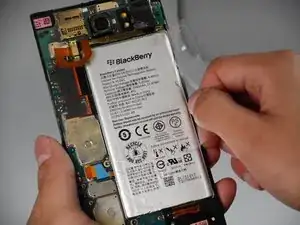
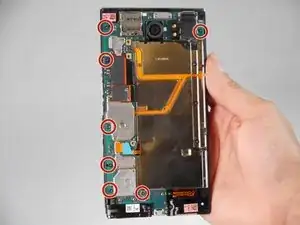
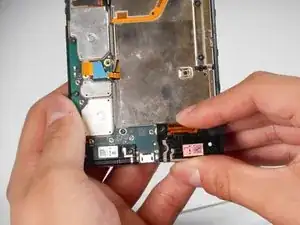
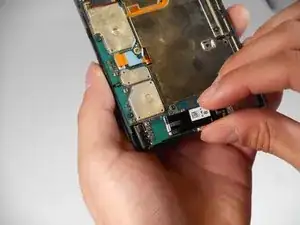
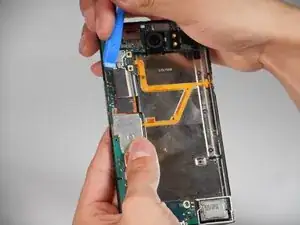
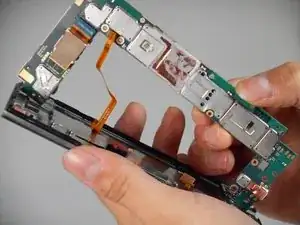
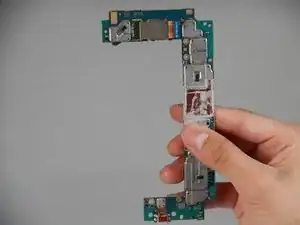
    • Lift the motherboard from the device.

    • Do not pull the circuit board with too much force as there is a strip connected under.

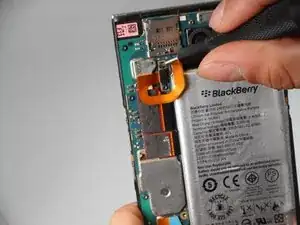
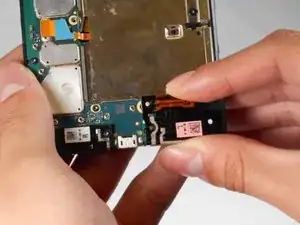
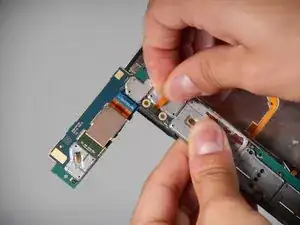
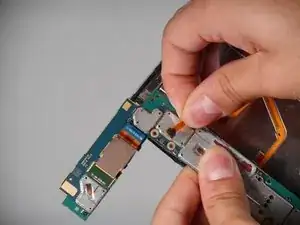
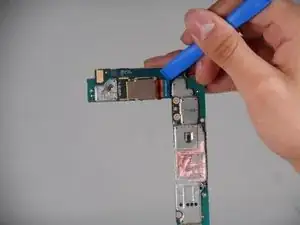
    • Using two fingers, pinch the on the strip as close to the connector as possible.

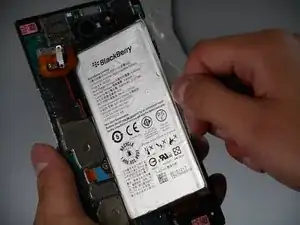
    • Lift and disconnect the connector from the motherboard.

  12. KplivSWnlApiGUZN
    KplivSWnlApiGUZN
    22nAAEISh1ed2hvu
    FEYmEKVRRhLkYoGe
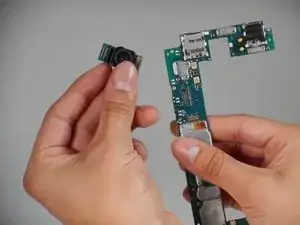
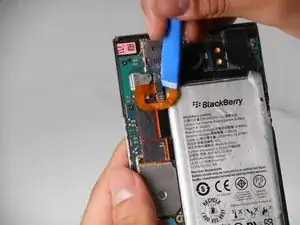
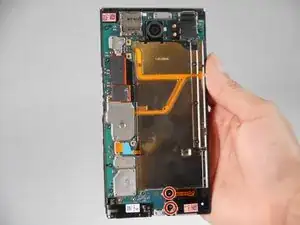
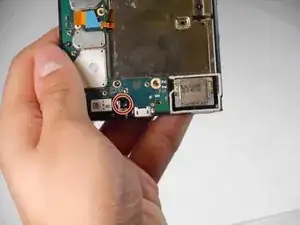
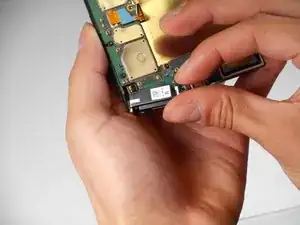
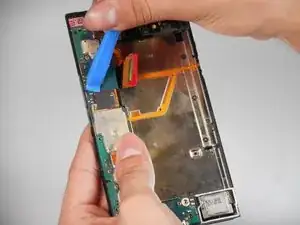
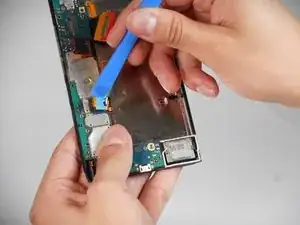
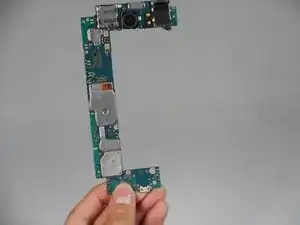
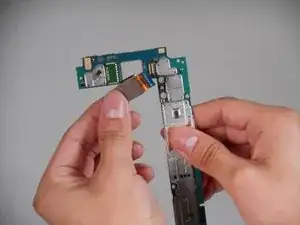
    • Turn the motherboard around.

    • Use an opening tool to lift and disconnect the camera connector.

  13. JaRINkYODRDlRfLG
    JaRINkYODRDlRfLG
    IVXAHKfcIVtXXTgl
    • Lift and remove the camera from the circuit board.

Conclusion

To reassemble your device, follow the above steps in reverse order.
Take your e-waste to an R2 or e-Stewards certified recycler.
Repair didn’t go as planned? Try some basic troubleshooting or ask our Answers community for help.

Benjamin Olvera

Member since: 25/09/24

563 Reputation

0 comments