Introduction

If you find that your camera needs a new image sensor, this guide will show you how to replace it.

Warning: The screws holding the sensor in place are holding the sensor at a very specific height. If after reinstalling the sensor each screw is not returned to the exact same height, your camera will no longer be in focus without recalibration (which requires specific tools and procedures).

  1. JZpuhYn5aNx2a5k5
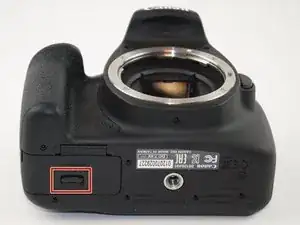
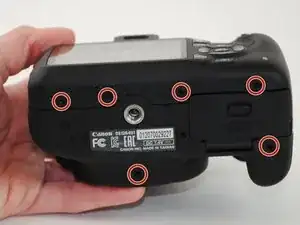
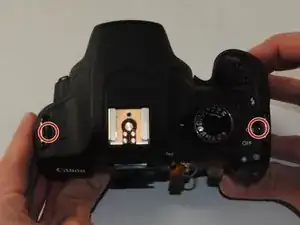
    • Lay the camera on its back so that the card/battery door is facing you.

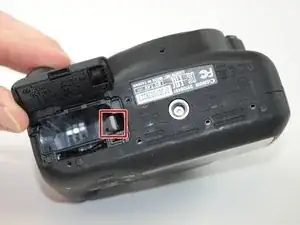
    • Using your fingernail, slide the tab on the battery door up to release the battery door latch.

  2. ImYNPluw4SOitEDE
    • Lift the now free card/battery door to reveal the battery compartment.

    • Push the gray lever to the right side so that the battery can be removed and replaced with a new one.

  3. pL6vROgghEGJB2p2
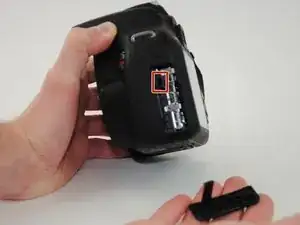
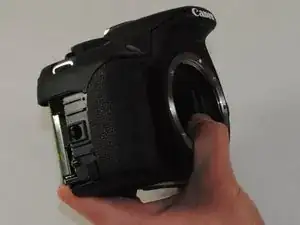
    • Turn the camera so that the back is facing to your right.

    • Remove the 5mm JIS #000 screw above the rubber USB port cover.

    2 more screws behind rubber cover.

    Michael Gill -

  4. QCLgfQBmWFJQQwmh
    • Remove the rubber piece.

    • Unscrew the two screws under the rubber cover to completely remove the rubber cover piece.

    • It is held in place by a notched tether, but can be easily manipulated to slide out.

  5. rInTocWZnrQMjULP
    • Turn your camera so that the bottom is facing you.

    • Remove the 5mm JIS #000 screws.

    There is a 6th screw next to the battery door.

    Michael Gill -

  6. ISEoqXlHElNZTyxX
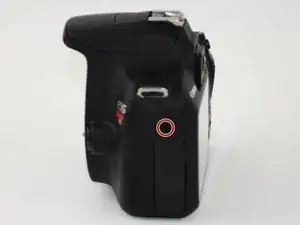
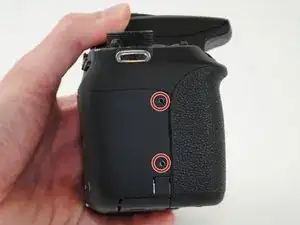
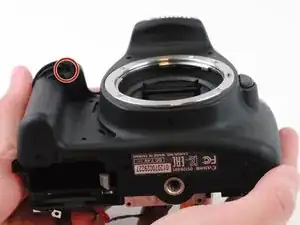
    • Now turn the camera so that the front is facing towards your right.

    • Remove the two remaining 5mm JIS #000 screws.

    Instructions are forgetting the two screws on either side of the viewfinder…. Viewfinder slides up to reveal two screws.

    Hugh Morand -

  7. MsAeFqtNGjb34bSj
    MsAeFqtNGjb34bSj
    f64UqWVwpAtPgpEo
    A33ZdIWoKkStvY3V
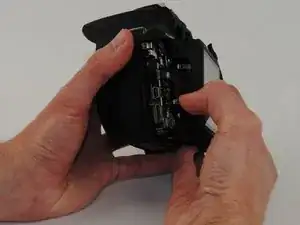
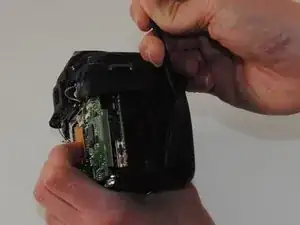
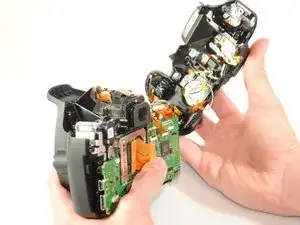
    • Now that all of the exterior screws have been removed, grip the camera firmly on both sides.

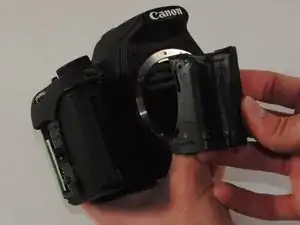
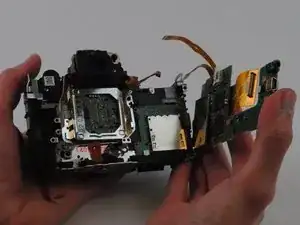
    • Gently pry the back panel from the main body of the camera.

    • There are two ribbon cables that need to be removed in order for the back panel to come free from the camera body, as indicated.

    • This back panel contains various control components of the camera as well as the LCD screen.

    Do NOT pry until you’ve removed the eye gasket, and the 2 screws behind this! You will break the camera.

    Michael Gill -

  8. E3xJNDcNIWcW65NV
    E3xJNDcNIWcW65NV
    tPwfHFwe2iETuvNA
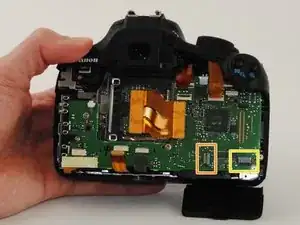
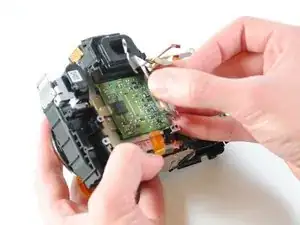
    • Remove all ribbon cables with the plastic spudger.

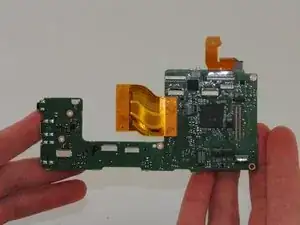
    • Gently pry up the black plastic tabs to slide out the ribbon cables

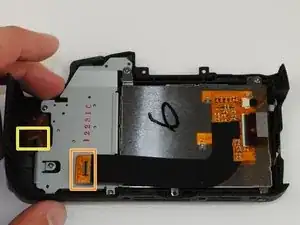
    • Take note of this black cable and where it connects to the motherboard. This is a fiber optic cable which is used for the camera flash. It will need to be reconnected after replacing the motherboard.

    • When reconnecting the fiber optic cable, simply push the black cable into the hole in the connector and push it all the way in.

  9. bwY4L1ruPBK2m1jF
    • Turn your camera so that the top is facing you.

    • Remove the two black 5 mm JIS #000 screws.

  10. iR5eTXmhxmFrsCxF
    iR5eTXmhxmFrsCxF
    HsM1vLY1VtQOefip
    RPe5ZDjWMFc1qgpo
    • Turn the grip side toward you.

    • Remove the rubber grip, using the plastic spudger.

  11. c4cl6nOrrMoj12Xm
    • Remove the black 5 mm JIS #000 screw, located under the grip.

    they is a cable i think gray in color on the top panel, where does it fit, it seems to come out easily

    Tshepiso Marques Molefe -

  12. jlDlMIYOoKcKYTnC
    • Remove the top panel of the device.

  13. ugfNSgnwDxFjmyi2
    ugfNSgnwDxFjmyi2
    gNem1Hd3xWCXO2xM
    • Remove the front panel of the camera.

  14. boa6RZLDuDIAb2FR
    boa6RZLDuDIAb2FR
    cN3PYQ6qSyovMSAv
    OFWsUITrSB6laMmi
    • Remove the five silver 5mm JIS #000 screws.

    • The motherboard can now be removed.

    Where can I buy a Motherboard for a T7 and what would the cost be?

    Dean Smith -

  15. 6Di2ImjPDPBWwPBf
    6Di2ImjPDPBWwPBf
    CLZFUdwRMWdVO4xf
    • The screws holding the image sensor in place is set to a very specific height. Unless they are returned to the exact same height after replacement, the camera will no longer be in focus unless the focus is recalibrated.

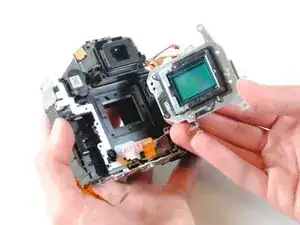
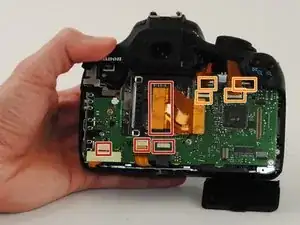
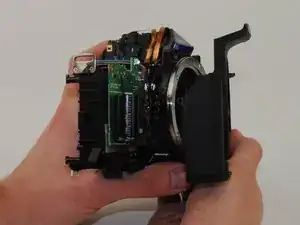
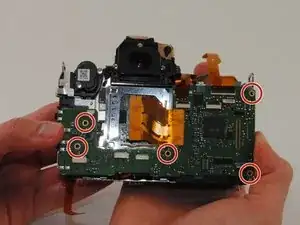
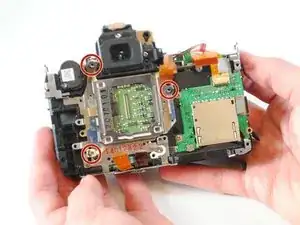
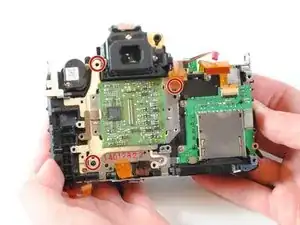
    • Remove the three silver 3mm JIS #000 screws from the image sensor holder.

    • Remove the image sensor holder.

  16. 4RAoefhLfvVLFiGR
    4RAoefhLfvVLFiGR
    pZVoL23nBuks6IqL
    aUtKWJP1o3srXnUx
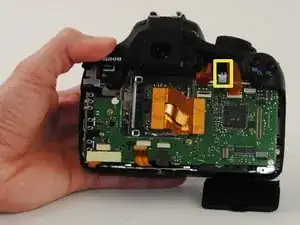
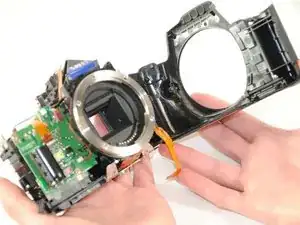
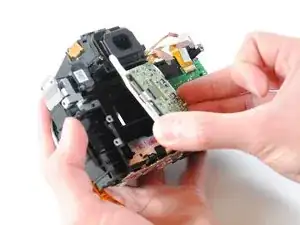
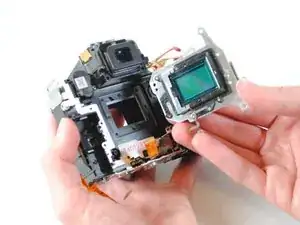
    • Remove the three remaining silver 3mm JIS #000 screws from the image sensor.

    • Be careful not lose the springs underneath the screws on the image sensor

    • Using your fingers, lift the image sensor from the device.

Conclusion

To reassemble your device, follow these instructions in reverse order.

Tyler Brown

Member since: 22/09/14

882 Reputation

3 comments

Thanks for the post. I was able to take this apart without damage to any of the camera parts. I am wondering if you happen to have the data sheet for the camera sensor, 704f? I cannot seem to find one.

Dawn -

Hi. I do not see where it explains the calibration of the Sensor. Could you give me some reference about that?

ivanram -

I reassembled on the camera no longer powers on, i checked disassembled again, checked for loose wires, ribbons, everything looks perfect and still it’s completely dead.

Edward Perkins -