
Introduction
If you're experiencing issues with the audio on your Canon Vixia HF S10 camcorder, replacing it is always a viable option. Any sound quality issues at all can be resolved when changing faulty parts. Audio problems can stem from a damaged microphone, faulty wiring, or malfunctioning ports. Provided are some easy steps to get you in the right direction of fixing these issues!
Before diving into the repair, it’s important to note that disassembling your camcorder requires patience and a careful hand. Even if you are not familiar with this product, learning with these proper tools can have you feeling like a pro.
To get started, you will need a few basic tools: your hands, a plastic opening tool to gently pry open the casing, a Phillips screwdriver for removing screws, and a magnetic mat to keep screws organized. A marker is also helpful to label where each screw belongs when reassembling the camcorder. Ensuring that all components are properly placed and connected is key to a successful repair, so proceed carefully.
Fixing this issue will not only improve your sound quality, but also help you become familiar with a product that you own!
-
-
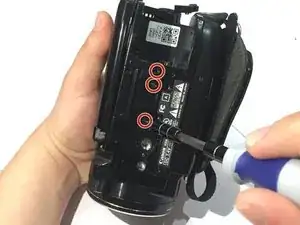
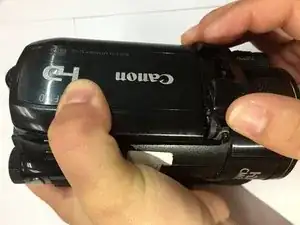
Turn the camcorder upside down and remove the three 3x4 mm Phillips screws securing the black plastic case.
-
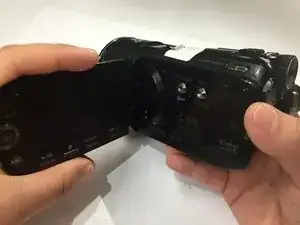
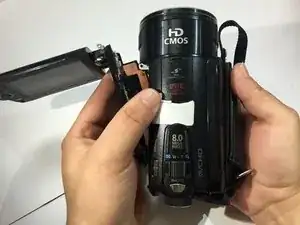
Flip open the LCD screen.
-
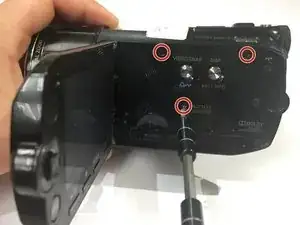
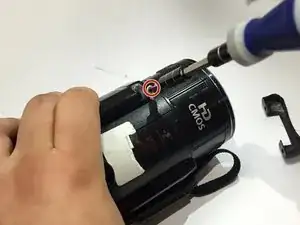
Remove the three 3x4 mm Phillips screws securing the black panel plastic case.
-
-
-
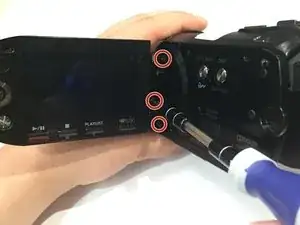
From the inner corner in between the panel and the LCD screen, remove the two 2x2.5 mm Phillips screws and the 3x4 mm Phillips screw.
-
Remove the black plastic covering with your fingers. Underneath the covering, you will find a screw hinge.
-
Remove the 2x2.25 mm Phillips screw located at the top of the screw hinge.
-
-
-
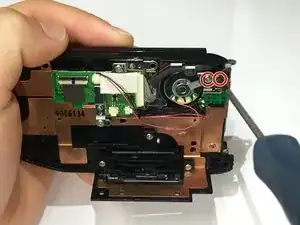
Using your fingers, remove the panel from the base of the camcorder.
-
After removing the panel, remove the two 2x2.25 mm Phillips screws located at the top right of the inside of the panel.
-
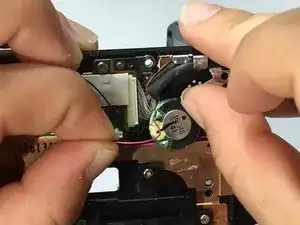
Using one hand, gently move the silver piece holding the speaker down while using the other hand to remove the speaker.
-
To reassemble your device, follow these instructions in reverse order.