
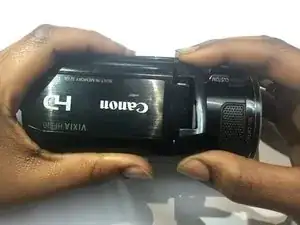
Introduction
The Mini Advanced Shoe on the Canon Vixia HF S10 camcorder allows users to attach external accessories such as microphones or flashes, enhancing the device's functionality. If accessories fail to connect, produce intermittent signals, or do not function properly, the Mini Advanced Shoe may be damaged and require replacement.
Before proceeding with this repair, check for debris or dust buildup in the accessory shoe, as this can sometimes interfere with proper connectivity. A small brush or compressed air can help clean the contacts. If the issue persists, this guide will walk you through the safe removal and replacement of the Mini Advanced Shoe.
Important Notes:
- Tools Required: Precision screwdrivers, spudgers, and an anti-static brush.
- Skill Level: No soldering required, but careful handling of internal components is necessary.
- Warnings: Before beginning, power off the camcorder and disconnect it from any power source to prevent damage. If disassembling the camcorder, take care not to damage ribbon cables or sensitive components.
For additional information on using external accessories with the Mini Advanced Shoe, refer to the camcorder's official manual.
-
-
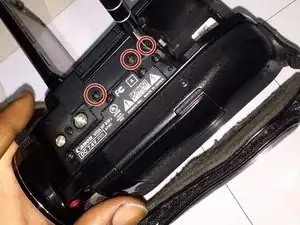
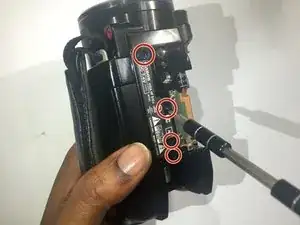
Flip the camcorder upside down and remove the three 3x4 mm Phillips screws highlighted in the diagram.
-
-
-
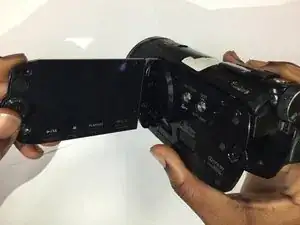
Open the LCD screen.
-
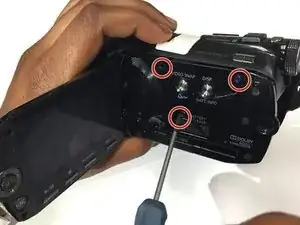
Remove the three 3x4 mm Phillips screws securing the black panel plastic case.
-
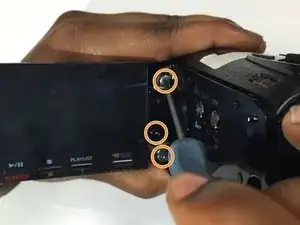
From the inner corner in between the panel and the LCD screen, remove the two 2x2.5 mm Phillips screws and the 3x4 mm Phillips screw.
-
-
-
With the canon logo facing you, remove the plastic casing located in the back of the lens. Underneath this casing, you will find a hinge with a screw.
-
Remove the 2x2.5 mm Phillips screw holding hinge in place.
-
-
-
Using your hands, remove the inside panel.
-
After removing the panel, remove the two 1x2.5 mm Phillips screws.
-
-
-
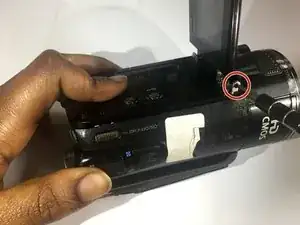
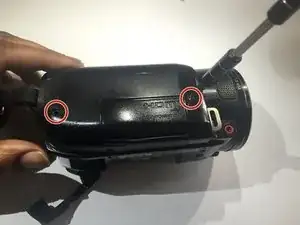
Turn the camcorder back to step one position and remove remaining screws on the bottom platform. There will be four 2x2.5 mm Phillips screws.
-
-
-
Remove the strap from mount.
-
Remove the two 1x2.5 mm Phillips screws revealed under the strap on the side panel.
-
-
-
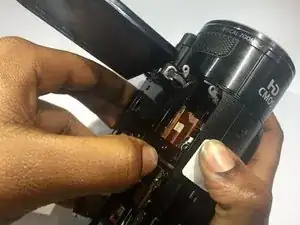
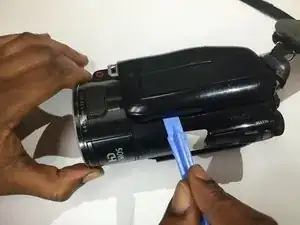
Pry the side panel from the base of the camcorder by using the plastic opening tool.
-
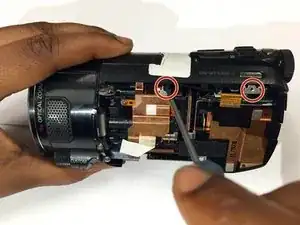
Remove the two 2x2.5mm Phillips screws located at the top.
-
-
-
Remove the two 3x4 mm Phillips screws located under the coverings labeled AV & DCIN. These covers can be found when the back of the camera is facing you.
-
-
-
Slide open the "Optical Image Stabilizer" cover located at the top of the camcorder.
-
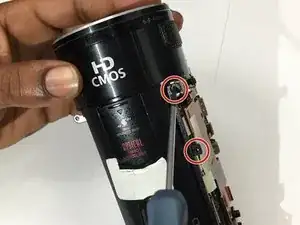
Remove the four 3x2.5 mm Phillips screws underneath.
-
Using your fingers, remove the metal casing.
-
-
-
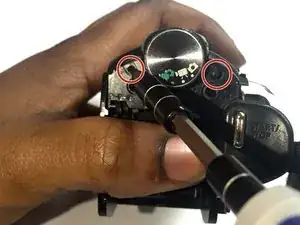
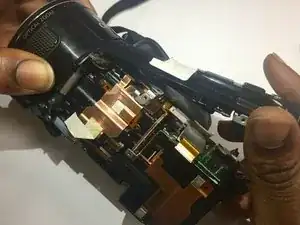
Lift the top cover of the camcorder using your fingers.
-
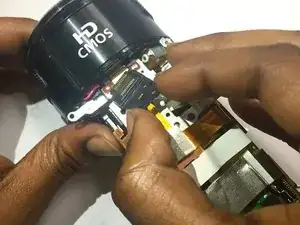
Remove the the Mini Advance Shoe with your fingers
-


To reassemble your device, follow these instructions in reverse order.