Introduction
Have you ever used a lot of time to configure your camera perfectly up front before filming a performance? But then disaster strikes when you replace battery and everything is lost just before the second act is about to start ?
In my case it was the internal battery going flat.
According to Canon this is not a user replaceable part, but it is possible and actually not that hard.
This guide features soldering batteries. Basic knowledge of how to solder is needed and some care to not overheat or short the battery.
-
-
Important: Remove the external battery and any power sources from the camera before opening it up.
-
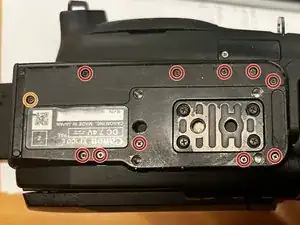
Battery is located under bottom plate and you need to take out all the screws as indicated in the photo. There are 10 screws for plastic and 1 screw for metal (in orange). These are all the same length and might look the same so keep them apart.
-
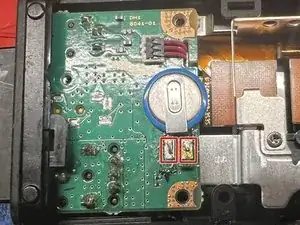
Lift the cover up and set aside.
-
-
-
Use the solder wick to remove as much solder from the battery terminals as possible. Be quick and do not overheat the battery in the process. Assume that battery is not entirely dead and do not short the terminals with the wick.
-
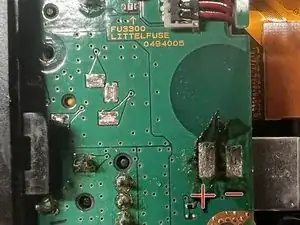
Use a pair of tweezers or your fingers to carefully lift the battery while you apply short heat to each of the battery terminals. It will eventually come off.
-
Clean the terminals with the solder wick. The left pad is positive and the right is negative.
-
-
-
If your battery is not marked with polarity measure it with a multimeter to ensure that left is positive and right is negative.
-
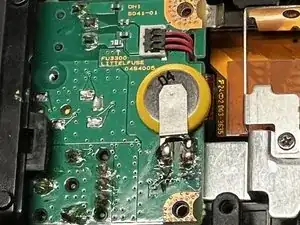
Solder in the new battery.
-
To reassemble your device, follow these instructions in reverse order.
Remember that these tiny screws do not need much force to strip the plastic threads inside. Use the force gently.