Introduction
If your Casio CTK keyboard (model 3200) has speakers that are distorted or broken, use this guide to replace them.
The speakers are an important part of the Casio keyboards, providing the sound from which you are able to make music. They are found behind a black plastic protector on the far right and left of the keyboard.
Determining if the speakers are playing correctly is pretty simple, make sure the volume is turned up and listen closely to one or both speakers to see if they are emitting the same or any sound.
This guide does require soldering, which can be a difficult and dangerous task for some. Here is a guide on how to solder safely.
-
-
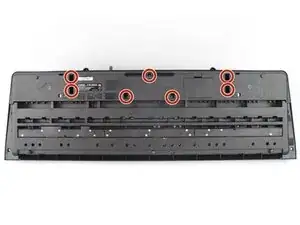
Remove the seven 10 mm Phillips #1 screws on the underside of the keyboard that secure the center front panel.
-
-
-
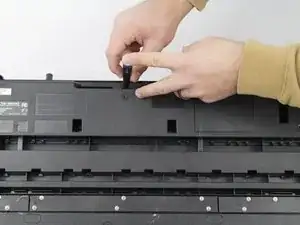
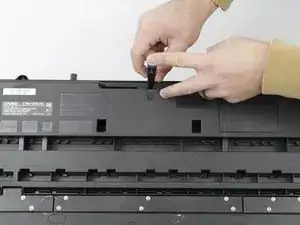
Flip the keyboard over and remove the central panel on the front and place it above the keyboard.
-
-
-
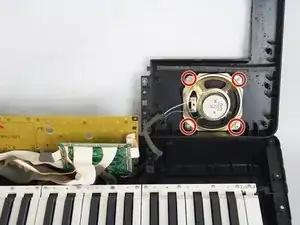
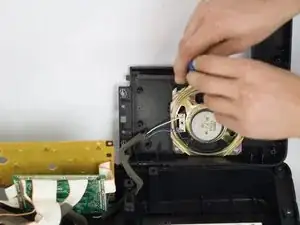
Carefully remove one side panel at a time from the top of the keyboard and place it above the keyboard, making sure not to sever any connections between the yellow-colored mainboard and the side panels.
-
-
-
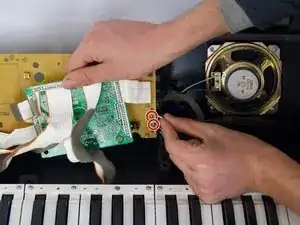
In order to replace the speaker, desolder the wire at the two locations indicated in the photo.
-
To install the the new speaker, you will solder the same wires to the marked locations.
-


To reassemble your device, follow the above steps in reverse order.
Take your e-waste to an R2 or e-Stewards certified recycler.
Repair didn’t go as planned? Try some basic troubleshooting or ask our Answers community for help.