Introduction

  1. 3tGPcJAErYfGAAxL
    • Flip the device upside down and remove all of the Phillips #1 screws.

  2. VuMqQDbboHyCsgkA
    VuMqQDbboHyCsgkA
    RYGAyDsIait5XEmk
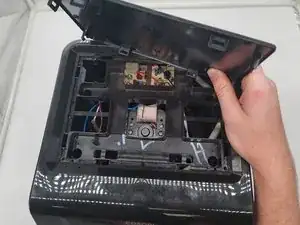
    • Use an opening tool to push on the retaining hooks to disengage them while prying slightly.

    • Remove the panel.

  3. rB3xHqQuMDEjQ5yO
    • Use a Phillips #1 screwdriver to remove all four screws.

    • Lift off the bracket.

    • When lifting this off be careful to not unplug the screen.

  4. vQNq4MWMkP5GfljJ
    vQNq4MWMkP5GfljJ
    UY6ulOxoTPwSSi2Q
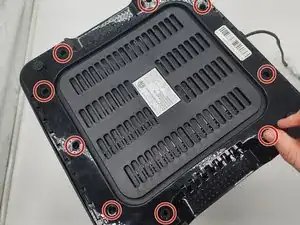
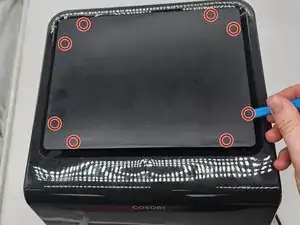
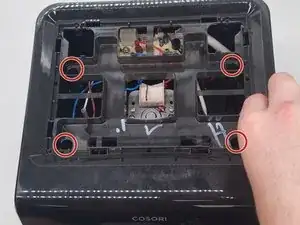
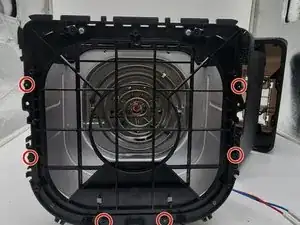
    • Use a Phillips #0 screwdriver to remove all the screws connecting to the shell.

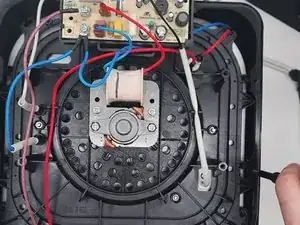
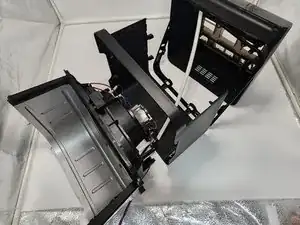
    • Dissemble the shell going up to separate the basket holder.

  5. bWUhOSYNPqDARLY3
    bWUhOSYNPqDARLY3
    D4QHVXyEqRPjcmqV
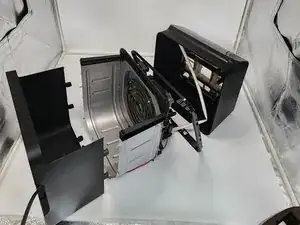
    • Use a Phillips #0 screwdriver and the 150 mm Flex Extension to unscrew the bottom plastic connecting to the basket holder.

    • Be careful to not apply too much force to the metal as it can cause it to warp it, and so it is easy rescrew the plastic piece in place.

  6. Y1vO3OCvG2MJQxLI
    Y1vO3OCvG2MJQxLI
    NekqHCsuZSIL6Zgt
    • Pull the bottom shell down pulling at the sides to get them over screw holes.

  7. DA1KWimrAUFX6wFt
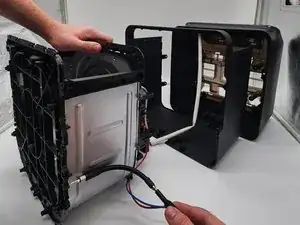
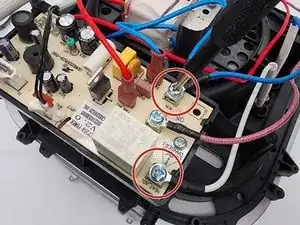
    • Remove the screws holding the cables into the distribution board with a Phillips #2 screwdriver.

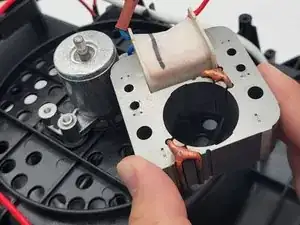
    • Remove the 2 cables that connect the heating coil to the distribution board on the top of the cooking chamber, there should be one blue and one white cable, both with a white shroud leading into the cooking chamber.

  8. FTZL512iptFRlTFk
    FTZL512iptFRlTFk
    1HoVsfLBgRZ3mRJE
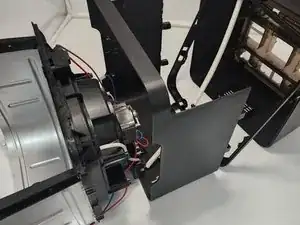
    • Flip the device backward so the metal walls appear in a U-shape.

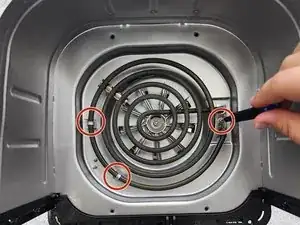
    • Remove the 3 screws inside the cooking chamber that hold the heating coil in place using a 2 Philips screwdriver.

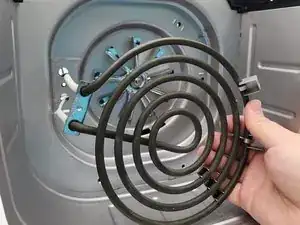
    • Remove the heating coil.

  9. 6YWdFVDfTn4ZpWsx
    6YWdFVDfTn4ZpWsx
    gOcxOCLLCuUmsE64
    • Remove the walls of the cooking chamber to get easier access to the fan.

  10. bp6vCHmcDXJ1P4wB
    bp6vCHmcDXJ1P4wB
    6XLjWe2ODUDgXLXu
    nWW31ok4DSHqBivc
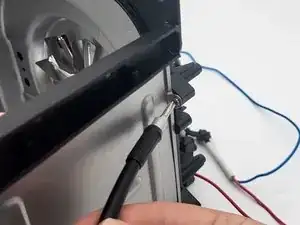
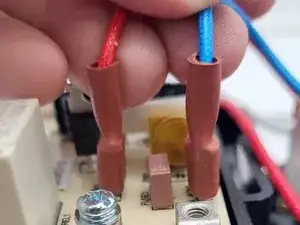
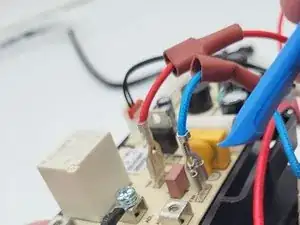
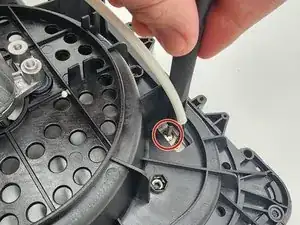
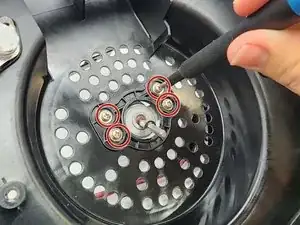
    • Squeeze and disconnect the connectors.

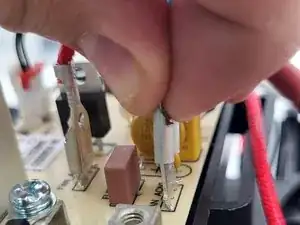
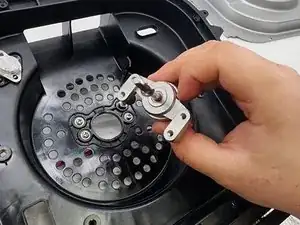
    • Press the tab on the disconnector down then carefully pull it off to remove the wires from the board.

  11. 1sDEYCdETbUrdfEI
    1sDEYCdETbUrdfEI
    foZykPbUvQ2FwNQH
    • Use a Phillips screwdriver to remove the two screws from the motor.

  12. VHWipqXP3ndCHI4E
    • Remove the screws securing the heat detector using a Phillips #1 screwdrivers.

  13. LRnDQMHRA2FexysU
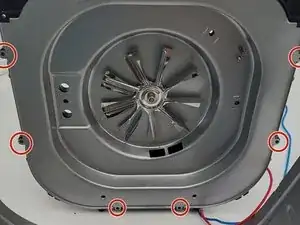
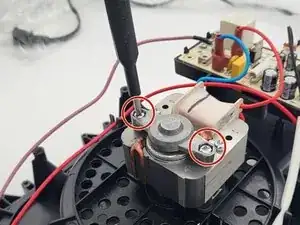
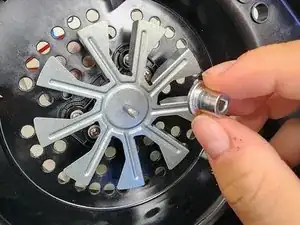
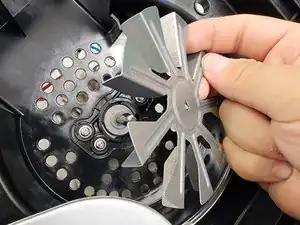
    • Using a 3/8" socket, unscrew the hex nut holding the fan in place, making sure to not apply to much pressure on the fan to avoid warping.

  14. BGoXkSXxGI2lq3OD
    BGoXkSXxGI2lq3OD
    SECCqvEh1eyuJn5N
    • Remove each piece to the roof of the cooking chamber.

  15. i5oyIEO1nWXvJr1y
    i5oyIEO1nWXvJr1y
    3vN31HbwJWHUElQg
    • Use a Phillips #2 screwdriver to remove the screws securing the motor.

    • Remove the motor.

Conclusion

To reassemble your device, follow these instructions in reverse order.

Davian E. Aguilera

Member since: 28/08/24

241 Reputation

0 comments