Introduction

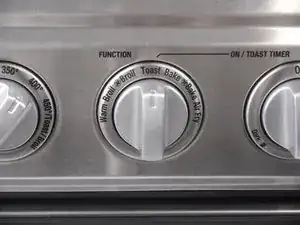
This guide will instruct you on replacing the function switch that toggles between the "warm broil","Broil","toast","Bake" and "Bake Air fry" functions.

  1. FQiIK633HA1xH2J5
    • Using a 25-hexagon head screwdriver, unscrew these three 7.31 mm screws.

  2. FGHclsLOQYuMJpGX
    FGHclsLOQYuMJpGX
    tH4XieoeMHA5iIjk
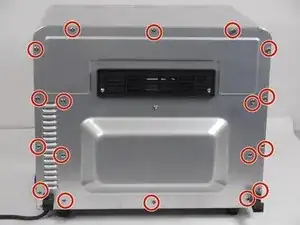
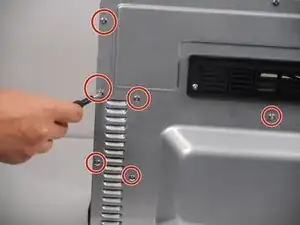
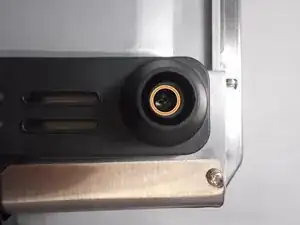
    • Using a Phillips #1 screwdriver, remove all of these 7.31 mm screws.

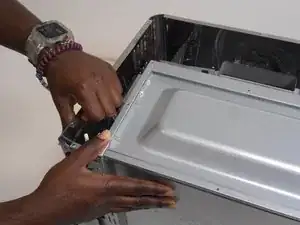
    • Pull off the back panel.

  3. AKcjop32RlEsvEAl
    AKcjop32RlEsvEAl
    QZmMhdTAgfCNuAnc
    UDj5E2drGCNfRgbt
    • Flip the oven upside down.

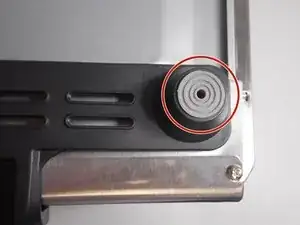
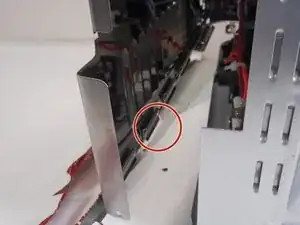
    • Use a spudger to pull out the grey stoppers.

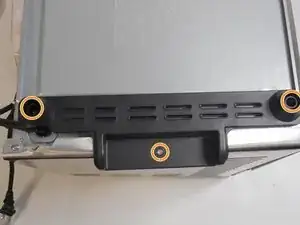
    • Use a Phillips #1 screwdriver to remove all three 11 mm screws.

  4. H4nftFS6vMtLCHj1
    H4nftFS6vMtLCHj1
    rWWfQKTRDMOSsWXm
    • Unscrew all of the 11.05 mm screws that connect the outer shell to the interior device.

  5. ItHgCPkSurRHJUcK
    ItHgCPkSurRHJUcK
    wfC2r4SAdcqOZmT2
    ofKmDrmHAjC5TQPR
    • Push down with a screw driver between the tabs, then pull up to release the tabs. Pull the top piece off.

  6. lxjlVnUgXZJMCwTG
    lxjlVnUgXZJMCwTG
    bCsbigtJMtBZ4oIp
    H6EXNyGKREMfXQAK
    • Inside of the device locate the function switch and remove the indicated screws (4.97mm).

    You do not have to remove these two screws and at least one of them is not in a position that is easy to reach. The two screws shown actually hold parts of the switch together, they do not connect to the oven.

    Nancy Kecso -

  7. fDZ6WTByaRXK13Ku
    • Unclip all connections.

    I have the Cuisinart toa-60 (fkk), it had 3 of the connectors soldered onto the switch. Otherwise it was the same.

    Mike Christopher -

  8. JrtXfSduulEbjqek
    JrtXfSduulEbjqek
    4RrBYtkgnyyWfnvA
    OatU2BFDkbRjrDxJ
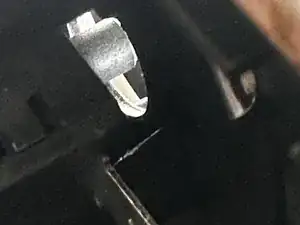
    • Rotate function knob to broil so plastic tab is visible when looking from the inside between the switch and control panel. Use screwdriver to push tab down and pull knob out from front side.

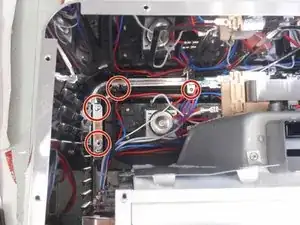
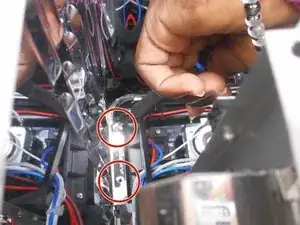
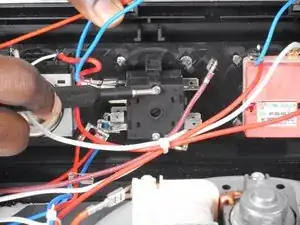
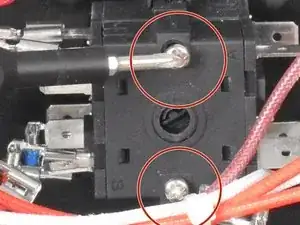
    • Remove 2 screws revealed under the front knob

    I got to this point and can’t figure out how to remove the switch entirely - I have a replacement but can’t get the full switch removed from the knob

    Stan Hung -

    Let me try to explain this a bit better. Try to imagine that when the knob is inserted into its hole from the front side, two small tabs on either side of the knob are pushed in towards the center of the knob. Once the knob is inserted far enough, the 2 tabs expand outward to anchor the knob against the back side of the panel. They don't expand very far, but enough to hold.

    Now, from the back of the air fryer, take a peak into the gap between the front panel and the (broken) switch, and rotate the knob back and forth. You will be able to see the tabs. They look like skinny cutouts in the white plastic. When you rotate the knob to the Broil setting, you can insert a screwdriver into the gap to push down the tab and pull out the right side of the knob (when looking from front) out a bit. Then carefully, without pushing the knob in again, turn the knob to the right, and while looking into the gap from the inner side of the fryer, you should see the second tab. Push that down with a screwdriver and pull the knob out from the front.

    Took a while to figure this out.

    Patrick De La Rosa -

    Yes, the original instructions don’t specifically state ‘2’ tabs it states ‘just push down the tab’ . We took that to mean one tab. There are 2 tabs which need to be pushed in I order to remove the knob from the outside. We also found when taking ours apart that one of the connections on the broken switch is actually soldered so we needed a soldering tool to remove the broken switch completely. Luckily we had one on hand. Before we removed the switch we took photos to know where the connectors should be placed. In reality, we found that you could remove the switch from the outside wall, then remove one connector at a time and replace it immediately onto the new switch. This was much easier than using the photos to reconnect. All in all, these instructions were excellent. Here’s hoping we get another few years out of this terrific oven.

    Bernie -

Conclusion

To reassemble your device, follow these instructions in reverse order.

TRiels

Member since: 08/09/23

244 Reputation

11 comments

Anyone have a source for a replacement switch?

Josh -

I ordered mine on Amazon

Martin Baumeister -

Big thanks for providing these instructions! It worked!

Martin Baumeister -

Thanks for the guide. Saved me the headache of having to find a new toaster oven and paying for it.
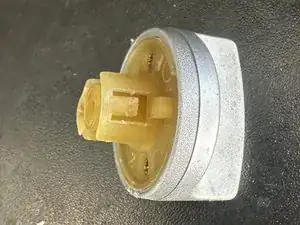
For those needing it, the part I ordered and used is part model number FZ31-9E (11 pins 7 positions) from amazon.
The switch will also have letters and numbers corresponding to the orientation as in step 6 so keep an eye out for that!

Adam Nguyen -

Part of Step 8...Difficult to understand picture how to remove knob on switch? i did follow up instruction that i didn't clear instruction if you have any video how to remove knob from panel switch?

Thanks Todd

Todd Bouma -

There's a small tab that you can see when you rotate the knob to the right position. Mine had one on each side. I turned it until it was visible and pushed in in with a screwdriver, (a headlamp or a helper with a flashlight is handy) I had to rotate it 180° to the other side as it had 2 tabs. Once it was pushed in the knob slid out pretty easily. (The shaft on the knob is smooth, the tab is holding from an external opening, my guess is the front cover.)

Mike Christopher -

Thank you. Fixed last night. I ordered the same part as Adam from Amazon= https://www.amazon.com/FZ31-9E-positions...

Luckily NOTHING was soldered- very easy to remove connectors

It helped to have someone squeeze on the sides when screwing/putting back together and insert back into accordion tabs last-- would have been much harder to align the screws and screw holes.

Janet Hill -

Thank you! I also ordered the same part from Amazon https://www.amazon.com/FZ31-9E-positions...

These photos and the notes from everyone made it pretty easy to change the switch. I did have to cut off the connector on 3 wires and add connectors and re-solder them to the new switch. (The factory put huge globs of solder on the connectors)

Mike Christopher -

I used straight connectors, the wires were tight, 90° flag connectors would work better. Make sure to pre-tin the wire before installing the connector, that way when you solder it to the switch everything is bonded together.

Mike Christopher -

I work on commercial kitchen and refrigeration equipment..well done on the pics and description. Tech sapport , always expidites the job. Keep up the good work

John R Faustmann -

This has been by far and away the best instructions to replace this switch.

Thank you

thomas rossi -