Introduction

This guide will show you how to both remove and replace the battery of your Dell Alienware 15 R3 laptop.

  1. ugaRUHPSOvfFUTvZ
    ugaRUHPSOvfFUTvZ
    YkXWVKpkLyJqZUEQ
    XA6lvmKoGmwOofCk
    • Before you begin, turn off the laptop and unplug the charger.

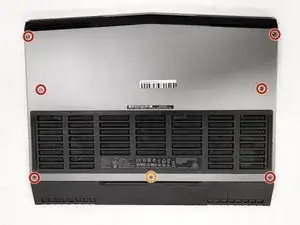
    • Flip the laptop over so that the backside is facing up.

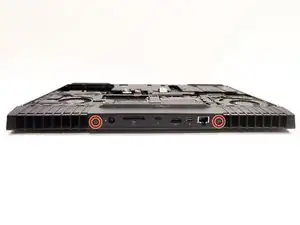
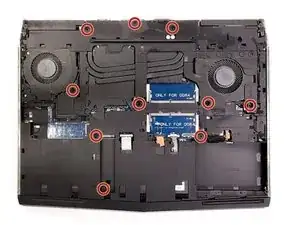
    • Use a Phillips #00 screwdriver to remove the six 13.0 mm screws from the sides of the back case.

    • Use a Phillips #00 screwdriver to remove one 5.0 mm screw from the back of the laptop.

  2. fUNUpWMVqyjxpxFL
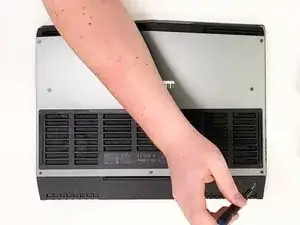
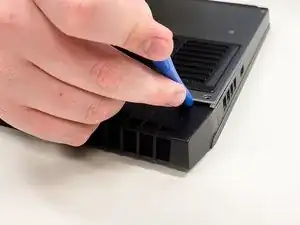
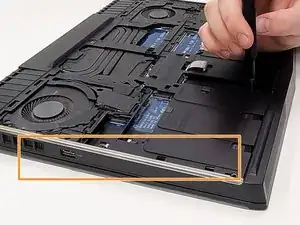
    • Use the opening tool to pry the back case from the computer.

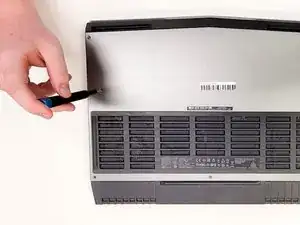
    • Use the opening tool and work your way around the perimeter of the back case to gently release the clips.

    • Start from the black vent for an easier removal.

    • Lift the back case off of the laptop.

  3. 32WCjabHJbsVBp2Y
    • Use a Phillips #00 screwdriver to remove two screws from the side of the laptop.

  4. YNPiUCeWDkjAUuuZ
    YNPiUCeWDkjAUuuZ
    yDFDTJJc1UA3sLei
    • Use an opening tool to release the four tabs from the hinge cover and gently pry it off.

  5. nSqpxJO23xg2VCLq
    nSqpxJO23xg2VCLq
    LLGQigK2VlVfaKQl
    yDnaadj4P4Eji3II
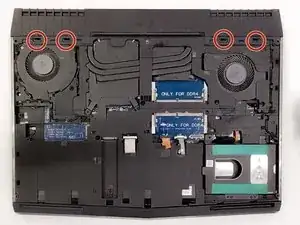
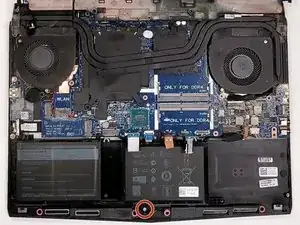
    • Use a Phillips #00 screwdriver to remove 10 screws from the chassis.

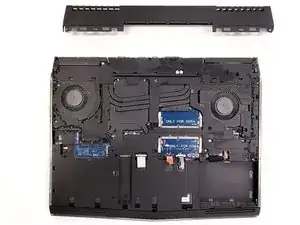
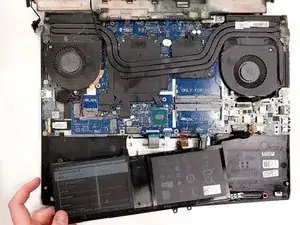
    • Use a spudger or opening tool to remove the chassis and reveal the battery, fan, motherboard, and other components.

    The Wlan cable holds the base to the computer along with a little wire in the back left corner.

    darkdestroyer66 -

    Mine has 12 screws not 9. one card also to remove, (held by screw), and 2 sets of connectors

    Sean -

    Plus you need to put the splonger in the edge below the usb connections, not on the area highlighted in the picture above. Yeah there are way more screws than 9. You also need to remove the screws out of any m.2 ssd drives, msata drives, and wlan card. You also need to unplug each ribbon cable, and unplug and unwire the tronlights on both sides of the laptop.

    This youtube video is really helpful for this part: https://youtu.be/QxJznOkvyic?si=eDLzrheu...

    jason -

  6. LYqbssZA5LMVipTI
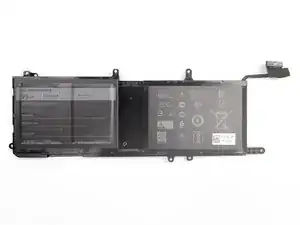
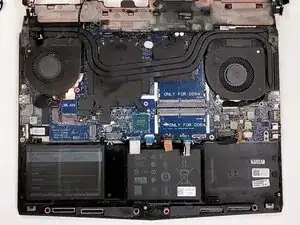
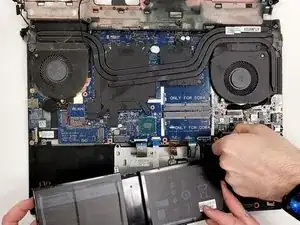
    • Use a Phillips #00 screwdriver to remove the 5.0 mm screw that is securing the battery to the palm rest assembly.

  7. WaZvTc34BU3o2BtC
    WaZvTc34BU3o2BtC
    RFtMSRBRSgZmIuqy
    1ytiCxG5EQGLCTj1
    • To the upper right of the battery is a connecting cable. Gently disconnect it from the palm rest assembly.

    • Confirm nothing else is connected to the battery and lift the battery completely off the palm rest assembly.

    While I did finish my battery replacement using this guide, I had to remove around 15 screws to release the midframe, not the nine listed. This is likely due to the source machine being a different h/w version than mine. It still didn't take long and wasn't much more difficult. I swapped a 68Wh dead battery with a 99Wh version. Now it lasts around 7 hours on a charge. Much better :D

    Tyler Regas -

Conclusion

To reassemble your device, follow these instructions in reverse order.

Jake Nelson

Member since: 22/09/22

623 Reputation

2 comments

does not seem to be for my alienware r3 15 inch

Craig Anderson -

step 5 - you need to unscrew 10 screws, not 9. You missed the one in the center.

Mike Kravchenko -