
Introduction
If you are trying to replace the motherboard for the Dell Alienware 15 R3 this is a step by step guide to help you.
Before you begin the repair, power off your laptop and unplug the power adapter. When you get to Step 6, it's important to disconnect the battery cable from the motherboard and remove the battery.
-
-
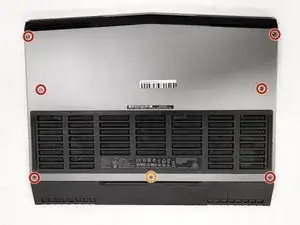
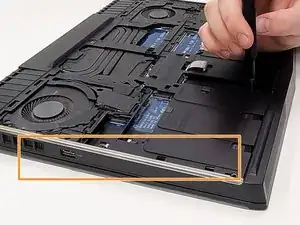
Flip the laptop over so that the backside is facing up.
-
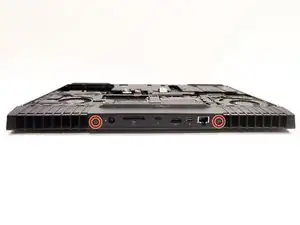
Use a Phillips #00 screwdriver to remove the six 13.0 mm screws from the sides of the back case.
-
Use a Phillips #00 screwdriver to remove one 5.0 mm screw from the back of the laptop.
-
-
-
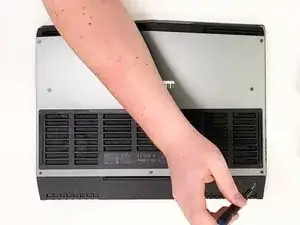
Use the opening tool to pry the back case from the computer.
-
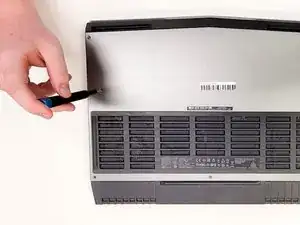
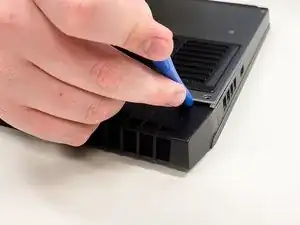
Use the opening tool and work your way around the perimeter of the back case to gently release the clips.
-
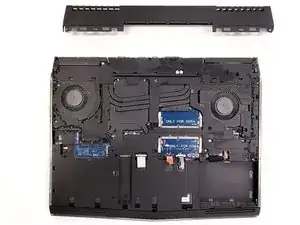
Lift the back case off of the laptop.
-
-
-
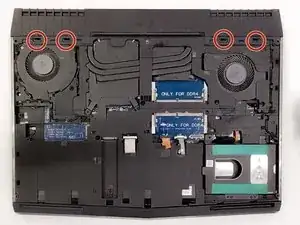
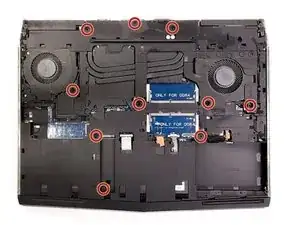
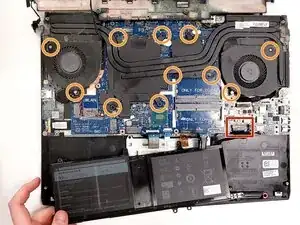
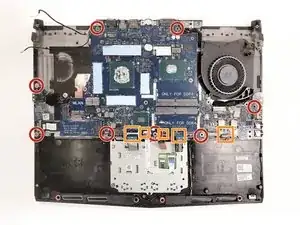
Use a Phillips #00 screwdriver to remove 10 screws from the chassis.
-
Use a spudger or opening tool to remove the chassis and reveal the battery, fan, motherboard, and other components.
-
-
-
Before you begin, disconnect the battery cable from the motherboard. Use the tip of a spudger or your fingernail to flip up the small locking flap. Then, you can safely pull the battery cable out.
-
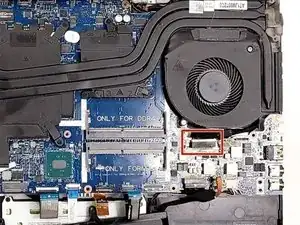
Use a Phillips #00 screwdriver to remove the eleven screws connecting the fan to the motherboard.
-
-
-
Detach the ribbon cable connecting the heat sink to the motherboard.
-
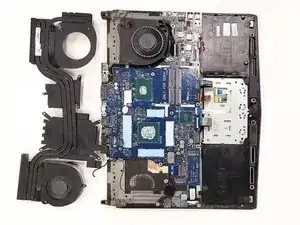
Pull the heat sink off of the fan.
-
-
-
Use a Phillips #00 screwdriver to remove the eight screws from the motherboard.
-
Detach the remaining ribbon cables from the motherboard.
-
Remove the motherboard from the laptop.
-

To reassemble your device, follow these instructions in reverse order.
2 comments
This guide completely skips disengaging the battery, which should be done before any components, and it should be plugged back in last.
Well, anyone in their right mind, would know that is the 1st thing to do. Give him credit for a great picturess of disassembling... :-)
Actually "Step 6" tells you to do just that !!!