Introduction

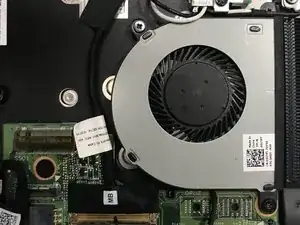
If you're experiencing overheating issues with your Dell Inspiron 13 7378, a quick and effective solution is to replace the fan. In this fast-fix, we'll guide you through the process of safely and efficiently replacing the fan in your laptop, helping to restore optimal cooling performance and prevent potential damage to your device. Let's get started!

  1. YSThvhlDvFlUIs23
    • Set the laptop with its underside facing up for improved accessibility.

  2. bX2UP2QbRaHV56mX
    bX2UP2QbRaHV56mX
    pRYSrOXthag5FHVo
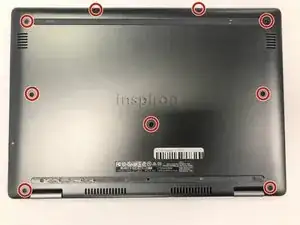
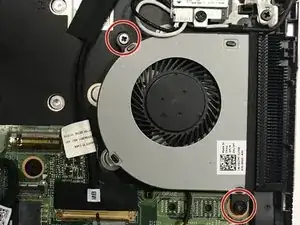
    • Using a Phillips #00 screwdriver, extract the nine 3 mm screws located on the back of the laptop.

  3. ec4l52CDiXNH4NAV
    ec4l52CDiXNH4NAV
    eDVIQqqonG1x6LLh
    SUHIumXpihFraCMq
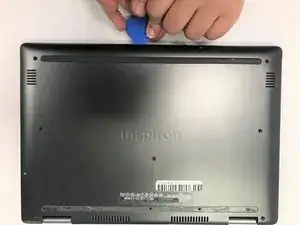
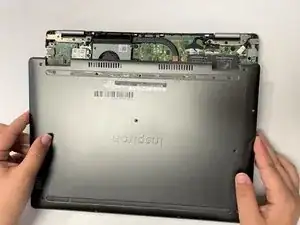
    • Carefully pry open the back of the back of the laptop using opening picks.

    • Carefully raise and detach the back cover from the laptop.

    • Exercise caution to prevent damaging or cracking the device's back cover.

  4. vlNRZUOdPFmtWZtp
    • Remove the two 3 mm screws holding the fan in place using a Phillips screwdriver.

  5. PN6gs2WiTopSVSqm
    PN6gs2WiTopSVSqm
    DiVtPMMctmvMlnnH
    eN6KZQLkNxD21pUq
    • Disconnect the fan's connector from the motherboard.

    • Remove the fan from the laptop.

Conclusion

Replace the back cover to complete the process.

Javier Perez

Member since: 08/02/22

277 Reputation

0 comments