Introduction

In this guide, we will be showing you how to remove and replace the Display Assembly.

  1. g5cAQEyXrKvDcZZX
    • WARNING: Before working inside your computer, read the safety information that shipped with your computer and follow the steps in "Before You Begin". After working inside your computer, follow the instructions in "After Working Inside Your Computer".

    • Peel the tape that secures the display cable to the system board.

  2. DP6YKlsOrNyPoZmP
    • Disconnect the display cable from the connectors on the system board.

  3. MNoSObtL6hMk5Fa6
    • Disconnect the wireless mini-card cables from the connectors on the wireless mini-card.

  4. QLwAlciio4Z6RCIe
    • Move aside the power adapter-port cable from the screws.

  5. BLKjeuPtrpGXnZrS
    • Remove the screws that secure the display assembly to the computer base.

  6. nmMEAFbK2AfmRraQ
    • Lift the display assembly off the computer base.

  7. NKjJfhrW6AQrAD6X
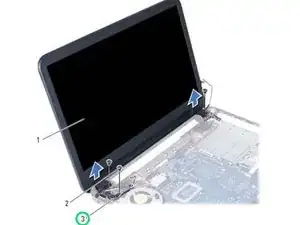
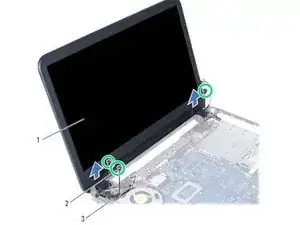
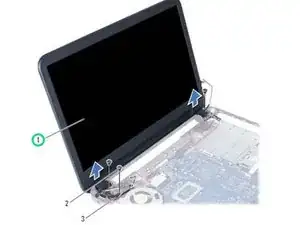
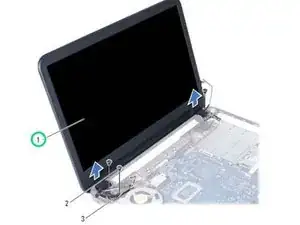
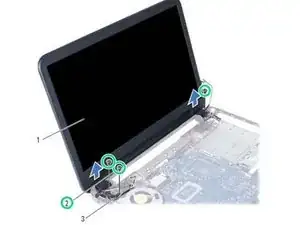
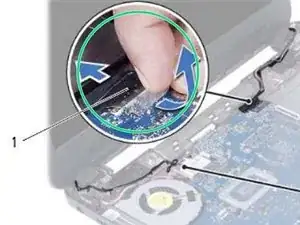
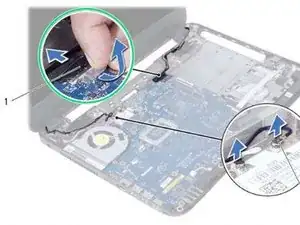
    • Place the NEW display assembly on the computer base and align the screw holes on the display assembly with the screw holes on the computer base.

  8. HHFdKRslNp52GPMU
    • Replace the screws that secure the display assembly to the computer base.

  9. fkJRvmpyUbVOJeyw
    • Connect the wireless mini-card cables to the connectors on the wireless mini-card.

  10. eaQiQWC5LX2XfXNw
    • Connect the display cable to the connector on the system board.

  11. AbgEMc1WlVMDJTWN
    • Adhere the tape that secures the display cable to the system board.

Terrence15

Member since: 18/12/17

79555 Reputation

0 comments