Introduction
A laptop battery is a crucial component of the computer system. Acting as a source of power, the battery enables the laptop to run without a power cable, however, laptop batteries tend to degrade over time. As such, you may find that your Dell Inspiron 16-7610 heats up faster than it used to or that the computer's performance has worsened. Replacing the battery will resolve these issues. If you find your battery is swollen or damaged, be sure to take any necessary precautions to prevent injury.
-
-
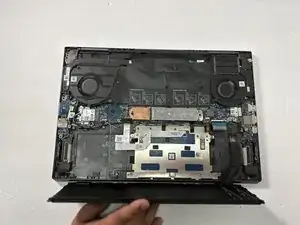
Flip the device over, so the backside is facing up.
-
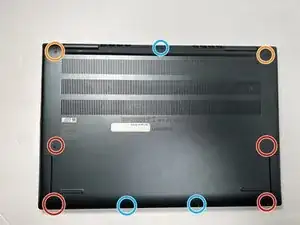
Use a Phillips #00 screwdriver to remove four 4.00 mm screws.
-
Use the Phillips #00 screwdriver to unscrew or loosen two captive screws at the right and left corner near the hinges.
-
Three of the screws are dummy screws, only screwed into retainers. They are not holding anything in and can be left in place for simplicity.
-
-
-
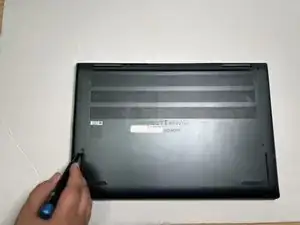
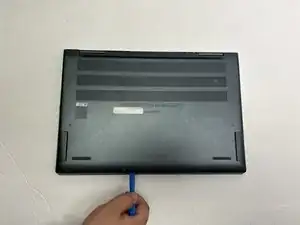
-Use the opening tool between the seams of the top and bottom case to pry the back case off of the laptop.
-
Undo the clips gently as you pry the back of the device to avoid breaking them when removing the back case.
-
Remove the back case from the device.
-
-
-
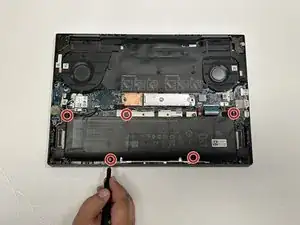
Use a Phillips #00 to remove the five screws securing the battery to the laptop.
-
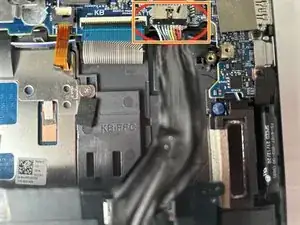
Pull the bundled cable away from the connector in the same direction as the wires are running.
-
Use both hands to life the battery up and remove it from the laptop.
-
To reassemble your device, follow these instructions in reverse order.
Only 6 screws have to be removed - the central one on the hinge area can remain.
Bob Irving -
As Bob noted in January, the top center screw doesn't do anything and doesn't need removing. As I found today during my repair, that is true but also the two bottom central screws are also unnecessary. If you check the photos in step 3, in the bottom of the battery near the screws circled in red, there are cutouts where the screws would go, but there is no mounting points on the bottom of the palmrest assembly where the screws go, so it was the case in the device photographed for this guide in the first place as well, the original guide author must simply not have noticed. (I did not notice at first, either, until reassembly found me questioning where the screws go.)
I have edited this step to reflect as such. It also means if you lose one of the important screws accidentally, you have three replacements that aren't holding anything in that are good to go.
Hope this helps.
Justin Castle -