Introduction
If your Dell Latitude 9510 laptop (identified with model number 9510) is overheating, running louder than usual, or shutting down unexpectedly, it might be due to a failing cooling fan. The fan is a critical component that keeps your laptop’s internal hardware at a safe operating temperature by regulating airflow. Without a properly functioning fan, your device may suffer from thermal issues that can lead to performance drops or permanent damage.
This guide will help you replace the fan in your Dell Latitude 9510 to restore proper cooling. Before starting, verify that the fan is the cause of the problem by referring to Dell's troubleshooting page for the Latitude 9510 by clicking here.
Important safety tips:
- Disconnect the laptop from all power sources and remove the battery before starting the repair to avoid electrical shock.
- Use ESD-safe tools and an anti-static mat to protect your laptop’s sensitive components from static discharge.
This repair does not require advanced technical skills, but follow the steps carefully to ensure a successful replacement. Once completed, your laptop will operate cooler and more quietly, extending its lifespan and maintaining optimal performance.
-
-
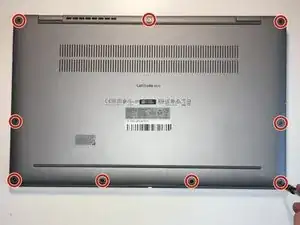
Flip the device so that the base plate is facing you.
-
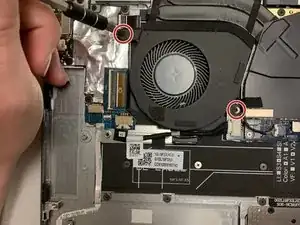
Use a Phillips #0 screwdriver to remove the nine 5.5 mm screws securing the base plate.
-
-
-
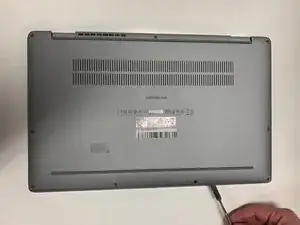
Wedge a spudger between the base plate and the chassis, then gently pry around the entire perimeter to release the base plate.
-
Remove the base plate.
-
-
-
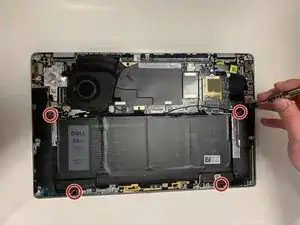
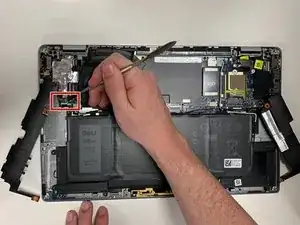
Use a spudger to gently lever the speaker connector out of its port.
-
Lift the speakers up and out.
-
-
-
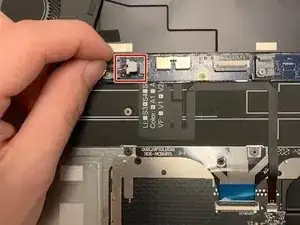
Place your fingernails behind the plastic tabs on the speaker's motherboard connector, then pull directly backwards, toward the wires, until the connector releases from its port.
-
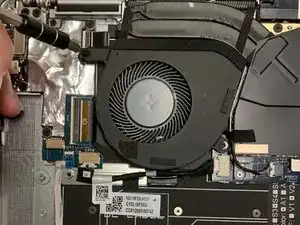
Lift the fan up and out.
-
To reassemble your device, follow these instructions in reverse order.