
Introduction
The Dell Latitude E6330 is a durable and reliable business laptop, but over time, the keyboard may experience wear and tear from heavy usage. Whether you’re dealing with unresponsive keys, sticky buttons, or a cracked keyboard, replacing it can breathe new life into your device.
This guide will walk you through the process of safely removing and replacing the keyboard on a Dell Latitude E6330, ensuring minimal risk to other components.
Before beginning, make sure to power off the laptop, disconnect the battery, and have the necessary tools on hand. With this guide, you’ll have your laptop back to peak performance in no time!
Tools
-
-
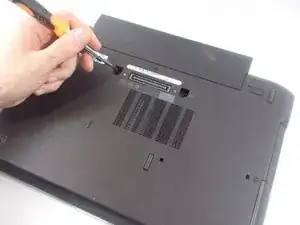
Start by flipping the laptop over and removing the two, deeply recessed, 2.5mm x 5mm screws from the bottom face of the laptop.
-
-
-
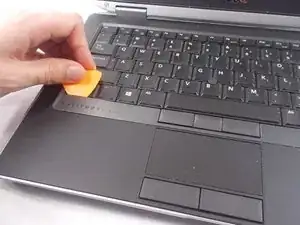
Locate and remove the remaining three 2mm x 3mm screws connecting the keyboard to the frame. (One is located just left of the left mouse button and the remaining two are just right of the right mouse button).
-
-
-
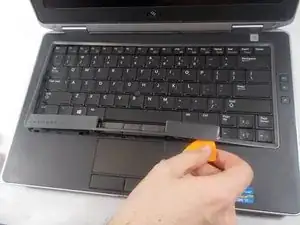
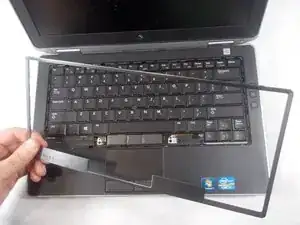
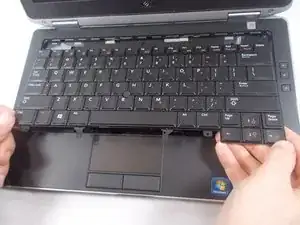
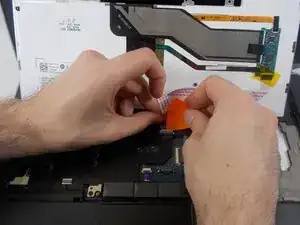
At this time you should be able to gently lift the keyboard off of the frame and expose a ribbon cable connecting it to the motherboard. Flip up the clip holding the ribbon in place and remove the faulty keyboard.
-


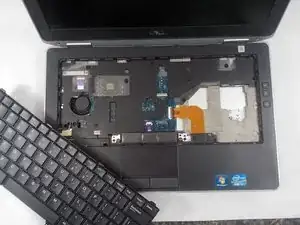
To reassemble your device, follow these instructions in reverse order. Take your e-waste to an R2 or e-Stewards certified recycler.
One comment
That's the way to do it!