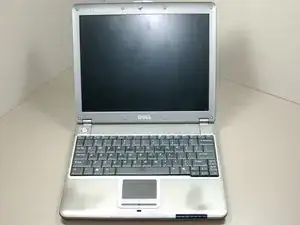
Introduction

If the cooling fan on your Dell Latitude X300 is damaged or no longer working, this set of instructions will aid you in replacing the cooling fan. The cooling fan is necessary for actively moving air through the inside of the laptop. If your Dell Latitude X300 is overheating or too noisy, your cooling fan may not be working properly. Before beginning ensure that the laptop is powered off.

  1. qICCXIaNXGcBEVkS
    • Before removing the battery from the laptop, make sure the power is off.

    • Push both battery locking clips outward at the same time.

  2. YWUnQZarvEKRYGVD
    • Slide the battery out of the laptop.

  3. fWK5E5Pb255TwcPK
    • Remove the four 4 mm Phillips #0 screws from the bottom of the laptop.

  4. 4NGQGNt4KDFJfGli
    4NGQGNt4KDFJfGli
    rGpNKObhjS63iZvU
    • Carefully turn the laptop over and open the screen all the way.

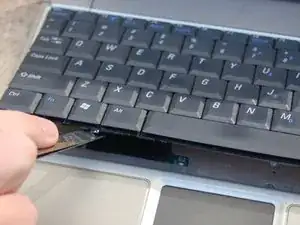
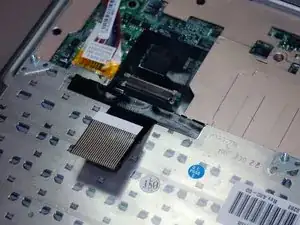
    • Locate the slot to remove the keyboard in the lower left hand corner.

    • Using a spudger as a lever, insert it into the slot and gently pry up.

  5. boEVdtVrJcKA6RxD
    • After the keyboard pops up, pull it away from the screen just enough to release the tabs.

    • Don’t pull the keyboard out forcefully as there is still a ribbon attached to the laptop.

  6. kKhbEEF3gKqIO2Jp
    • Unlock the ZIF connector on the computer by pushing the two outside tabs toward the screen.

  7. kOeXhhLvvOSDPENM
    • Remove the flexible ribbon from the ZIF connector.

    • Do not pull on the ribbon to remove it from the ZIF connector.

  8. h14Ce4Af6oBSelPi
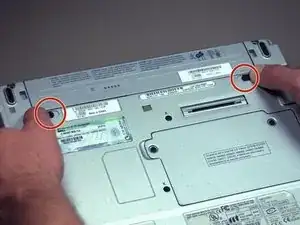
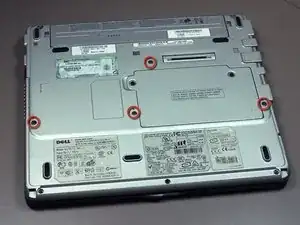
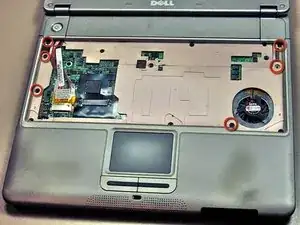
    • Position the laptop so that the bottom is facing upward.

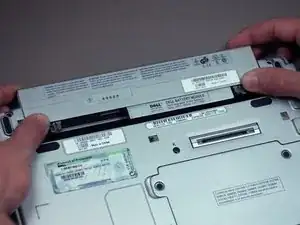
    • Remove the three 4 mm Phillips #0 screws holding the bottom of the palm rest.

  9. cV3S2FAOGUwTKMcv
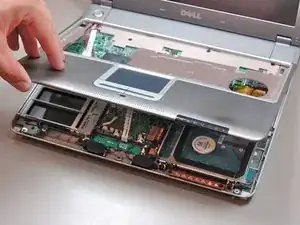
    • Return the laptop to proper position and open the screen.

    • Remove the six 4 mm Phillips #0 screws holding in the palm rest.

  10. cDWFvMIUpCAxDpqV
    • Gently lift the palm rest and rotate it outward so that the bottom is now facing up.

    • The ribbon attached to the track is short and extremely delicate. Use care when moving the palm rest.

  11. h1mijPFDFao6jdDq
    • Lift up on the small ZIF connector and remove the ribbon.

    • If the ribbon seems stuck, gently wiggle it to remove. Do not pull the ribbon with great force.

  12. XvEAcQOHVJ4vJNXb
    • Remove the four 3 mm screws that hold the cooling fan to the system board.

  13. WftGHQDSGnesFbWA
    • Remove the tape holding the cooling fan wires down.

  14. gKEph6SQLXajDIdN
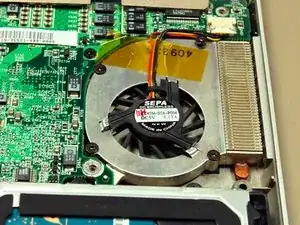
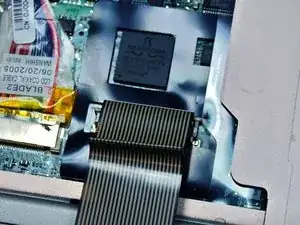
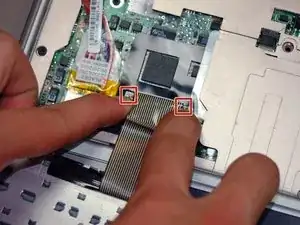
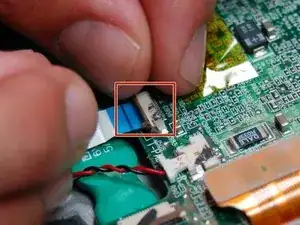
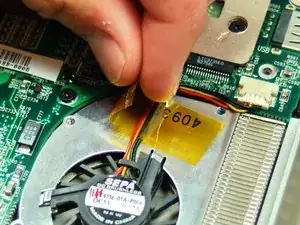
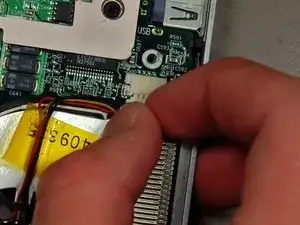
    • Unplug the cooling fan wires from the system board by gently pulling on the hard molded plastic portion.

    • Be careful not to damage the wires by tugging on them.

  15. aTEXfvuuFoRvNO2l
    • Lift the cooling fan out of the laptop.

Conclusion

To reassemble your device, follow these instructions in reverse order.

Taylor Bateman

Member since: 20/01/12

93 Reputation

0 comments