Introduction
In this guide, we will be showing you how to remove and replace the Memory Module.
-
-
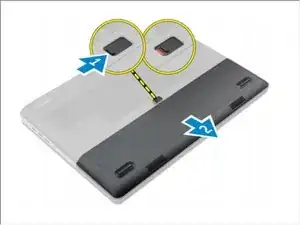
Slide the release latch to unlock the battery cover.
-
Slide and lift the battery cover to remove it from the computer.
-
-
-
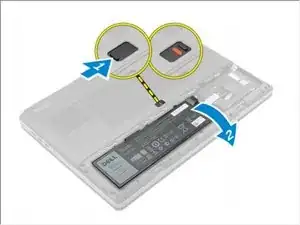
Slide the release latch to unlock the battery cover.
-
Slide and lift the battery cover to remove it from the computer.
-
-
-
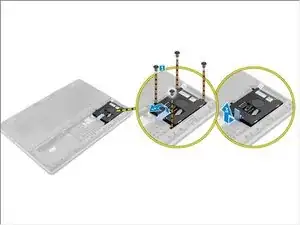
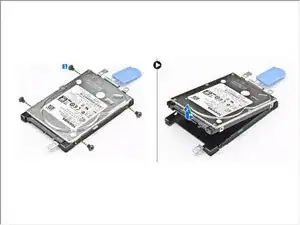
Remove the screws that secure the hard drive to the computer.
-
Lift the hard-drive latch to the unlock position.
-
Slide and lift the hard drive from the computer.
-
-
-
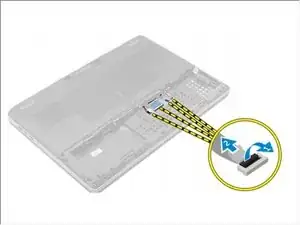
Peel the tape to access the cable.
-
Lift the tab and disconnect the keyboard cables from the system board.
-
-
-
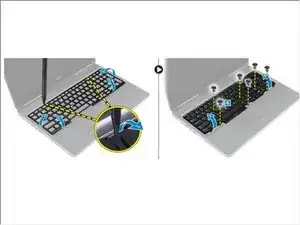
Pry the keyboard trim starting from bottom and work along the top edge and remove it away from the computer.
-
Remove the screws that secure the keyboard to the computer.
-
Lift the front side and slide the keyboard to remove it away from the computer.
-
-
-
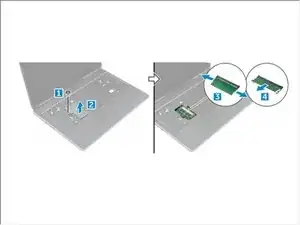
Remove the screw that secures the memory shield to the computer.
-
Lift and remove the memory shield from the computer.
-
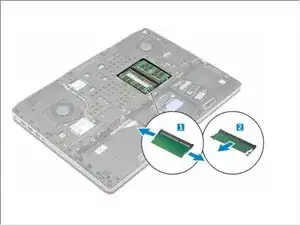
Pry the retention clips away from the memory module until it pops up.
-
Lift the memory module and remove it from the computer.
-
-
-
Pry the retention clips away from the primary memory until it pops up.
-
Lift the primary memory and remove it from the computer.
-
One comment
Thanks Johnathan. Step 4 is unnecessary.