Introduction
-
-
Turn the system badge fap over and place it on the base cover.
-
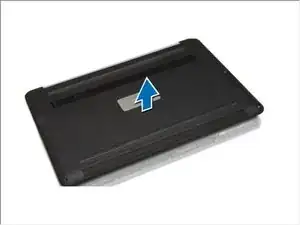
Remove the screws that secure the base cover to the computer. Release and remove the base cover from the computer.
-
Lift up and remove the base cover from the computer.
-
-
-
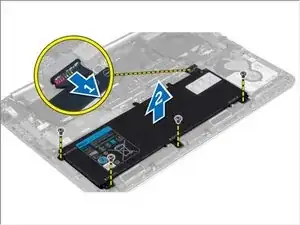
Disconnect the battery cable from the system board [1].
-
Use a Phillips screwdriver to remove the four screws securing the battery to the laptop.
-
Lift the battery off the computer [2].
-
-
-
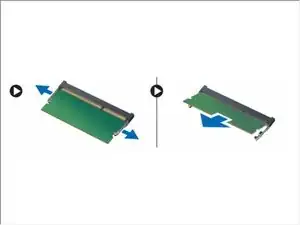
Pry the securing clips away from the memory module until it pops-up. Remove the memory module from its connector on the system board.
-

Conclusion
To reassemble your device, follow these instructions in reverse order.