Introduction

Click here for the updated version of this guide. The guide you are currently viewing is archived here for historical purposes only.

  1. d4dlLhKy4BBopKMR
    d4dlLhKy4BBopKMR
    k2WqKJVEtDes4Ca2
    • Remove the eight 4 mm T5 Torx screws from the bottom cover.

    Missing a step about removing the tiny Phillips head screw under the XPS flip up cover in the middle. Also, there are hooks all the way around the cover so it doesn’t simply lift off.

    curtis_p_brown -

    What about step 3???

    Peter Hecht -

    Please dont hurry , take your Time to follow this procedure. It takes 20 min (not 5) and step 4 requires half of this Time. Good luck.

    Peter Hecht -

    +1 Peter Hecht is right - getting the little clips the back is snapped on with is time consuming and a bit fiddly for people not used to “spudging” off covers. Starting from the back is the key those come loose much easier and help with the rest

    Doug Steinschneider -

    Great guide. It took me 20 minutes and there were no surprises. Battery installed. :)

    dhenniga -

  2. 2TNJ3aF1OiC3dQrY
    2TNJ3aF1OiC3dQrY
    RKMGHiGBGvwUs2b6
    • Use a plastic opening tool to pry open the 'XPS' flap in the middle.

    No flap or screw on the XPS 9370, just a press-fit latch at the centre of the cover. This can be gently prised off.

    Alan Thomas -

  3. TtZb5DNBruSpJQiH
    • Remove the single Phillips screw hidden beneath the flap.

    XPS 13 9370 doesn't have it.

    Kes Bond -

  4. SV3vQLxNPuaLAJc2
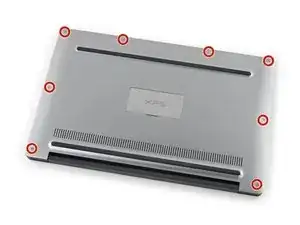
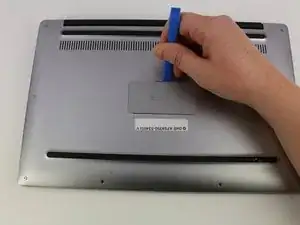
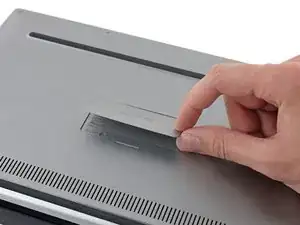
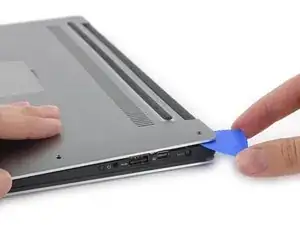
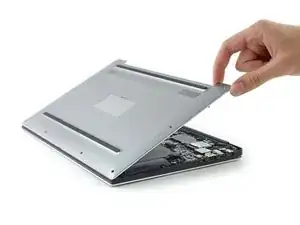
    • Use opening picks or a plastic pry tool to pry open the case clips, beginning from the back edge.

    It’s not that easy to lift actually, cause there are latches. Had t release them gently all around beforehand.

    Davit Barbakadze -

    Also there’s one additional screw under that plate on the bottom!

    Davit Barbakadze -

    Maybe the later models are different, since it should be from the front: https://www.youtube.com/watch?v=xFIE2SKs...

    shigmas -

    Very difficult step, Proceed very carefull

    Peter Hecht -

    If you are replacing the battery of a 9360 or latter (2016 onward) make sure to do the FRONT first. There are latches on the back that you may break if you try to force it open that way. After prying up the front and the sides, just lift up the front like you would open a hinged box. You shouldn’t feel that much resistance as the back hinges off towards you after you’ve lifted it around 30-40 degrees.

    Giacomo P -

    Very easy with XPS 13 9370 - just used my nails (rather short!)

    Kes Bond -

  5. SclHTlmfKvgauUBi
    • Remove the bottom cover.

    good evening, is there a site that sells the back part because it's broken

    marios cocka -

    good evening, is there a site that sells the

    back part because it's broken

    marios cocka -

  6. 5rXrBlHURqTbrkyJ
    • Remove the black, 4 mm Phillips #000 screw on the right of the SSD.

    • The SSD card will pop up at a 45-degree angle after the screw is removed.

  7. SCiK6m6NKb3r6Dou
    SCiK6m6NKb3r6Dou
    mINUKCAZall6DJlj
    • Gently lift the SSD card with your hand to pull it up and to the right.

Conclusion

To reassemble your device, follow these instructions in reverse order.
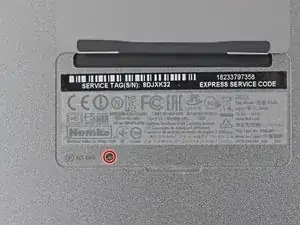
Jay

Member since: 16/05/17

261 Reputation

0 comments