Introduction

Use this guide to replace or upgrade the RAM in a Dell XPS 17 9710.

  1. kBLTMQ5AmLylSOZS
    • For your safety, discharge the battery below 25% before disassembling your device. This reduces the risk of fire if the battery is accidentally damaged during the replacement. If your battery is swollen, take appropriate precautions.

    • Power off and unplug your laptop.

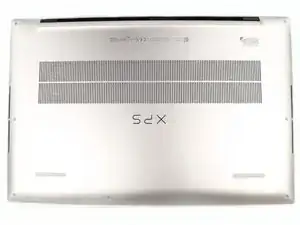
    • Close the display and flip the entire laptop upside-down, with the hinge facing away from you.

  2. FRnxbsdAylymcrBl
    • Use a Torx T5 screwdriver to remove the eight 4.4 mm-long screws that secure the lower case.

    • The lower case is further secured by various clips that must be released before removal.

  3. JIFJOeACQKUBX2BR
    JIFJOeACQKUBX2BR
    KoQRKjnN31wfCvoE
    iHAMNDPaQRXepJWg
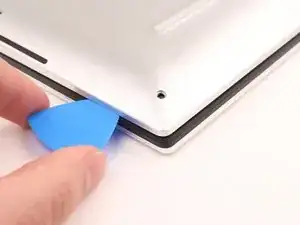
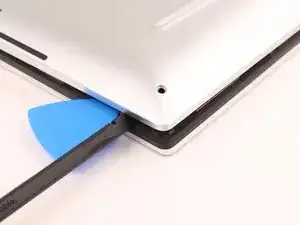
    • Insert an opening pick at the bottom left corner, between the lower case and the chassis.

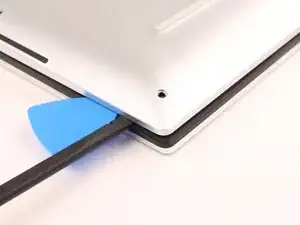
    • Insert the flat end of a spudger into the gap created by the opening pick.

    • Pivot the spudger up to release the first set of retaining clips.

    • Repeat this process for the bottom right corner.

  4. WPCBQUTTnItIEVqK
    WPCBQUTTnItIEVqK
    nBuhDnO5Evswg4KB
    rgLQrBPpMlU3Q1QE
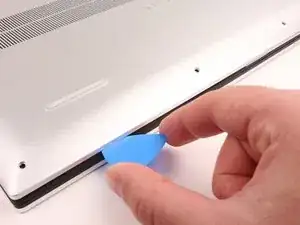
    • Insert an opening pick into the gap created on the front edge of the laptop.

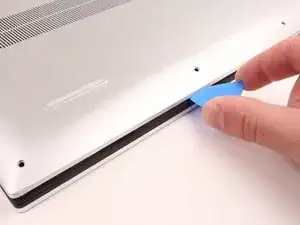
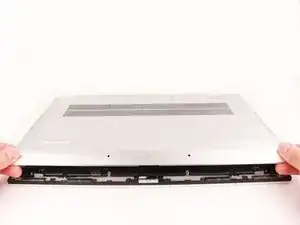
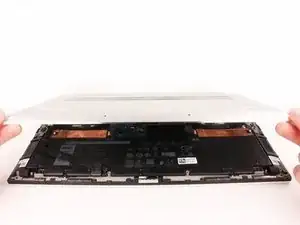
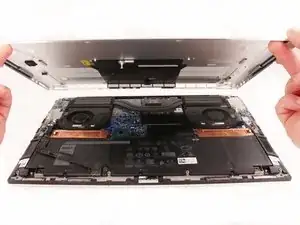
    • Slide the opening pick around the entire perimeter of the laptop, prying up intermittently, until the lower case fully releases from the clips on the chassis.

  5. cP5ygUMZOgVXnwmj
    cP5ygUMZOgVXnwmj
    gDu5nvXSmTvs62j1
    FqlWQkXAIQLPmYvu
    • The lip of the lower case is very sharp. Handle it with care, and try not to slide your fingers along any of the edges.

    • Lift the lower case up and off of the chassis to remove it.

  6. DKgOFwVi4uLrXJPL
    DKgOFwVi4uLrXJPL
    ASZXgbqHpYt2hKlP
    AkNgfkhHC1dMuZxK
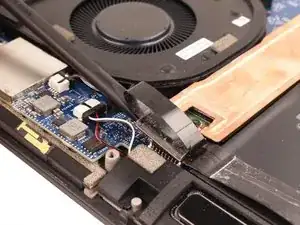
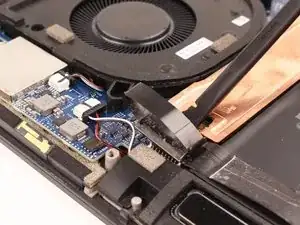
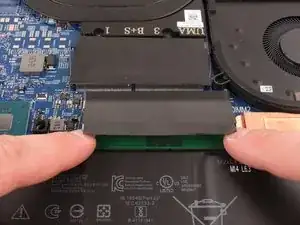
    • Use the flat end of a spudger to pry the battery's connector up, directly out of its socket.

    • Alternatively, grip the battery connector pull tab with your fingers and lift straight up to disconnect it.

    • During reassembly, line the connector up with the socket and push down gently with a finger to reconnect it.

    • The connector should seat in place with minimal resistance. If it feels difficult to reconnect, realign the connector and try again.

  7. 6NTD1vxgUSN6R1Q1
    6NTD1vxgUSN6R1Q1
    QhgTNSJEmIwf2NP3
    • Push over and hold down the mylar flap covering the RAM chip.

  8. MDNNVb4TDCO5MiOQ
    MDNNVb4TDCO5MiOQ
    vZFqAIGGb6haeO5w
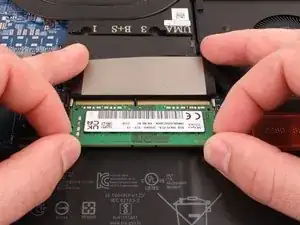
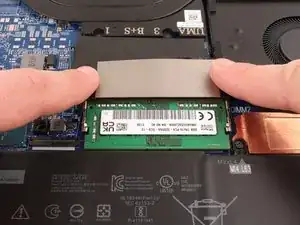
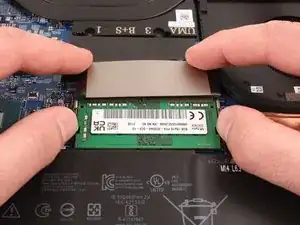
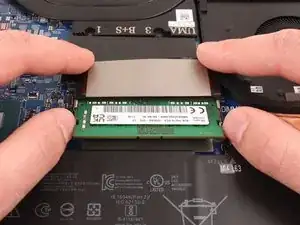
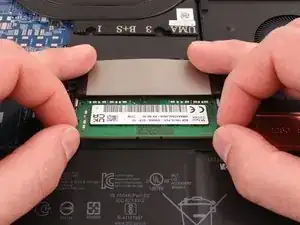
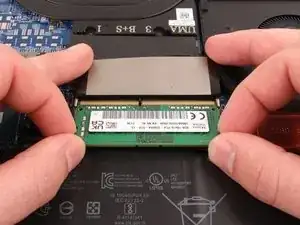
    • While holding down the flap, release the silver arms on each side of the RAM module by simultaneously pushing each arm away from the RAM.

  9. MckcuxDoGHecAEYr
    MckcuxDoGHecAEYr
    2pO3hHaVWX2A4QU3
    • Grip the free end of the RAM and pull it straight out of its socket.

    • Repeat this procedure for the second RAM module above if necessary.

    • When handling the RAM chips, touch only the outside edges. Take care not to touch the gold-colored contact points along the bottom edge.

Conclusion

To reassemble your device, follow these instructions in reverse order.

Take your e-waste to an R2 or e-Stewards certified recycler.

Repair didn’t go as planned? Try some basic troubleshooting, or ask our Answers community for help.

Connor

Member since: 29/03/22

12295 Reputation

0 comments