
Introduction
This is a very nice Keyboard, but after about a year the Volume-Wheel - which i really like overall - started acting up (volume 'jumping' wildly at the slightest touch, sometimes even in the wrong direction)
This guide shows the disassembly of the keyboard to get you close enough into the volume wheel to clean the encoder with some contact cleaner
-
-
Most of the screws keeping the whole thing together are between the keys, spread over the whole keyboard. Technically you don't need to remove all of them, but it's quick work and i used the opportunity to clean out the huge amount of dirt that collects beneath them. Just pull the Caps straight up - i used the puller that came with the Keyboard
-
Note: no need to remove the 4 media-keys on the top right
-
remove all the screws you find beneath - they are all the same type
-
-
-
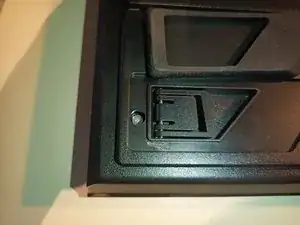
turn the keyboard around and lift the corners of the rubber pads to get to the screws that are unfortunately hidden there - see pictures for exact screw positions
-
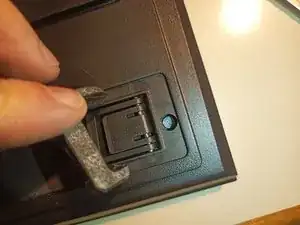
The pads are glued on, but with a pick or similar prying tool, it's easy to lift one side. I feel confident that the original glue still sticks well enough after one or two of these repairs
-
remove all 4 screws (one beneath each rubber pad)
-
During reassembly, i didn't put these back in, because i'm sure i'll do this repair again in future. The Keyboard doesn't feel less sturdy without these
-
-
-
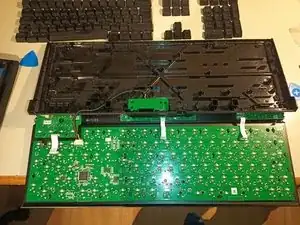
the bottom (plastic) half can now be detached from the front (aluminium) frame - a bit of careful prying along the upper edge (side of the USB - connector) might be needed
-
there's one cable connecting the 2 parts - unplug it from the main PCB
-
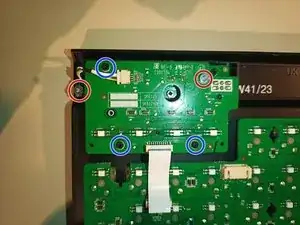
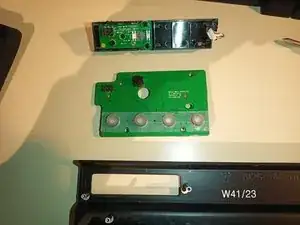
the wheel assembly is in the top left corner - unplug the short cable connecting it to the main PCB on one side
-
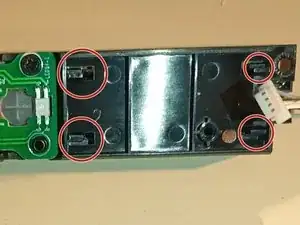
remove 3 black screws (blue circles) and 2 silver screws (red circles)
-
the complete media control assembly can be lifted out now
-
unplug the remaining cable (that's from the encoder we're trying to get to)
-
the big PCB can now be pulled from the wheel assembly
-
-
-
from the backside of the wheel-housing there are 4 plastic tabs locking the side-cover-arcs on either side of the wheel in place. Unlatch them with a pointy tool and carefully push the covers out towards the front
-
the wheel and the encoder is now pretty accessible - probably well enough to get some contact cleaner to the contacts
-
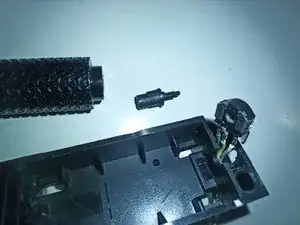
i went one step further and lifted the wheel out - first the side opposite from the encoder! then the wheel itself can be pulled out from the encoder and the encoder can slide out of the housing
-
Spraying some contact cleaner onto the encoder and turning it completely fixed the issue at least for now - i hope i don't have to do this too often...
-

To reassemble your device, follow these instructions in reverse order.