Introduction
Need to disassemble your Nintendo 64 but don’t have the special tools? Follow this guide to remove the protective barrier and gain access to the motherboard using everyday items.
Tools
-
-
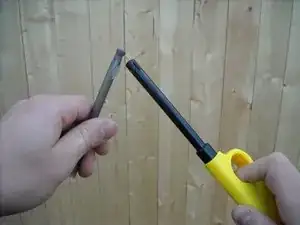
You will need a kitchen lighter and a plastic pen shell, and you will want to do this outdoors to allow the plastic the burn into the air instead of trapping it in a room. Heat the tip of the empty pen shell until it melts into a glob.
-
-
-
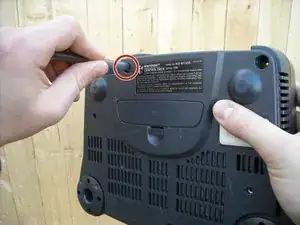
Stick the pen into one of the 6 holes on the bottom of the Nintendo 64. When it reaches the screw, press forcefully for about three seconds and then let go.
-
TIP: The circled hole has the smallest inner diameter, so if you mold your pen with this hole, you can remove the others without remolding if you are careful not to strip it.
-
-
-
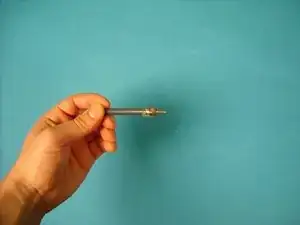
Allow the pen to reform and solidify around the screw for 4 to 5 minutes. If done correctly, the pen will mold completely around the specialized screw and grip it so that it can be twisted out.
-
-
-
Grip the pen and, pushing down forcefully, begin to twist it loose (to the left) as if you were using an actual screwdriver. The screw should come out with the pen as shown in the picture if done flawlessly. If not, you can still manage to get the screw out without it molding completely.
-
-
-
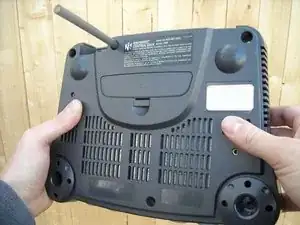
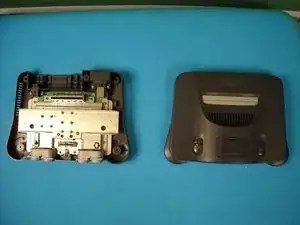
Repeat the melting and re-solidifying process 5 more times for the rest of the screws, and the console will be ready to be opened up for repair.
-
-
-
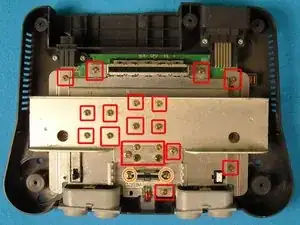
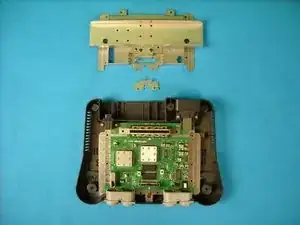
Once the case is off, turn your attention to the silver plate covering the green motherboard underneath. Begin unscrewing the screws connecting the plate to the motherboard.
-
Also remove the two smaller screws on the expansion slot.
-

To reassemble your device, follow these instructions in reverse order.