Introduction
The belt in most Dymo DiscPainters has returned to the dinosaurs and turned to tar, rendering the machine entirely unusable - even if you were already aware that you could use a Lexmark #1 color print cartridge instead of the long-obsolete Dymo cartridge (simply trim off a small plastic tab).
The symptom of a broken belt is a turntable that spins far too freely, and for far too long when flung with a finger. When flung with maximum gusto, the turntable should stop spinning within about 1 second if the belt is good (and you can hear the motor whirring inside when you do). If the belt is broken, it'll spin near-endlessly. When you try to print, you'll likely get a printer error of some kind, as it's not tracking turntable movement when it's expected.
The procedure to replace the belt is a bit invasive and fiddly, but if you get it right, your DiscPainter can continue printing in 2024 and beyond!
-
-
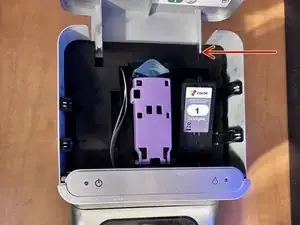
Press inward on the hinge (as arrow, on the thinner side) to disconnect this side of the lid.
-
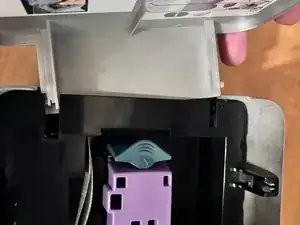
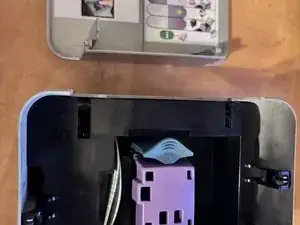
The opposite side of the lid will now be free to fully remove.
-
-
-
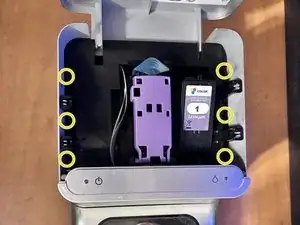
Remove 6 Philips #2 screws that secure the upper chassis to the lower chassis.
-
The upper and lower chassis should simply lift apart.
-
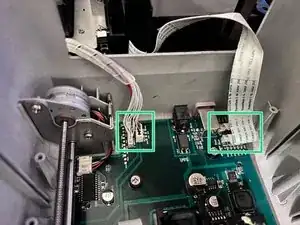
Disconnect the two printhead ribbon cables (careful to keep them in that layered order when reassembling!) and the sensor connectors, which simply lift out.
-
-
-
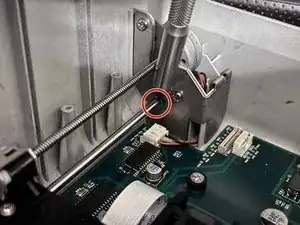
Pop out the C-clip in the rear of the machine, attaching the rail to the motor mount.
-
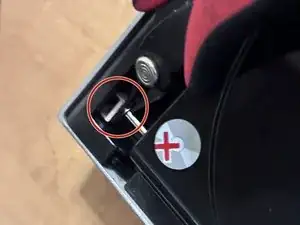
Pop out the C-clip in the front of the machine on the opposite rail, attaching the rail to the chassis.
-
Once the C-clips are removed, simply slide each rail in the direction that was freed by the C-clip, and it should dislodge the opposite end, which allows you to pivot the rod and completely remove the rod.
-
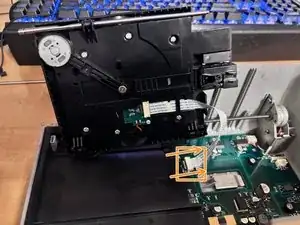
Tilt the print bed mechanism on its side, revealing the ribbon connector to the main board.
-
To unlock the ribbon connector on the board, slide the locking tabs towards the back, parallel to the board, at the same time. They should move approximately 1-2mm, and the ribbon cable should then move freely within the socket, requiring no force to remove it, as it is a zero insertion force (ZIF) connection.
-
-
-
Remove 6 Philips #2 screws that secure the lower print bed to the upper cover.
-
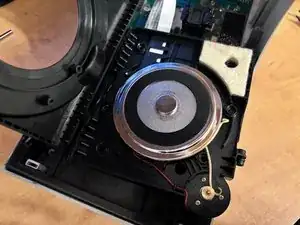
The turntable belt can now be accessed for cleanup and replacement.
-


To reassemble your device, follow these instructions in reverse order.

2 comments
What sort of belt is used to replace the OEM belt?
I initially replaced the OEM belt with a regular office rubber band. It worked fine for printing, but it deteriorated and broke by the end of the year. So, when I rebuilt it, I documented the process for this guide.
The motor itself is just a basic DC motor and doesn’t directly control the disc position. Instead, there's an optical encoder around the base of the turntable that handles position sensing and synchronization. As a result, the belt only handles spinning the turntable and has no impact on print accuracy or quality because the encoder ensures everything is aligned on the driven side of the belt.
Long story short: use any belt that fits, spins freely, and doesn't pull too tight. Preferably one that won't decompose back to oil in the next decade or so (so you never have to do this again). On this rebuild, I just grabbed an appropriate-sized belt out of a belt assortment I got off Amzn. Seems the only way to get belts these days.