
Introduction
-
-
Before starting the disassembly, make sure the speaker is powered off and disconnected from any charging source to prevent any potential electrical shock.
-
I've also did this on a completely deplected battery just to be extra sure.
-
-
-
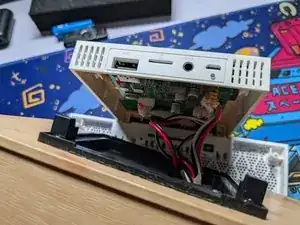
At the bottom of the speaker, carefully insert a plastic opening tool into the seam between the front panel and the main body. Gently pry the front panel open, working your way from the bottom to the top.
-
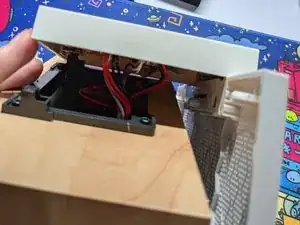
Be cautious, as the top part of the speaker contains the battery cage, which houses delicate wires. Take care not to damage them while prying the front cover. Additionally, be mindful to avoid accidentally poking the speaker itself.
-
-
-
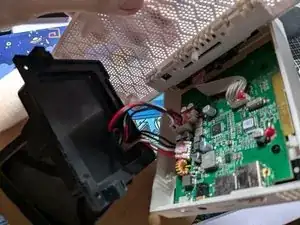
There are four screws securing the battery cage, which includes the battery, its wires, the left and right channel wires, and the main audio wire. Use a Phillips screwdriver (PH2 or larger) to remove them, and keep the screws safe for reassembly
-
-
-
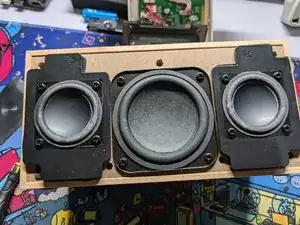
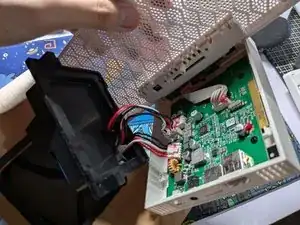
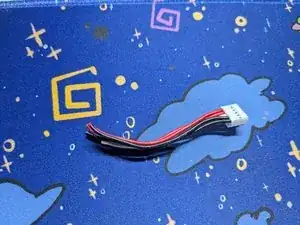
Now, carefully disconnect the battery cable and the speaker wires from the motherboard. For each connector, gently lift the latch to disconnect it. You can use your fingers for this, but tweezers may help if you need more precision.
-
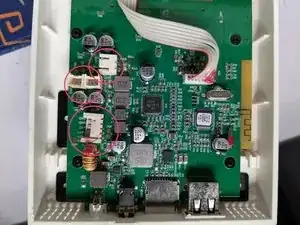
Refer to the second image, which has three marked circles: the bottom indicates the battery connector, while the middle and top circles correspond to the speaker wires.
-
Be gentle to avoid touching any delicate components, including capacitors and other electrical parts nearby, as they may hold residual power and pose a risk of electric shock.
-
-
-
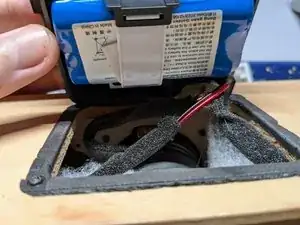
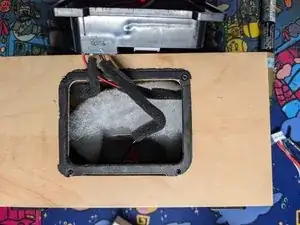
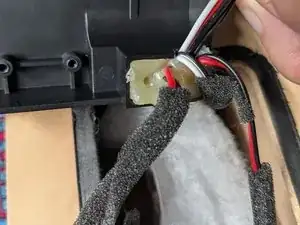
The wires pass through a hole in the battery cage, which is also glued to hold them in place. The easiest way to remove the battery wires from the hole is to just cut them. Cut them one by one to avoid shorting the battery.
-
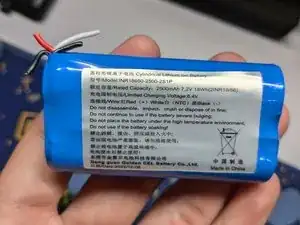
To remove the battery from the cage, unscrew the two screws holding it in place. Since the wires are glued, use a hairdryer to soften the adhesive and gently pull the cable out.
-


To reassemble your device, follow these instructions in reverse order.
11 comments
Thank you for this guide. The same speaker I have just went bust, luckily it's still under warranty. Definitely will come in useful for the next change.
Thank you for this guide, the battery is dead and I have to change it.
It's disassembled (thanks to you) and now I have to find the right battery with the same amount of cables (4 apparently)
Bo DAYS -
Hello, thanks for the guide. I followed it but had a problem with reassembly, here, would you happen to know how you reassembled it? Whenever I push the top part down, the front panel goes forward so I haven't been able to reassemble it like before
Gio -
Hello Gio,
If you check well, on top of the device, you have 2 "brackets" letf and right sides (here) to attach the top part and in front, and 7 wholes (here) to attach the front part.
To reassemble the 2 pieces, your have to :
- present to white piece a bit upfront the wholes in order to slide its top part into the 2 brackets on top of the device.
- by doing so, you will attach the top parts together and in the same time, enter the "pins" into the 7 front wholes.
- You will have to apply a bit of strengh but it should work
A bit difficult to explain but I hope it's clear.
Bo
Bo DAYS -
Yes Gio... Seems broken because you should have some "hooks" (here) on the white piece, at left and right sides of the motherboard which have to be slided into the "brackets" (here)on the device to attach both together
NOTE : the pictures are the one provided for the tutorial not mine so don't pay attention on red circles.
Bo DAYS -
Well that's unfortunate, would you happen to have any suggestions on how I could fix this?
Gio -
It seems like you guys are correct. Some parts of the plastic "hooks" are missing on yours Gio. I'm not really sure how this would be fixed, but if I remember corectly, I also had some difficulties putting that portion back. I think I slid the top part first then the front.
Btw, have you checked if maybe some parts of the white plastic hooks were lodged at the bracket?
It will be difficult to do something clean but I think I would screw the two pieces together on the sides and by using the internal black brackets as the holding points.
1- find the right screw (small and with a tip)
2- predrill the sides of the white piece at the exact place where there are the "bracket" (you need to hold both pieces to keep them together)
3- Then by still holding both pieces, use the predrilled wholes to screw them together (screw the left side of the white piece into the left side of the inner bracket and the same for the right side)
Hope this is clear
See red arrows of these pictures to understand where to predrill and screw (link)
Bo DAYS -
You're welcome Gio, and glad to hear that you figure this out.
Cheers
Bo
Bo DAYS -