Introduction
If your Stream Deck screen starts flickering or you have any other issue that seems fixable by replacing the screen, here's a guide on how to do it. There are no official replacement screens but it's a very standard screen which can cost as low as $5.
No screwdrivers required. No soldering required.
Parts
-
-
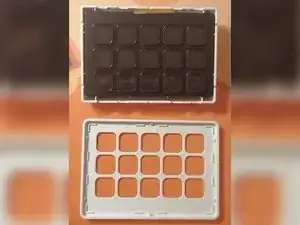
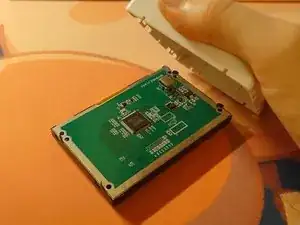
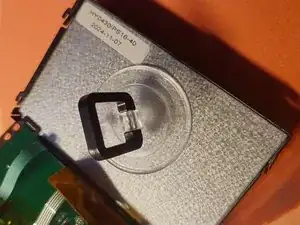
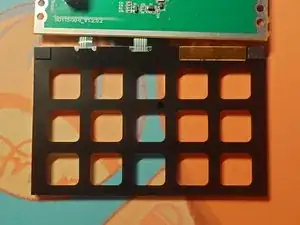
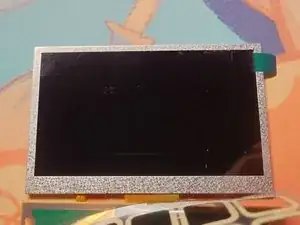
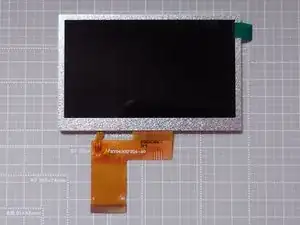
It should look like the one on the picture. Pay attention to the shape of the ribbon cable.
-
must have a resolution of 480x270
-
must be 4.3 inch TFT
-
must have a 40-pin connector
-
should not have a touch capability
-
There are apparently various versions with different luminance. I bought a 1000 nits one and it looks just about right.
-
-
-
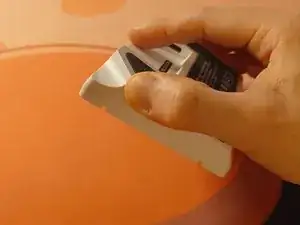
Unplug the USB cable from the device and take the main unit out of the stand.
-
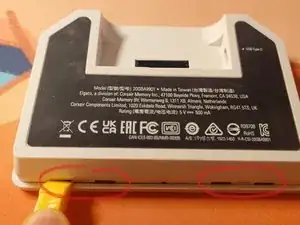
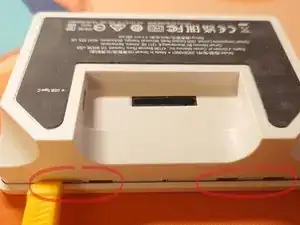
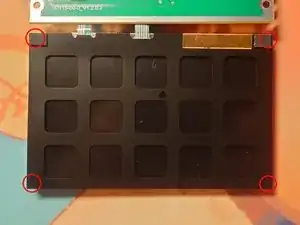
Pry gently at the 4 marked places to remove the faceplate.
-
-
-
The internals of the device are not secured to the plastic case so you should be able to get it out by just shaking it a bit.
-
-
-
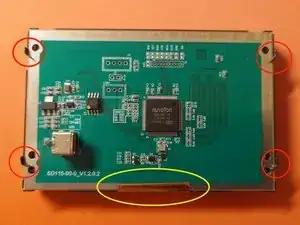
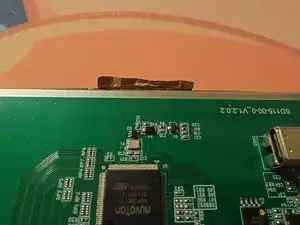
The motherboard is secured with 4 metal brackets 🔴 and a conductive tape 🟡
-
Use precision pliers to bend the brackets out
-
Use something thin to stick between the conductive tape and the motherboard to detach it without damaging. (I used a piece of a bit thicker paper to start the corners off and then gently pulled with pliers)
-
⚠ Do not lift the motherboard yet
-
-
-
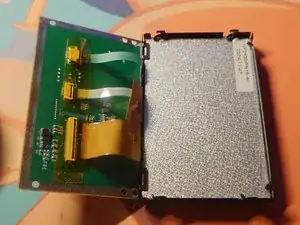
Gently lift the motherboard as if the red-marked edge was a hinge.
-
⚠ There are ribbon cables on that edge so be sure to not damage them.
-
-
-
The screen is secured with another 6 metal brackets 🔴. Use pliers to bend them out of the way in the same manner as before removing the motherboard.
-
✅ The 2 more brackets at the top edge don't need to be bent out. You can leave them as they are.
-
-
-
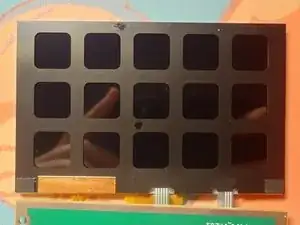
Use a suction cup to lift the screen out of the black metal case.
-
⚠ Best not to push on the buttons on the other side of the case at all! You can push a bit on them to push the screen out but don't push them more into the frame as you would do when normally using the device to not damage them!
-
⚠ Make sure to not damage the ribbon cables! The two thinner ones are not a part of the screen and are not replacable!
-
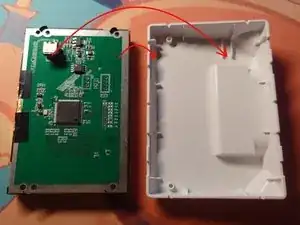
At this point, the black metal casing together with clear buttons should come completely apart from the electronic parts.
-
-
-
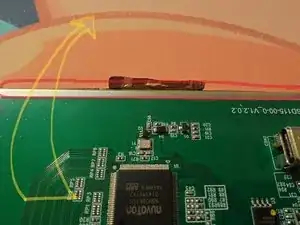
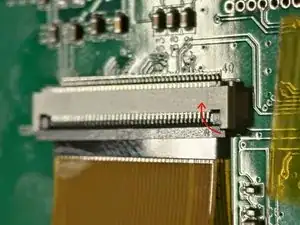
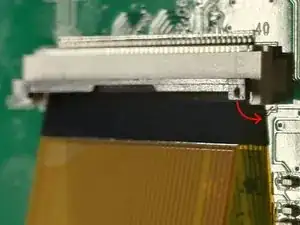
Only the widest cable which connects the screen to the motherboard needs to be disconnected. Lift the yellow kapton tape covering the connector in a way that would allow you to reapply it later.
-
⚠ Do not use regular adhesive tape as a replacement!
-
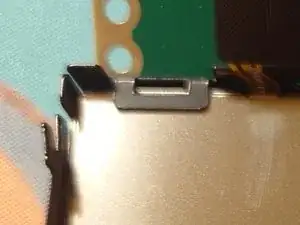
The ribbon cable is secured to its connector by the little black bar.
-
You can insert a plastic prying tool between the small bar and the cable to lift it.
-
Only after the bar is lifted, the cable can be removed from the connector.
-
-
-
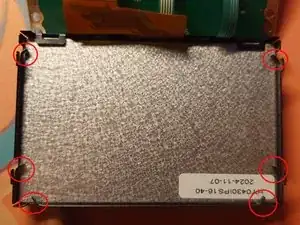
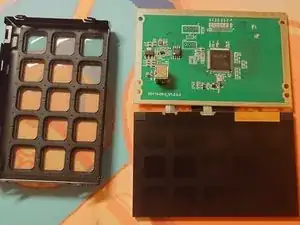
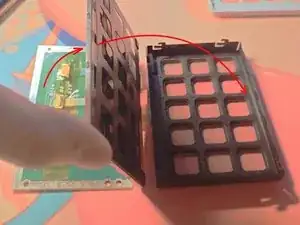
The thin black piece of plastic with button-shaped cutouts is lightly glued to the screen frame in four places.
-
Use a plastic prying tool to gently detach the plastic sheet.
-
⚠ Make sure to not band the plastic and not create any permanent creases in it!
-
-
-
With the old screen gone... Congratulations, you are ready to plug your new screen to the motherboard! 🥳
-
-
-
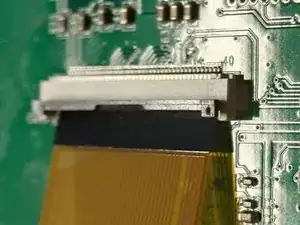
Connect the new screen by putting the ribbon cable into the connector (no force should be needed to do it) and snap the black bar down to secure it.
-
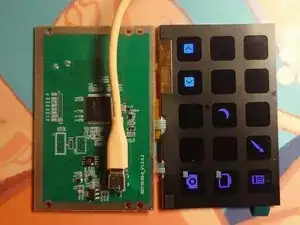
(optional) At this step you can connect the device to your PC to check if the new screen works properly.
-
⚠ Make sure to not touch any of the electronic components!
-
⚠ Disconnect the USB cable after checking.
-
⚠ The USB cable might sit quite strongly in the port so make sure to not damage the port when disconnecting it.
-
-
-
You can use a small patches of double-sided tape to attach the thin plastic sheet with cutouts to the new screen. It will make reassembly a bit easier.
-
⚠ Do not use any strong permanent glue. The plastic sheet is not replacable and if you needed to disassemble it again, you might damage it if it's glued too strongly.
-
-
-
Insert the screen back to the black metal frame. (🧹 this is your last chance to have a direct access to the screen surface so make sure there is no dust or fingerprints on the screen)
-
Bend the 6 metal brackets back to secure the screen
-
Reapply the yellow kapton tape on the connectors (do not use regular adhesive tape)
-
Put the motherboard back to its place
-
Bend the 4 metal brackets back to secure the motherboard
-
Reattach the conductive copper tape to the motherboard edge (you can use a bit of electrical tape to do so)
-
Push the assembly back into the plastic casing. Reattach faceplate.
-
Done! 🎉
-