Introduction

The lower housing is very important to your Enabot EBO SE since this is where the daughterboard, battery, and speaker are located. You will potentially need to replace them for your Enabot EBO SE to continue functioning correctly. We will take you step by step to replace these necessities and hopefully help you have a more pleasant experience.

  1. SosCchgNH3uj4RyT
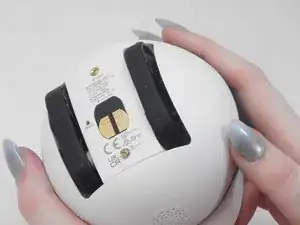
    • Gently turn the robot upside down.

    • Place the robot on a stable surface to prevent it from rolling or falling.

  2. lbH6WhbIxBq1FlxD
    lbH6WhbIxBq1FlxD
    Zkwk5aWeWHnsPMCa
    ehFtFeoqZJZriEZf
    • Use a flathead 2.5 mm screwdriver to remove the 5.7 mm screw from the wheels.

    • A tool should have been provided in the box for this purpose.

  3. bnVuQfKUKIXNe21s
    bnVuQfKUKIXNe21s
    LtgxdREiK4jj5Pq4
    • Pull the wheel assembly towards you so it comes straight off without resistance.

    • If there is resistance, make sure to apply gentle force when pulling as it can get damaged with too much force.

  4. 1iN3LwROkDBrULHQ
    1iN3LwROkDBrULHQ
    SSK61XH5LYpfklZ4
    • Use a Torx screwdriver to remove the four 9 mm screws from the assembly.

  5. 4BTAEjda5AMx4dUR
    4BTAEjda5AMx4dUR
    CeiTWTaBZHJJfV3f
    bWG3phMxZXB26PHq
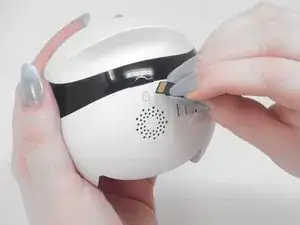
    • Use your fingernail to carefully press down and eject the Micro SD Card from the back of the Enabot.

    • Keep the Micro SD Card in a safe spot for later.

  6. YIIsIFRNRwmUEnZS
    YIIsIFRNRwmUEnZS
    oWoFVXhjDtQPPcE5
    • Place the iFixit opening tool inside the Micro SD slot.

    • Very carefully apply pressure to the top of the slot and pry open the casing to separate the upper and lower housing.

  7. qY4w2Krj6GV2EQE4
    qY4w2Krj6GV2EQE4
    cS6MAPbEuxeepkFW
    BRupX5cEXsiPFTxd
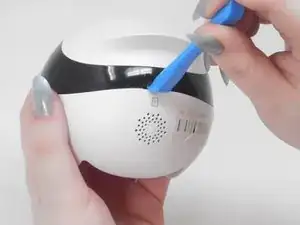
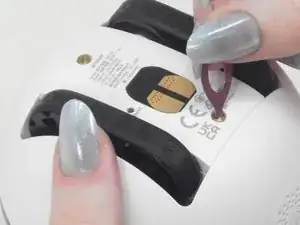
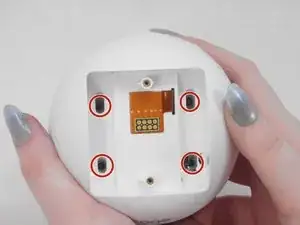
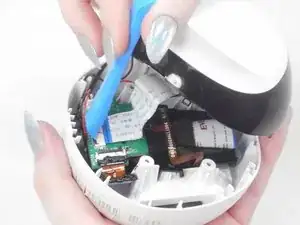
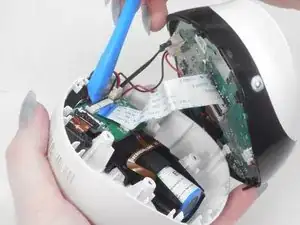
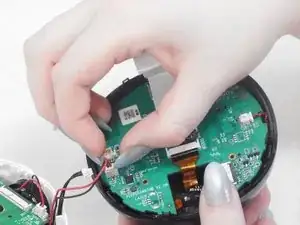
    • Using the iFixit opening tool or your fingernail, place it underneath the gray tab on the lower housing.

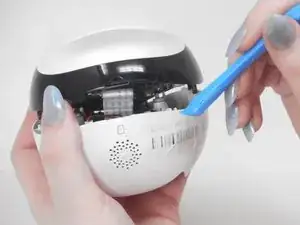
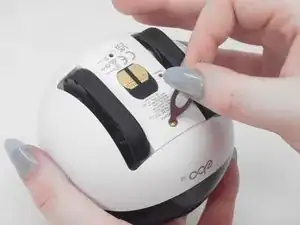
    • Lift the tab up and pull out the ribbon cable to disconnect it from the lower housing.

  8. lAZVpKqtx3Dl2eVg
    lAZVpKqtx3Dl2eVg
    nKiONmRPKIL6QGMU
    IyUcEwya5FxgZFvd
    • There are two black and red wire connectors attached to the upper and lower housing.

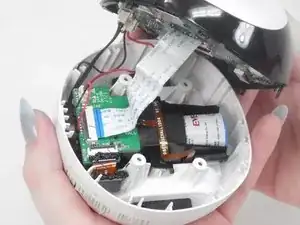
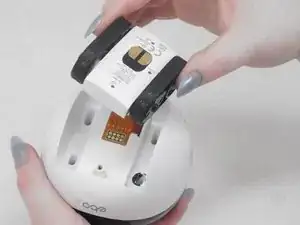
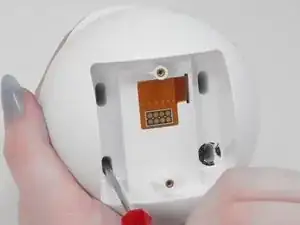
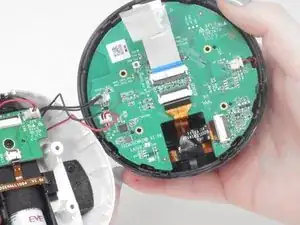
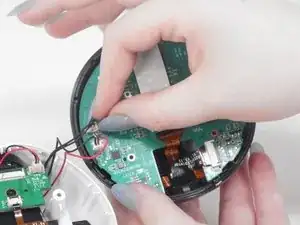
    • Gently use your finger nails to lift up and disconnect both wires to fully separate the upper and lower housings.

Conclusion

To reassemble your device, follow these instructions in reverse order.

Kevin H.

Member since: 15/02/24

680 Reputation

0 comments