Introduction

  1. FNXxUdZLPBGaWUbt
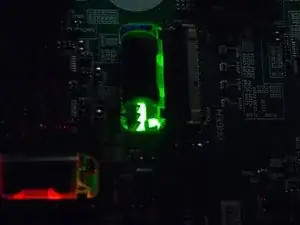
    • Here you can see the green stain I got on the projection. It is caused by dust (in my case) on the green lcd panel. It is to a certain degree possible to focus the projector on these stains.

  2. af4OJXYqYdHrUJs4
    • Remove filter and lamp.

  3. jQHYyLvsNpnGAFUd
    jQHYyLvsNpnGAFUd
    mVNkEkafTxUcO5lO
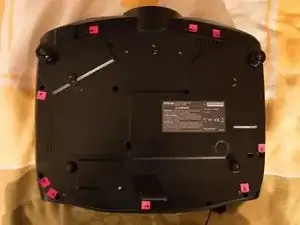
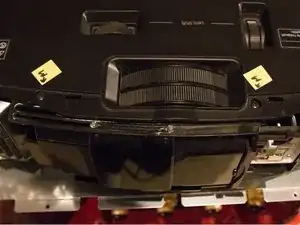
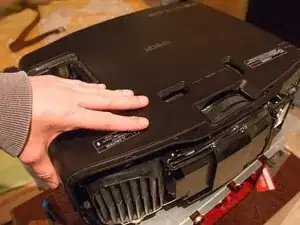
    • Remove 10 non metric screws, one inside the lamp housing and 9 at the bottom. I marked all non metric screws with pink markers.

  4. lAX5SircAnOdmDC3
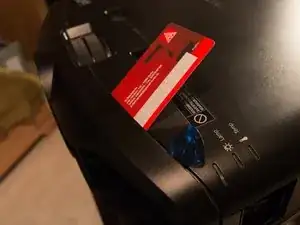
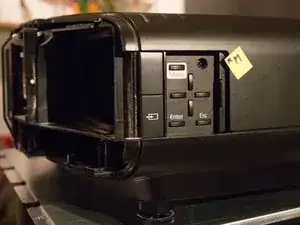
    • You can take of the front now. I used a guitar pick and a plastic card. Insert the pick carefully in the left side of the projector between case and front plate and try to make your way to the middle. Do the same from the right side, the front cover should come off now.

  5. HnYcCEDFpoINmKQk
    HnYcCEDFpoINmKQk
    XbVKeLb5hmJJbbeP
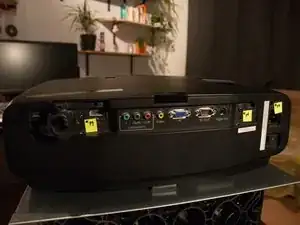
    • Remove the metric screws at the back, I marked them with yellow markers. The rear plate should come off than

  6. KB23fIPm3yacyA2P
    KB23fIPm3yacyA2P
    2Tgcx44J5vlPcWmM
    ZOtsvRMhWgM2bpHL
    • 3 more metric bolts need to be unscrewed (yellow markers).

  7. DAuFhpdyS2ZUZHFQ
    DAuFhpdyS2ZUZHFQ
    DcrZqALXWhObO53p
    • Lift up and remove the lid.

  8. 1l5LwIIeidXUrysw
    1l5LwIIeidXUrysw
    JraVVASGLqJQ2AwY
    wJLlndqETGVCiuOS
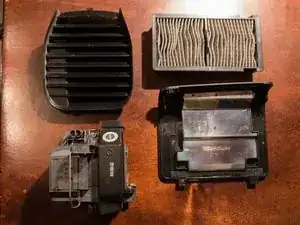
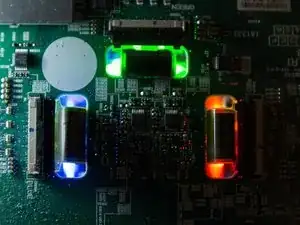
    • You can see the LCD block below the pcb.

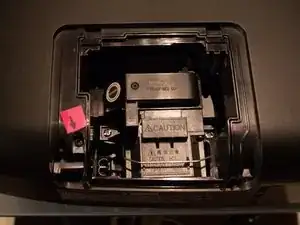
    • [optional] plug the lamp back in

    • CAUTION: The next step instructs you to plug in the device while the housing is off and the board is exposed. Be careful not to touch anything as it may pose an electrocution risk.

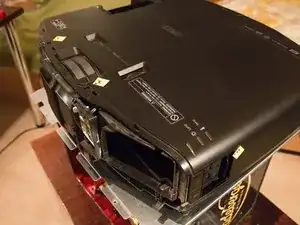
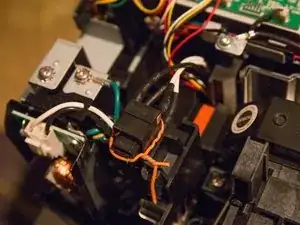
    • [optional] To get it running you need to overwrite the switch next to the lamp as you can see on the second picture. As soon as you plug the projector in there will be LIVE PARTS everywhere, continue with extreme caution!

    • Unplug the device and let it cool down! As pointed out by Peter Källgren (see comments) it is not wise to spray flamable gases onto hot or live parts!

    • You dont need to remove the pcb. Just use some clean and dry air to blow into the holes where the cable go through. If you use air or gas in cans, make sure to not freeze the panels! If you use a compressor make sure there is no oil or water in the air. Be careful with the nozzle, especially if it is made out of metall.

    Do NOT EVER spray compressed air from a spray can into the projector while it is running or even plugged in. Read the label of the spray can. See any warning about flammable gases. Well, there you go. Talking from experience.

    Peter Källgren -

    Thanks Peter, I added a warning to the guide. It could have came to my mind earlier that they use flamable gases in these spray cans, it seems that I was just lucky.

    Tobias F -

    Hi Thanks for providing this guide.

    Was it successful for you?

    Is there an 'after' video showing the improvement?

    I have the same issue with green blobs on a TW9400/5050ub model which appears to have a near identical chassis and construction.

    I found an online fixt video for the TW9300/5040ub where the engineer advise to gently vacuum the LCD ribbon inlets rather than spray, due a risk of the delicate LCD coatings flaking off.

    https://www.youtube.com/watch?v=CoQCD7Uy...

    darrenjpowell -

    In my case it worked very well, the dots are completely gone. I can't tell how good vacuum works. If you give it a shot let us know of the results.

    Tobias F -

Conclusion

To reassemble your device, follow these instructions in reverse order.

Tobias F

Member since: 22/12/18

169 Reputation

0 comments