Introduction

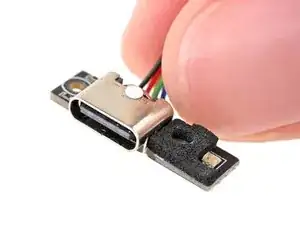
Use this guide to replace the USB-C port in your Fairphone Fairbuds.

You should replace your USB-C port if you're having issues charging the charging case or if USB-C cables connect loosely and require odd positions to work properly.

  1. cRraJONmYVGbpqJd
    cRraJONmYVGbpqJd
    xXvNP25mQIJDbQFP
    • Remove your earbuds from the charging case.

  2. lXay4EagVDRK6LON
    lXay4EagVDRK6LON
    aUd1McARvpJFRVnI
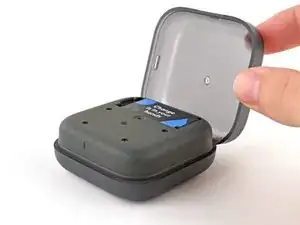
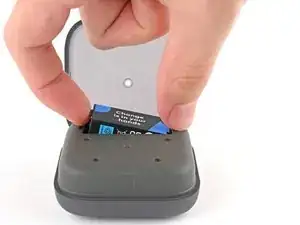
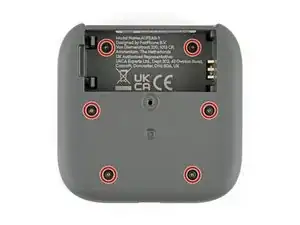
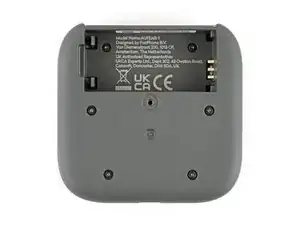
    • Flip your charging case upside down.

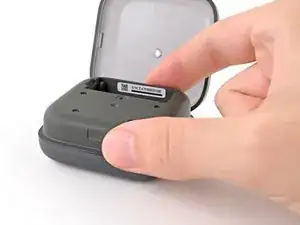
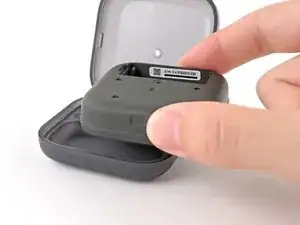
    • Use a Phillips screwdriver to remove the 4.5 mm‑long screw securing the outer shell.

  3. dhOS2gTspVWxpbKA
    dhOS2gTspVWxpbKA
    tgkFvDkDNbOIj1iw
    • Flip up the bottom of the outer shell to expose the battery.

  4. bJeAkHv6pELr6RSP
    bJeAkHv6pELr6RSP
    AuMwLE36qkuYcpAn
    GEQweoUy4JPi2RTo
    • Use your finger to pry up the battery at its notch and remove it.

  5. yRtRuKUPYrnXaIcu
    yRtRuKUPYrnXaIcu
    bGpYFKFrKJ1hc1nY
    • Lift the charging core out of the outer shell and remove it.

  6. pRAKA2tteaoWAS22
    pRAKA2tteaoWAS22
    LOR2YYN34peTyVMB
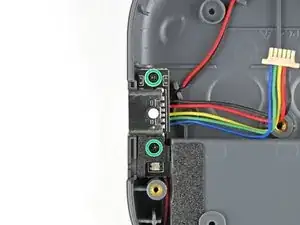
    • Use a Phillips screwdriver to remove the six 3.9 mm‑long screws securing the two halves of the charging core.

  7. ZaoUan133piZHLZT
    ZaoUan133piZHLZT
    LJpPvDgsL5rigPML
    wUtbBYSnpK5yKbHD
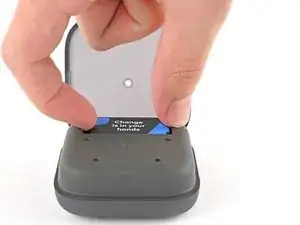
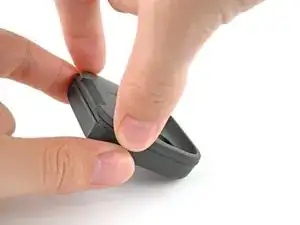
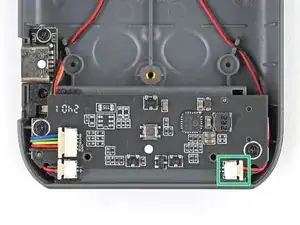
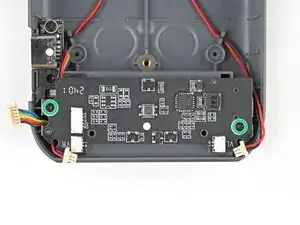
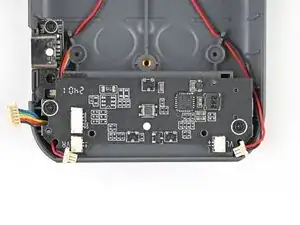
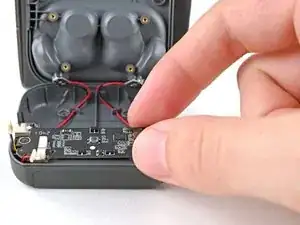
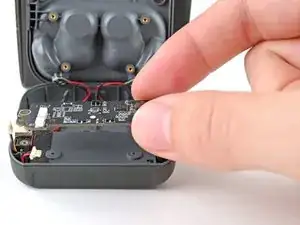
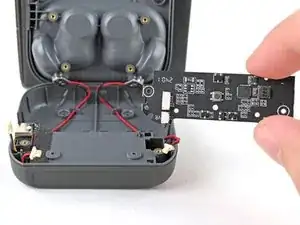
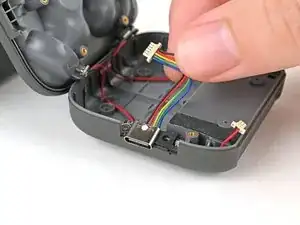
    • Flip over the charging core and grip its top half, near the pairing button.

    • Lift the top half and swing it over the core, letting it rest on something sturdy.

    • Don't try to separate the two halves, as they're still attached by cables.

  8. 2QA4IwZYaQMbRYnx
    2QA4IwZYaQMbRYnx
    vXtxhVJ5HkLHhuW4
    MObGt1i6VFSK6dZb
    • Use your fingers to pull the left earbud charging cable out of its socket.

    • Don't grip the cable! Only pull on the cable's plastic head.

    • If you're having trouble gripping the cable's head, use the tip of a spudger to push it out of its socket.

  9. UVD1fjdXWDHcaTsE
    UVD1fjdXWDHcaTsE
    U3psZWN1PgiJuiMe
    cZbC2msK2GXMHymM
    • Since the remaining connectors are next to each other, it can be difficult to grip them with your fingers. The following instructions use a spudger instead.

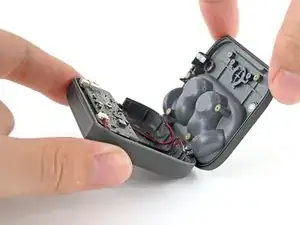
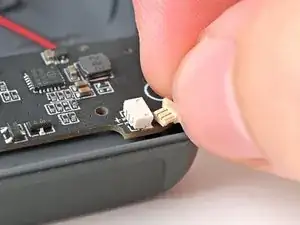
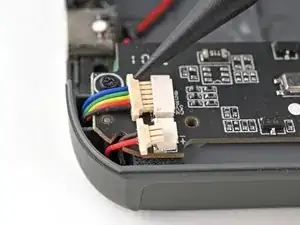
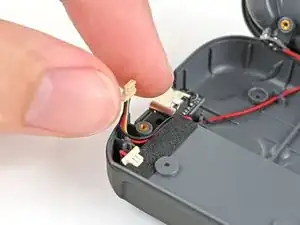
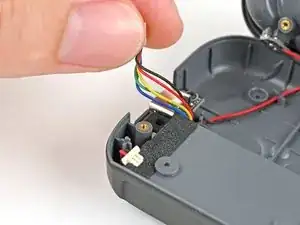
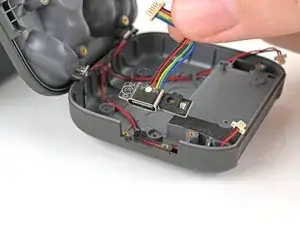
    • Use the tip of a spudger to push the right earbud cable head out of its socket to disconnect it.

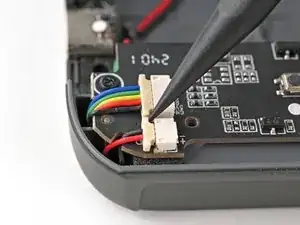
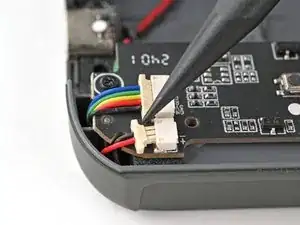
    • Repeat for the USB-C port cable.

  10. qluPaH2M6rGjC12J
    qluPaH2M6rGjC12J
    KUDeDrB3APoiOqIN
    • Use a Phillips screwdriver to remove the two 3.9 mm‑long screws securing the mainboard.

  11. cwtPxqeHpjAoUCtf
    cwtPxqeHpjAoUCtf
    MlMfTefMcGGMTU1R
    S2CWYJ1USfanvDMK
    • Lift the mainboard off its posts in the charging core and remove it.

  12. RQUikKfIXcJwAKWd
    RQUikKfIXcJwAKWd
    KBhYFwBKVxjKmgUh
    • Move the USB-C port cable out of its groove next to the screw peg.

  13. MNetJqsma2FawYSl
    MNetJqsma2FawYSl
    2piPSW3bbjTDyUiY
    • Use a Phillips screwdriver to remove the two 3.9 mm‑long screws securing the USB-C port.

  14. LDgkb5IRvGQEk3rD
    LDgkb5IRvGQEk3rD
    3GrVx3jfJf5LfqKQ
    • Lift the USB-C port out of the charging core and remove it.

Conclusion

To reassemble your device, follow these instructions in reverse order.

Take your e-waste to an R2 or e-Stewards certified recycler.

Repair didn’t go as planned? Try some basic troubleshooting, or ask our Answers Community for help.

Alex Diaz-Kokaisl

Member since: 16/01/22

163004 Reputation

0 comments