Introduction

This guide will show how to safely replace the battery without damaging other parts of the board, or the battery itself.

  1. Jq1t3EuWxGMgHJtq
    Jq1t3EuWxGMgHJtq
    ipqFveJFeS4m2xfm
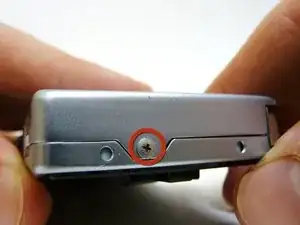
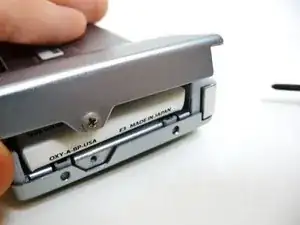
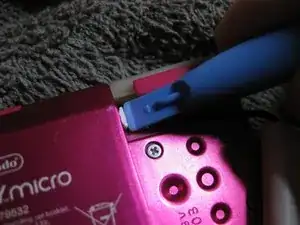
    • Remove the Phillips #00 screw on the side of the Game Boy closest to the directional pad.

    • Once the screw has been loosened, lift the cover off the back of the device.

  2. R3Ay3jcLbNaKOwWB
    R3Ay3jcLbNaKOwWB
    nEktRbxrXACqhwMU
    MXRP2T3obP1GUVlT
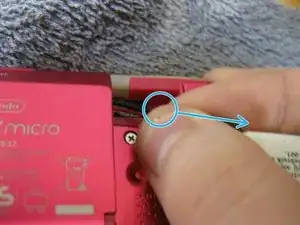
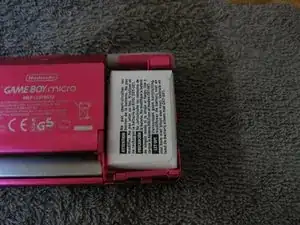
    • Grip, and gently pull outwards on the cable as close to the battery connector as you can

    • Pull in level with the back cover in the direction as indicated by the arrow (not upwards, and not sideways), otherwise you could damage the connector, the cable, or just rip everything off.

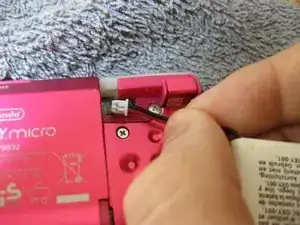
    • When plugging the battery back in, make sure to use a non-conductive tool with a flat head to push the battery plug back into the connector, to avoid shorting the battery pins in the plug.

Conclusion

To reassemble your device, follow these instructions in reverse order.
SonoSooS

Member since: 30/07/24

212 Reputation

0 comments