Introduction
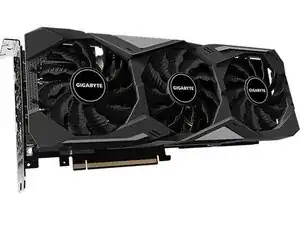
Follow the steps below to thoroughly clean your 2070 Super video card and replace thermal paste and thermal pads.
Tools
-
-
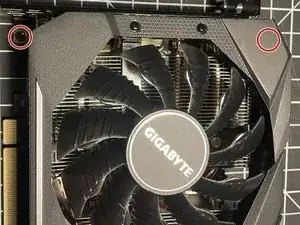
Using the #1 Philips screwdriver, remove the two screws below the fan shroud
-
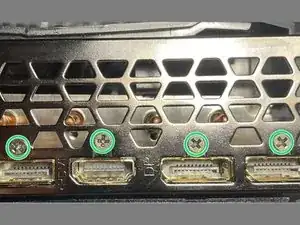
Turn the video card to face the display ports
-
Remove the four screws using a #0 Philips screwdriver
-
-
-
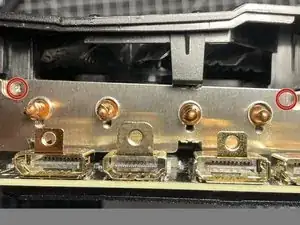
Using a #0 Philips screwdriver, remove the two screws holding the fan shroud to the heat sink, then flip the card over and remove the identicaltwo screws from the other side of the card
-
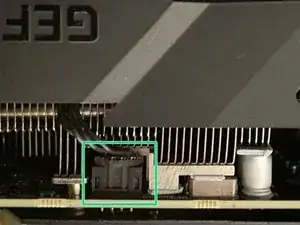
Disconnect the two fan connectors from the video card
-
Separate the fan shroud from the video card
-
-
-
Flip the card over so the back plate is facing up
-
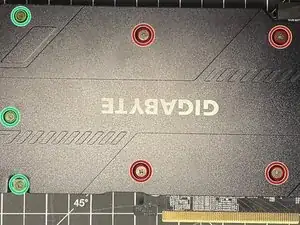
Using a #0 Philips screwdriver, remove the four screws with springs from the back plate
-
Using a #0 Philips screwdriver, remove the three remaining screws from the back plate
-
Flip the card back over and carefully remove the heat sink from the card
-
-
-
Using a #0 Philips screwdriver, remove the three screws from the front of the card
-
Carefully remove the back plate from the card
-
-
-
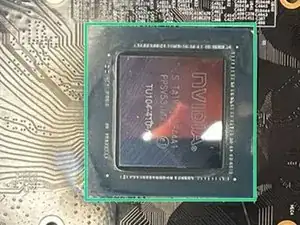
Using 90% or higher isopropyl alcohol and cotton swabs, carefully remove all old thermal paste from the heat sink and CPU
-
Be sure to completely remove any remnants of the old thermal paste
-
-
-
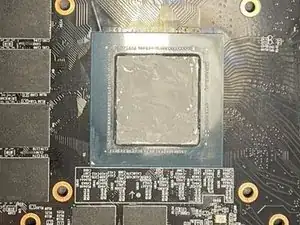
Using a high quality thermal paste, such as Thermalright TF thermal paste, carefully apply a small amount to the video card
-
Use a thin spreader, or credit card-like tool, spread the thermal paste evenly over the card, ensuring no excess paste leaks over the edge
-
Heating the thermal paste in warm water may help it spread more evenly
-
-
-
Remove the old thermal pads and clean the VRAM chips with 90% isopropyl alcohol
-
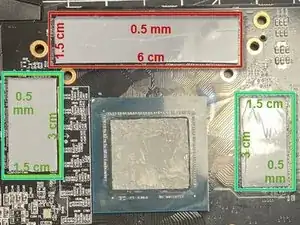
Using the 0.5 mm thermal pad, place one strip, measured at 6 cm x 1.5 cm along the top VRAM
-
Using the 0.5 mm thermal pad, place two strips, measured at 3 cm x 1.5 cm along the VRAM on either side of the CPU
-
-
-
Remove the old thermal pads and clean the heat sink with 90% isopropyl alcohol
-
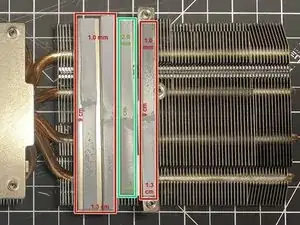
Using the 1.0 mm thermal pad, place three strips, measured at 9 cm x 1.3 cm, along the heat sink as outlined in red
-
Using the 2.0 mm thermal pad, place one strip, measured at 9 cm x 1.3 cm, along the heat sink as outlined in green
-
-
-
Remove the old thermal pads and clean the back plate with 90% isopropyl alcohol
-
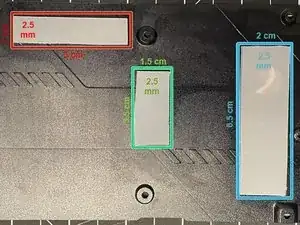
Using the 2.5 mm thermal pad, place one strip, measured at 5 cm x 1 cm on the back plate as outlined in red
-
Using the 2.5 mm thermal pad, place one strip, measured at 3.5 cm x 1.5 cm on the back plate as outlined in green
-
Using the 2.5 mm thermal pad, place one strip, measured at 6.5 cm x 1.5 cm on the back plate as outlined in blue
-
-
-
Follow all steps in reverse order to reassemble the video card once cleaned and thermal paste and all thermal pads are replaced
-
Follow the steps below to thoroughly clean your 2070 Super video card and replace thermal paste and thermal pads.
13 comments
Thank you so much. It was exactly what I was looking for.
steps 1 and 2 (fan shroud/display port shield) are unnecessary. The entire fan + heatsink assembly comes off in one piece and the DP shield stays attached to the board. Also on step 8, all of the pads are 1mm. The green one was not 2mm on mine. (measured with caliper, they are all identical)
Not Me -
On step 8, 9x1.3cm wasn't too wide? It looks more like 9x0.8cm.
Albert -
A couple of questions:
1. Is it ok to use 3mm pads instead of 2.5mm in the back plate?
2. On step 8, 9x1.3cm is way to big, it looks more like 9x0.8cm. Also can i use 1.5mm instead of the 2mm?
Albert -
Did you do it? What thickness did you use for the backplate?
Feixas -
Mine were already 3mm on the back. I wouldn't use a thinner pad than was already installed in case it no longer makes good contact, but I reckon you could get away with 0.5mm thicker on most of them without issue because they squash flat pretty well, almost like clay. (At least these Thermal Grizzly minus pads do)
