Introduction

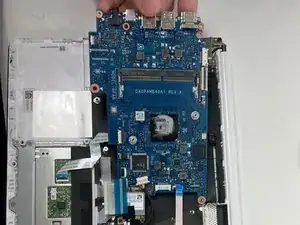
This guide will show you how to replace the motherboard in an HP 14-dq0052dx laptop. It could be the charging port that is broken, and with that the motherboard needs to be replaced since the charging port is soldered to it. If you know how to solder then the best course of action is to try to replace the charging port, but if you're not then replacing the motherboard is the best option after that. There will be some wires that need to be removed so be very careful with removing them or you might damage your laptop further.

  1. TEmUn6U1RTCGVLHD
    • Orient your laptop so that the vents are facing upwards.

  2. Sfen1EGBZWimFqwi
    • Remove the rubber feet.

  3. vagDhyuTdEd5MBwj
    vagDhyuTdEd5MBwj
    3C6J4AL1h46CGvLj
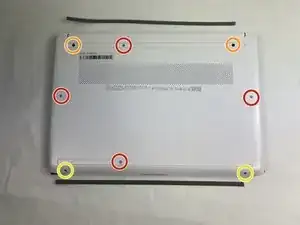
    • Remove the four M2.0 x 6 mm screws using a JIS #1 screwdriver.

    • Remove the two M2.5 x 6 mm screws using a JIS #1 screwdriver.

    • Remove the two M2.0 x 4 mm screws using a JIS #1 screwdriver.

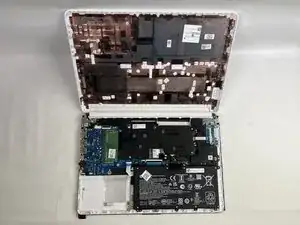
    • Use an iFixit opening tool to pry the back cover away from the laptop.

  4. LXU4cTXJvaouX2Zm
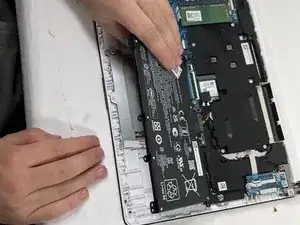
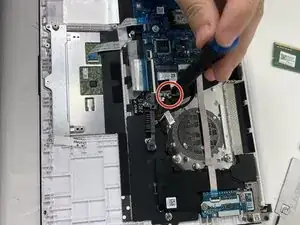
    • Unplug the battery from the motherboard.

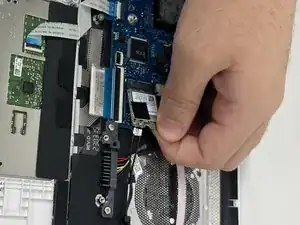
    • Carefully pull back and raise the battery out of its slot.

    • Replace the battery.

  5. mFpQsPYAZANQNkIP
    • Remove the five 4 mm screws from the heatsink.

  6. mGHM3GlrciRfXQfo
    • Remove the heatsink from the laptop.

  7. BKmrOO1ysOBmyVP4
    • Remove the 4 mm screw from the bracket holding down the motherboard.

  8. uMHdtICDiSMF3OVc
    uMHdtICDiSMF3OVc
    qItb2lZaiLfbLp6j
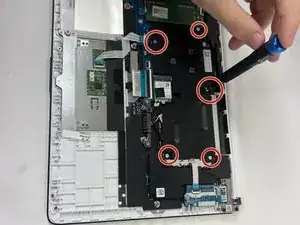
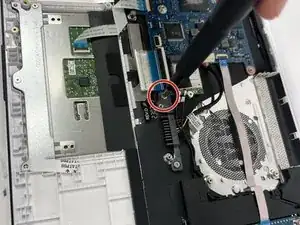
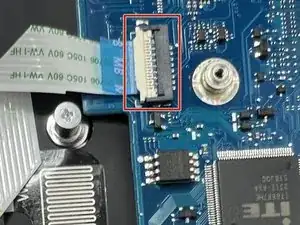
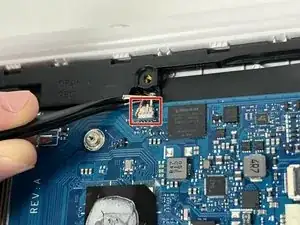
    • Lift up the retaining clip to access the ribbon cable attached to the motherboard.

    • Be careful when removing the ribbon cable as it is prone to ripping which will damage it.

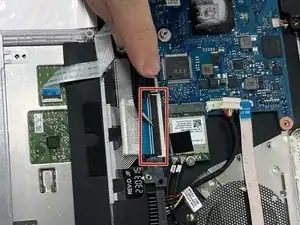
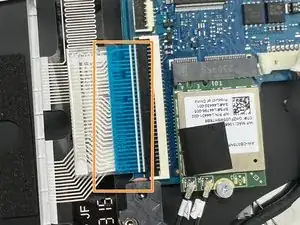
    • Remove the ribbon cable from the motherboard

  9. xiqjnHl2erCKVvOT
    • Lift up this tab and remove the ribbon cable from the motherboard.

    • Be gentle with the ribbon cable as it can easily tear.

  10. EMD3v1DQREadxStr
    EMD3v1DQREadxStr
    yMeIZZ5Iva1VIgZE
    • Remove the 4 mm screw from the Wi-Fi card.

    • Remove the Wi-Fi card from the motherboard.

  11. YAZHKmawy5HDQg1I
    YAZHKmawy5HDQg1I
    QBS5N5GiUZyMChuW
    • Disconnect the small wires from the top of the motherboard.

    • Be extremely careful with these wires as bending them can cause the fragile inner wire to break.

  12. PSEO5KPCAIGn6vVK
    • Carefully remove the motherboard.

Conclusion

To reassemble your device, follow these instructions in reverse order.

DamianR

Member since: 18/10/24

279 Reputation

0 comments