Introduction

This guide will show you how to replace the touchpad button board of your HP Pavilion 14-cf0014dx laptop.

Before you begin the repair, make sure your laptop is powered off and unplug it from the charger.

  1. 4Vvkm3dhfLGhMaU2
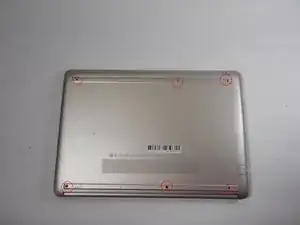
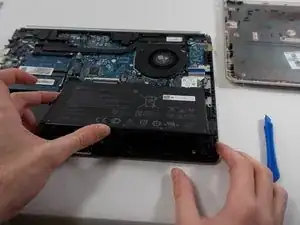
    • Flip the device over so that the backside is facing you.

    • Remove the rubber feet to expose six screws.

    • Using the Phillips #1 screwdriver, remove six screws securing the back panel to the device.

  2. H5IpLO4sBUmUXiWG
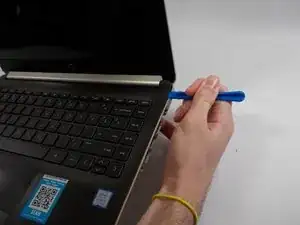
    • Insert a plastic opening tool and run it along the edges of the laptop.

    • Remove the back panel from the device.

  3. mCmrkDq5CMsy12dr
    • Using the Phillips #0 screwdriver, remove the four screws securing the battery in place.

  4. JbRoFTPSK6F5esPN
    • Lift the battery up and out and remove it from the device.

  5. dRCe1EvgfQTcZPq5
    • Remove the two 6.7 mm screws with a Phillips #0 screwdriver.

  6. eKAvxf3tPdIH2cKU
    eKAvxf3tPdIH2cKU
    F6S6XKeZYryFOrO5
    • Unlock the ZIF connector with the tip of the spudger.

    • Remove the ribbon cable.

  7. nrBdtnvT5ShOWHF5
    • Remove the daughterboard with a pair of tweezers.

  8. AygPxvYfRuSkVrQB
    AygPxvYfRuSkVrQB
    c2XADT1fqYqUMdjG
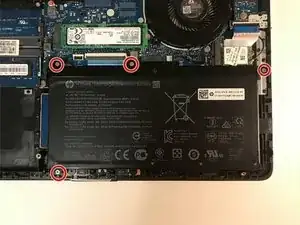
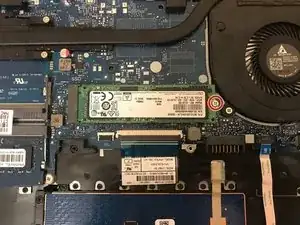
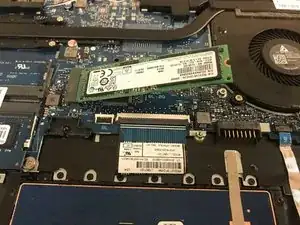
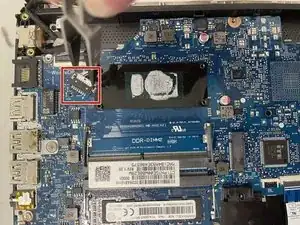
    • Using the Phillips #0 screwdriver, remove the single screw securing the SSD to the motherboard.

  9. ptNKO1Hi2CsMeSoP
    ptNKO1Hi2CsMeSoP
    WuPMWQfNXj1dBZxh
    S5SC66K2GiD1NRDi
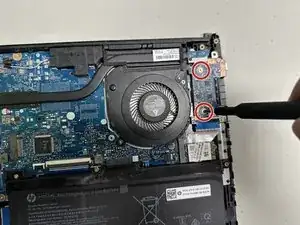
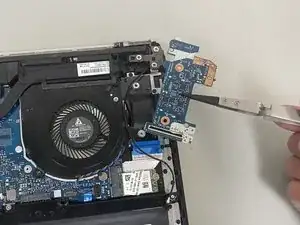
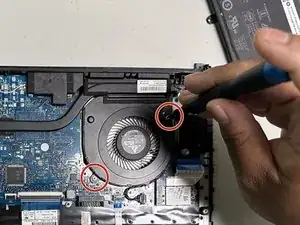
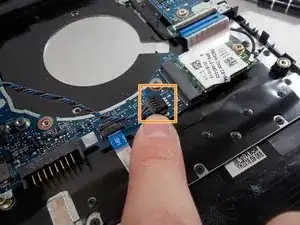
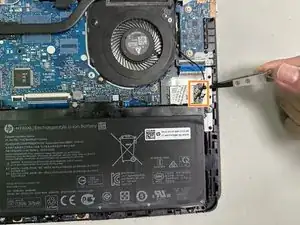
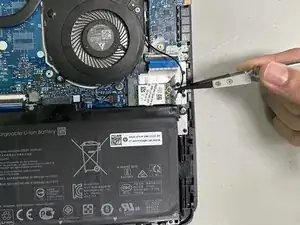
    • Remove the two 4.2 mm screws with a Phillips #0 screwdriver.

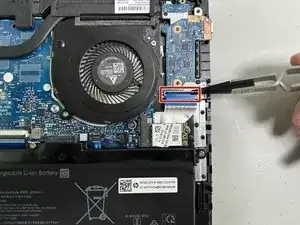
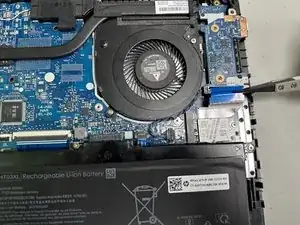
    • Use a spudger to disconnect the fan connector from the motherboard.

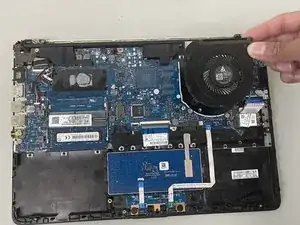
    • Remove the fan from the laptop.

  10. kOOYxeJMqedwVl2W
    kOOYxeJMqedwVl2W
    Lnsx5l4IdkiL2oiV
  11. JkuF1RfmtJwXxdwn
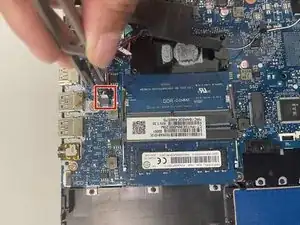
    • Remove the sliding cable connector with a pair of tweezers.
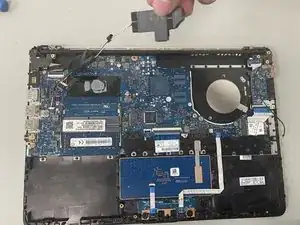
    • Pull from the white plastic tab and not the cables to avoid ripping them.

  12. HLWaNVtNicSHgyAO
    HLWaNVtNicSHgyAO
    Q3dqeDljiKRrtYWO
    5POQGMZGeOxhI3GT
    • Remove the 4.2 mm screw with your Phillips #0 screwdriver securing the Wi-Fi card.

    • Use tweezers to detach the coaxial cables from the Wi-Fi card.

    • Hold the tweezers closer to the metal pin to avoid ripping the cable and damaging the connector when removing the clip.

  13. MvxReGu3YTIciBSR
    • Use a Phillips #0 screwdriver to remove the 2.5 mm screws from the motherboard.

  14. tTmaKFAIQxf1PPrG
    tTmaKFAIQxf1PPrG
    yFORZGZhNtWh2wro
    1iXcPvcBTI6bePbp
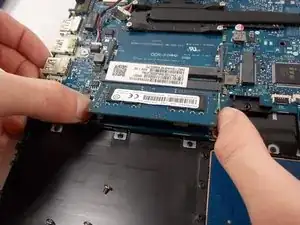
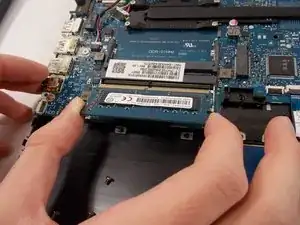
    • Using your fingers, pull the metal arms (located on both sides of the RAM stick) slightly away from it.

    • Do not separate the metal clamps (holding the chip) too much to avoid bending them.

    • The RAM stick will pop up by a few millimeters.

    • Remove it at an angle and not straight up so you don't damage the socket.

  15. DDyABu1C3jlJxQCu
    DDyABu1C3jlJxQCu
    aWUAaNrwqWJcXuBa
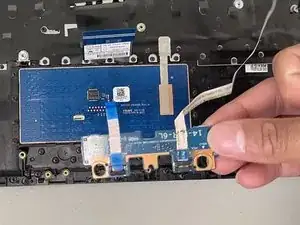
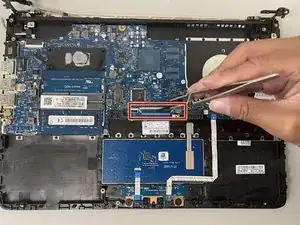
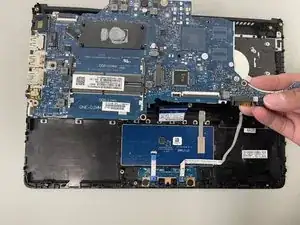
    • Unlock the ZIF connectors with a pair of tweezers.

    • Remove the ribbon cables by the blue tab.

  16. QGxKEbiFJ2PbdTou
    • Remove the motherboard from the device.

  17. Ull2PmjuhfVchTOe
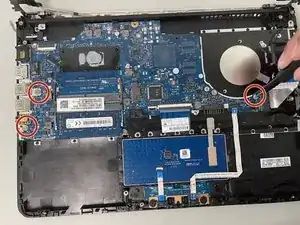
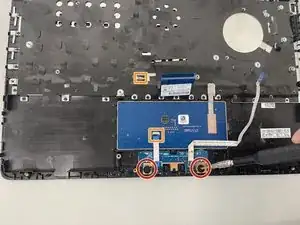
    • Use a Phillips #0 screwdriver to remove the two 2.7 mm screws that secure the touchpad button board.

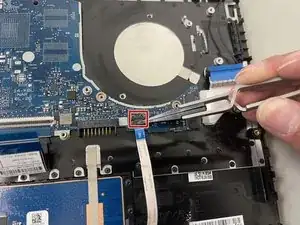
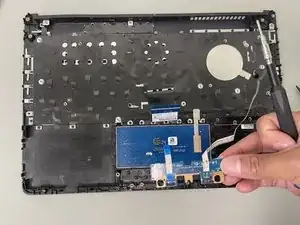
    • Use a spudger or a clean fingernail to flip up the locking flap on the ZIF connectors securing the two ribbon cables connected to the button board.

    • Use the widest tool possible to avoid damaging the delicate hinge pins.

    • Once the flap is in the unlocked position, use tweezers or your fingers to gently pull the cable out of its socket by the tab.

    • To reconnect, make sure the locking flap is flipped up and gently reinsert the cable. Then, flip the locking flap down to secure the cable. The cable should slide into the socket with little to no force. If you're having trouble, remove it, check that the flap is fully unlocked, and try again.

  18. hfk5jrx2Hrthtlbt
    • Remove the touchpad button board from the laptop.

Conclusion

To reassemble your device, follow these instructions in reverse order. Take your e-waste to an R2 or e-Stewards certified recycler.

Ben

Member since: 08/02/24

85 Reputation

0 comments