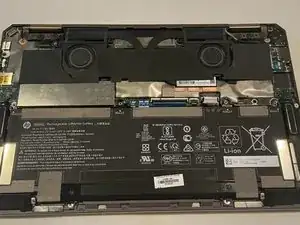
Introduction

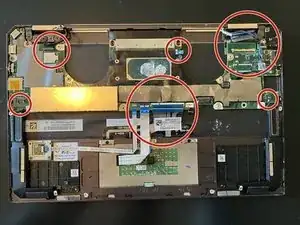
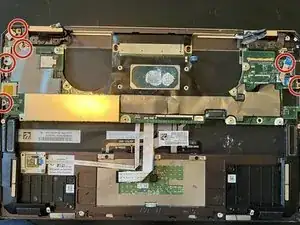
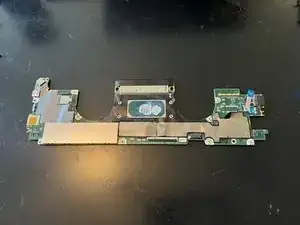
In this guide, we will outline the steps needed to remove the motherboard for replacement, cleaning, or any other repair.

  1. kduPsBpHAGi2wfqo
    kduPsBpHAGi2wfqo
    ereKkyBUu1xQdZl2
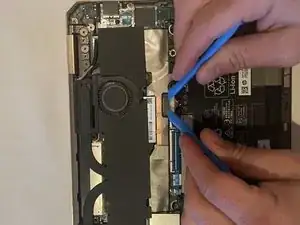
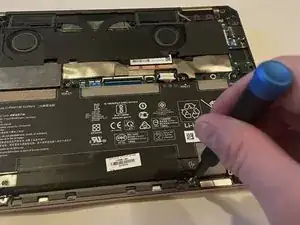
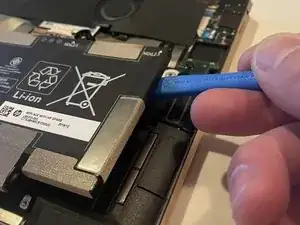
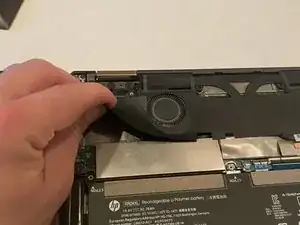
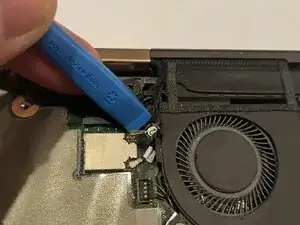
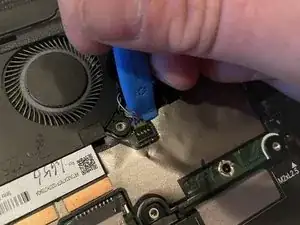
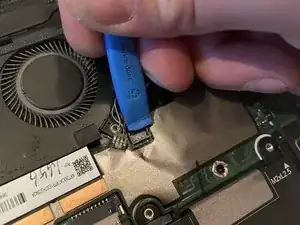
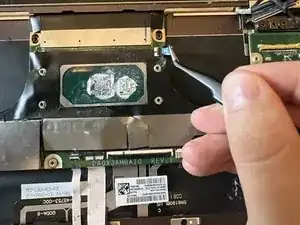
    • Use two opening tools, one on either side of the battery plug, to slowly pull the plug straight out of its port.

    • Alternatively, use your fingernails.

  2. JXlIdePWOILhNsIj
    JXlIdePWOILhNsIj
    lkLTEES1kmY2TNdh
    • Use a Phillips #00 screwdriver to remove the six 2.5 mm screws securing the battery.

  3. nHlaXih4TUpXY1DB
    nHlaXih4TUpXY1DB
    JjK5cSaFTCPwpVn3
    • Carefully lift the edge of the battery with an opening tool.

    • Lift the battery up and out.

  4. ouBaGrwhejOl5UWt
    ouBaGrwhejOl5UWt
    VcduxGYV6HXkGsT2
    umBpSjkIno2WSPlq
    • Remove the black film around the fans.

  5. OEXbXTlpkt6gm6e2
    OEXbXTlpkt6gm6e2
    Y2PjkwSsPeWR3WgF
    • Remove the two Wi-Fi card antenna wires using a small pry tool.

  6. C4DGHoHXGIpkCMWJ
    C4DGHoHXGIpkCMWJ
    fuAX2GtmxufR5AVY
    • Remove the eight 3 mm Phillips #00 screws securing the fan assembly.

  7. EvBZYIh3IJRsrPCR
    EvBZYIh3IJRsrPCR
    ZMCdMfLLAUK5SnQM
    EPmr4PAvebBaVFbs
    • Disconnect the two fan cables using a small pry tool.

    • Be sure not to rip the wires, as they are fragile. It may help to slightly pry on the fans while disconnecting the wires, so the pry bar has enough room.

  8. cNsPFRXvEiOpaHfR
    cNsPFRXvEiOpaHfR
    TVGlrhDLWOMEZd4f
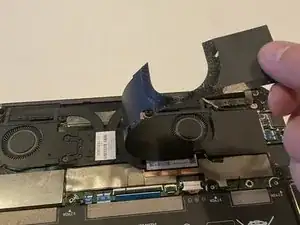
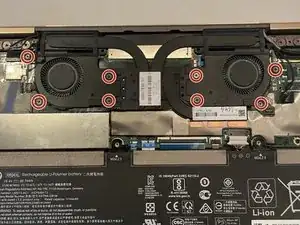
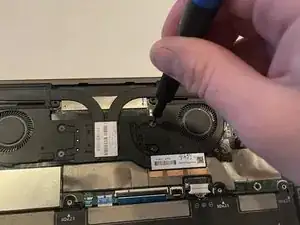
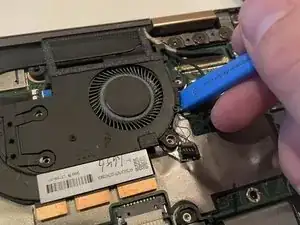
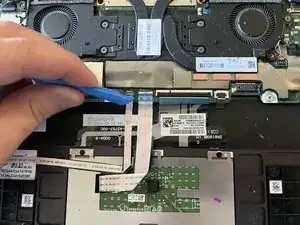
    • Use an opening tool to gently lift the edge of the fan assembly.

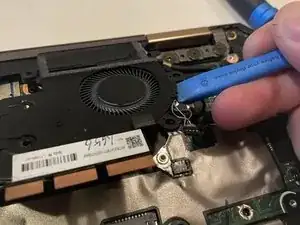
    • Lift the fan assembly up and out.

  9. 3wteAuDetxJqrRqW
    3wteAuDetxJqrRqW
    SkDTDmCQnPLQ3J1h
    fMUFhETQrKLOmxCb
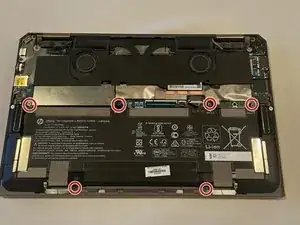
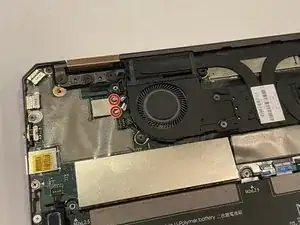
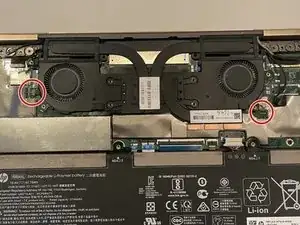
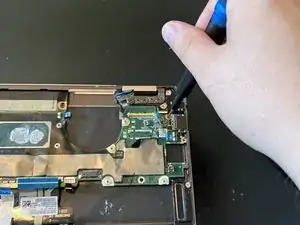
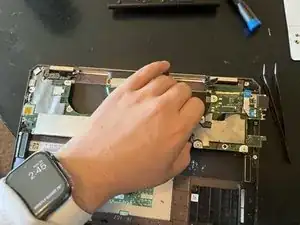
    • Disconnect the six ribbon connectors: four at the bottom of the motherboard and two at the top.

    • Disconnect the two speaker connectors and two display connectors as well.

    • The tweezers help tremendously when releasing the locking tab for the ribbon connectors.

  10. DEE5WWGkFMToxZEv
    DEE5WWGkFMToxZEv
    vGkHa1FsmROuBu6s
    • Remove the six 2 mm Phillips #00 screws securing the motherboard.

    • Note that one will be beneath a security sticker, pictured on the lefthand side of the motherboard.

  11. MdvcRstV4xUmRRW3
    MdvcRstV4xUmRRW3
    AeRcCldnfFhuD3Ie
    gN1EgEbW2OXtqEoS
    • Gently remove the motherboard.

Conclusion

To reassemble your device, follow these instructions in reverse order.

Maxwell Francesco

Member since: 14/02/23

599 Reputation

One comment

Where can I buy a replacement motherboard? I know eBay and AliExpress but I dont trust that too much and HP support just doesnt answer like ever and if they do they just tell me they will transfer me and then Im on hold again for literally 2hrs

Aleksander Stokin -