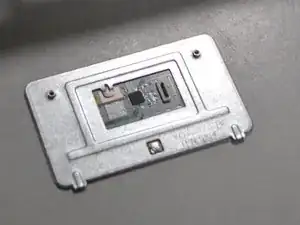
Introduction

An HP Stream 11-d010nr can develop a faulty clickpad through mechanical or electrical malfunctions. This replacement is fairly straightforward and should only take 5-10 minutes. Unplug and power off your device before you attempt to open the device.

  1. n2rhmBxEXG6V2yBa
    n2rhmBxEXG6V2yBa
    txQGFPX2hRvtFhdu
    • Unplug and turn off the HP Stream 11 before disassembling the device.

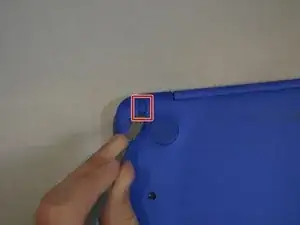
    • Using a spudger, gently pry off the two elliptical rubber inserts located in the top corners.

    • Carefully remove the two circular rubber inserts positioned beneath the removed elliptical inserts.

  2. 1PMNZYFXOTHGUEKo
    • Using a Phillips #1 screwdriver, remove the eleven 5.6 mm screws securing the back cover.

    • Keep the screws in a safe place for reassembly.

  3. bQOtd153e3lfYJgQ
    bQOtd153e3lfYJgQ
    IuvAkyFWhZ6L1ZCD
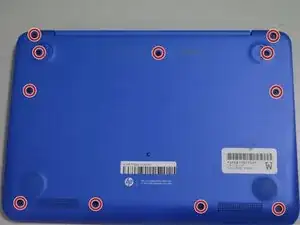
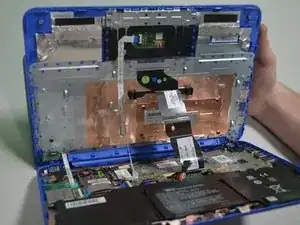
    • Using an iFixit opening tool, carefully pry open the case to separate the keyboard from the main body. Work slowly to avoid damaging the edges.

    • HP Stream 11s tend to be really difficult to open. If your device is not opening with a standard iFixit opening tool, use a nylon spudger, then the metal spudger, or a metal Jimmy as the last resort.

    • When using the metal spudger or Jimmy, be careful not to bring these tools into contact with any electronic components of the device as this can damage the device.

  4. OE12qoTwAGZrooIn
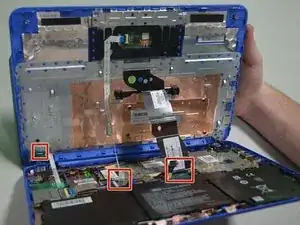
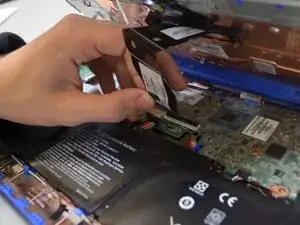
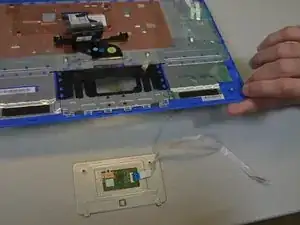
    • Carefully lift the keyboard and identify the three ribbon cables connecting the main body of the laptop to the keyboard.

    • Lift the keyboard with extreme care to avoid damaging the delicate ribbon cables. Applying excessive force can easily tear or break them easily.

  5. OotCEBOdKWBQLr1L
    OotCEBOdKWBQLr1L
    WeorDiShDoLXjMCP
    aUNhrfBMZSGnb4JN
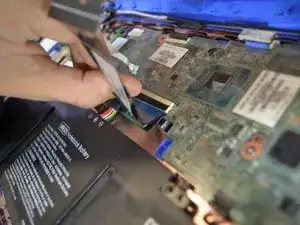
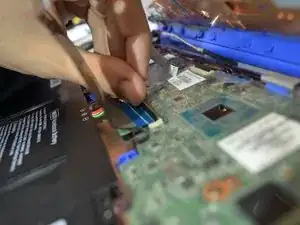
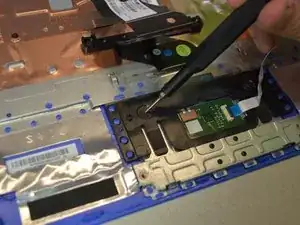
    • Using a spudger, gently lift the flaps on the ZIF connectors to release the three ribbon cables securely attached to them.

    • Carefully disconnect the three ribbon cables.

  6. dA2FOQMiRJNpX4Am
    • Gently lift the keyboard out of the laptop to fully detach it from the device.

    • While handling, avoid damaging any remaining components.

  7. bTMZDFZfUZdSk5lI
    bTMZDFZfUZdSk5lI
    HTDuccBwntNTPLJP
    • Remove the two 2mm #000 Phillips screws.

  8. kQrRZnkJjQGlAI1V
    • Release the clickpad by lifting the keyboard up.

    • When installing the new clickpad, make sure the black tabs go into the laptop.

Conclusion

To reassemble your device, follow these instructions in reverse order.

Josh Corrigan

Member since: 24/01/19

341 Reputation

0 comments