Introduction
This guide will walk you through the steps to replace the speaker on your HP Stream 11-d010nr.
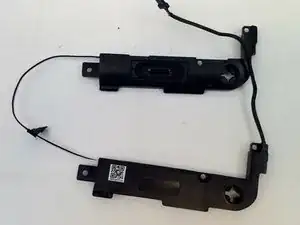
The speaker is a crucial part of your laptop. Without it, you miss out on many key features of laptop ownership. Signs of speaker damage may include distorted audio, static noise, or no sound at all.
Before completely replacing your speakers, it’s important to explore all other possible solutions. First, check your sound settings to ensure your laptop isn’t muted and that the audio hasn’t been disabled. Next, verify that you have the correct and updated drivers; outdated or incorrect drivers can cause audio issues. Try uninstalling and reinstalling the audio drivers for the HP Stream 11-d010nr. Finally, check if any recently installed software conflicts with your laptop’s audio system; uninstall any new software if necessary.
If you’ve completed these steps and your audio issues persist, follow this guide to replace your speakers.
Before you begin,
- make sure that your device is powered off and unplugged to prevent electric shock, short circuits or damage.
- If your battery is swollen, you must take extreme precautions to stay safe. if you are unsure if your battery is swollen or are unaware of what to do follow this guide.
- It might be a good idea to wear an anti-static wrist strap to help protect you while working, a guide to help set this up can be found here
- Steer clear of any loose or exposed wires
- Make sure to handle all parts with extreme care to avoid any extra or unnecessary damage.
- When you are finished, please dispose of your old speaker safely by following this link which will go through the process of recycling electronics.
Good luck!
-
-
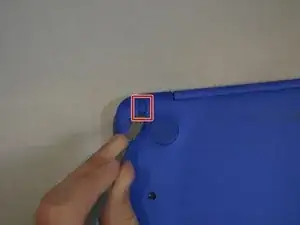
Using a spudger, gently pry off the two elliptical rubber inserts located in the top corners.
-
Carefully remove the two circular rubber inserts positioned beneath the removed elliptical inserts.
-
-
-
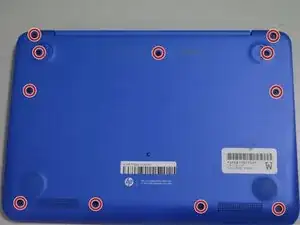
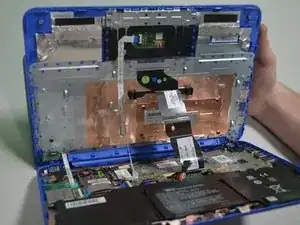
Using an iFixit opening tool, carefully pry open the case to separate the keyboard from the main body. Work slowly to avoid damaging the edges.
-
-
-
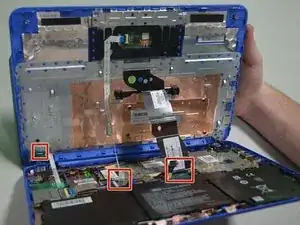
Carefully lift the keyboard and identify the three ribbon cables connecting the main body of the laptop to the keyboard.
-
-
-
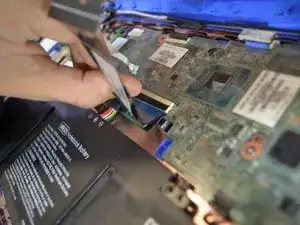
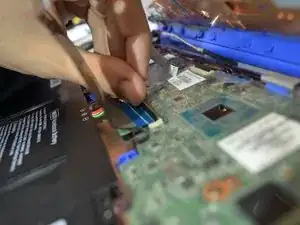
Using a spudger, gently lift the flaps on the ZIF connectors to release the three ribbon cables securely attached to them.
-
Carefully disconnect the three ribbon cables.
-
-
-
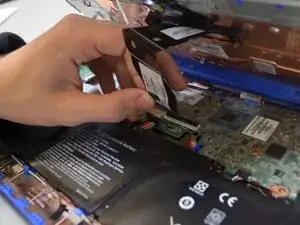
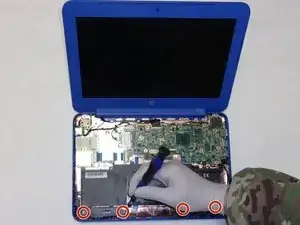
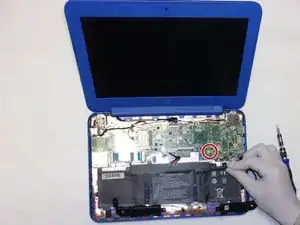
After disconnecting the speaker from the computer hardware, carefully lift it out of its slot and place it in a safe location.
-


To reassemble your device, follow these instructions in reverse order.