Introduction

This guide shows a step-by-step process for removing a broken, old, or non-functional main board for a Honeywell Quietset Tower Fan HYF260BV2 and replacing it with a new one.

Safety Tips:

  • Unplug your fan before doing anything.
  • Wear a mask if your fan is very dusty.
  1. HSfbfubRHd4nmI2F
    HSfbfubRHd4nmI2F
    HXsOUKN2uDTvkyXw
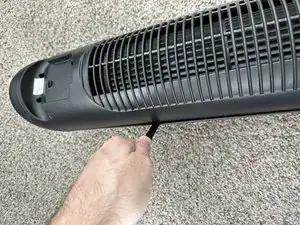
    • Unplug your fan and place it on its side.

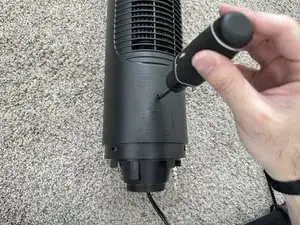
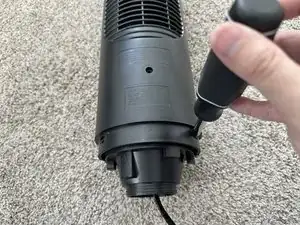
    • Twist the red plastic piece off from the bottom.

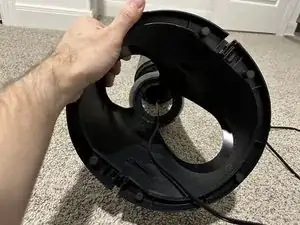
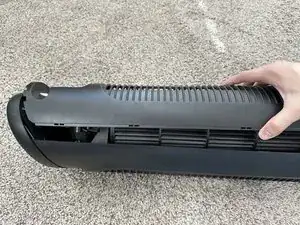
    • Carefully detach the base from the fan to expose the screws located at the bottom of the fan.

  2. XhIDnNsnhFZ2VFFv
    XhIDnNsnhFZ2VFFv
    MtVrnJ4AqMLFO4HC
    xmW3EiYueqkLSJRQ
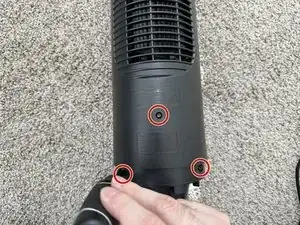
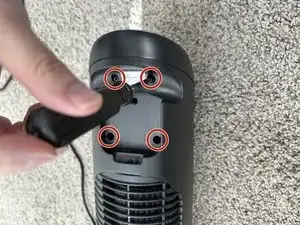
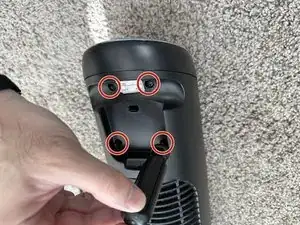
    • Use a TORX Security TR15 screwdriver to unscrew the three 12 mm screws near the bottom of the fan.

  3. xJfNHKgJyhWHsU1m
    xJfNHKgJyhWHsU1m
    yWeLsoXbd5mbmaUG
    LuryOOlByQmOEBDJ
    • Use a Phillips #1 screwdriver to remove four 12 mm screws on the head of the fan.

  4. F44sWMBTkuEqVxAG
    F44sWMBTkuEqVxAG
    bXrCBSNZjHBpy24u
    SP4EI53SSk2peRgo
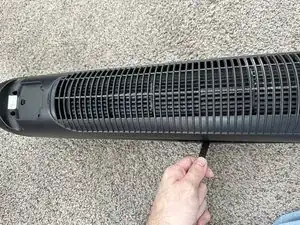
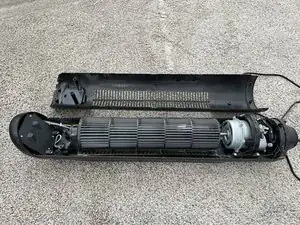
    • Use a heavy-duty spudger or opening tool to release the tabs securing the front and back of the fan, then gently pry them apart.

    • Do this gently because you could break the connectors for the back of the fan.

  5. ERfAPFEoAAbYCUHE
    • Pull off the back of the fan and set it aside.

    • Dust the inside of the fan if it is needed.

    • Be careful when dusting and ensure nothing is knocked out of place.

  6. GeykjpRECE1DHHF3
    GeykjpRECE1DHHF3
    jNGbWvVWDHvT1GLv
    Z5OVhMj2s2wRJpNf
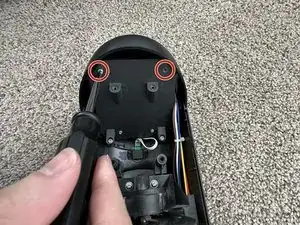
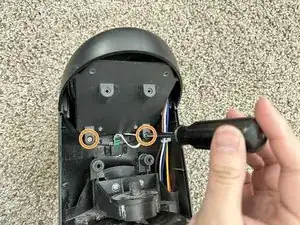
    • Use a Phillips #1 screwdriver to remove the two 10 mm screws at the head of the fan.

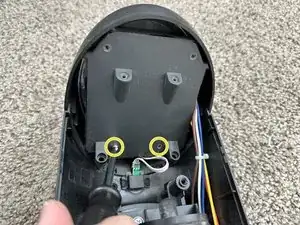
    • Remove the two larger 14 mm Phillips #1 screws located below.

    • Remove the two 10 mm Phillips #1 screws located between the 14 mm screws.

  7. uJfaBmqWWAEEJTIs
    • Pull the gray cover from the fan to reveal the main board.

  8. CaglStjF2Ue3vKlP
    • Carefully hold the edges of the main board and slowly pull it out.

  9. mMsMhswdrxfGNdo6
    mMsMhswdrxfGNdo6
    Hv5tDVZifAOHDCUQ
    • Unplug the main board.

    • Follow the cables connected to the board to the bottom of the fan.

  10. DESRDFfPDSCBu1uM
    DESRDFfPDSCBu1uM
    eOYBlFrxN2UDxRj6
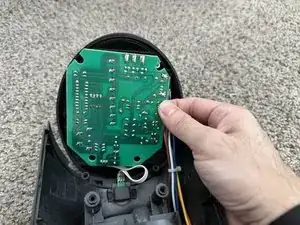
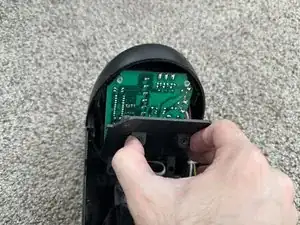
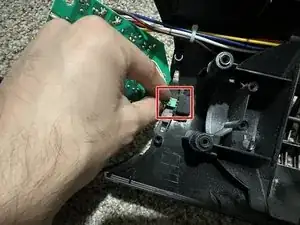
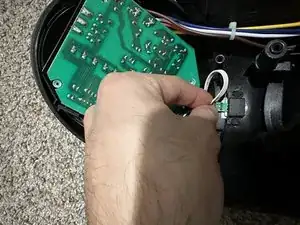
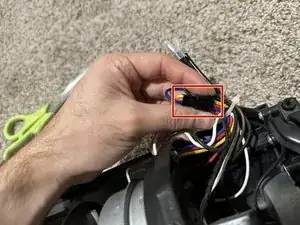
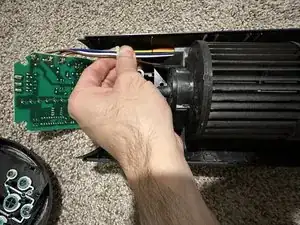
    • Unplug the connector to disconnect the bundle of wires.

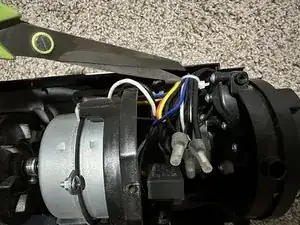
    • Use scissors to cut the zip tie that secures the wires.

    • Be careful when you cut the zip tie so that you don't accidentally cut the wires.

  11. OMND4Y5TEwbRw4UY
    • Pull the wires up and slide them out of the fan to replace the main board with a new one.

Conclusion

To reassemble your device, follow these instructions in reverse order.

Joshua Moreno

Member since: 16/10/24

193 Reputation

0 comments