Introduction

An awl is a tool that allows you to sew through very thick materials. It takes a bit of practice to master, but once you have it down you'll be ready to repair boots, webbing, and packs on the fly.

  1. PkrENiLGKnkabTeM
    PkrENiLGKnkabTeM
    nJHDZKfcm4ysW1ga
    • Loosen the awl by holding the smooth end and twisting the ridged piece counterclockwise.

  2. dR1BXydPijlRwOLd
    dR1BXydPijlRwOLd
    mHpZRLbJAvJeeQPu
    Sr6U5gXjMgEhkcEf
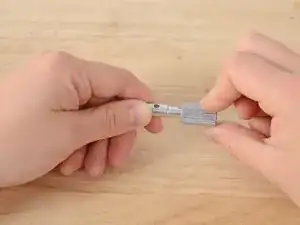
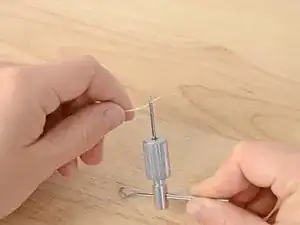
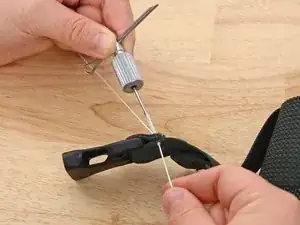
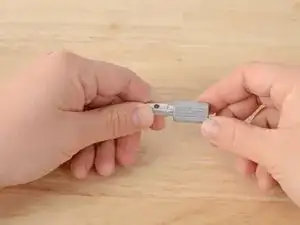
    • Insert the needle into the ridged end of the awl, with the eye facing outward.

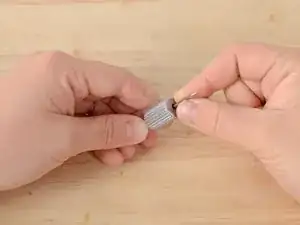
    • Retighten the awl by holding the smooth end and twisting the ridged end clockwise.

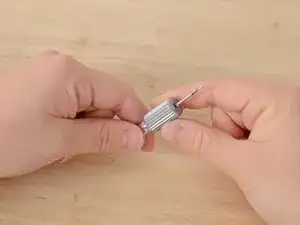
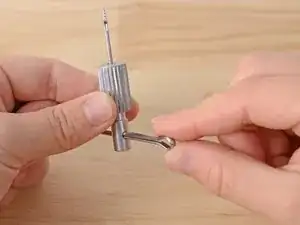
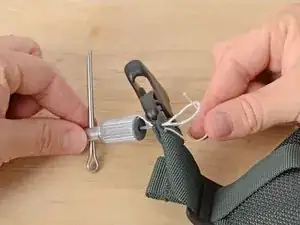
    • Insert the cotter pin into the hole in the smooth end.

    • The cotter pin provides a nice handle for working with the awl.

  3. xorAU1CaYYHtoGfn
    xorAU1CaYYHtoGfn
    OrZp1JNeU6bon13p
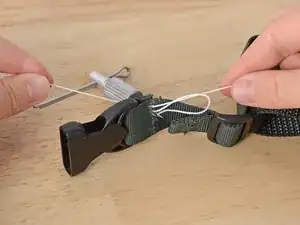
    • Thread the needle with very thick thread.

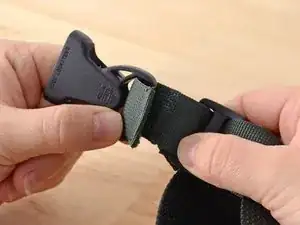
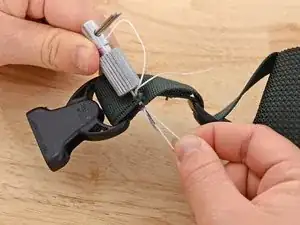
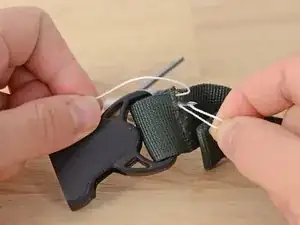
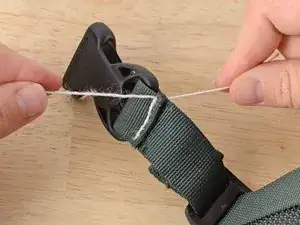
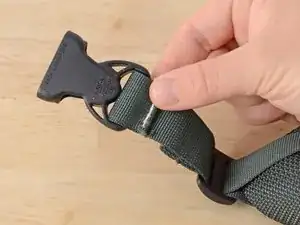
    • Align your material. In this case we are resewing the webbing holding a buckle in place.

  4. nASoDteuPIPuqMBO
    nASoDteuPIPuqMBO
    WecEjcJNmHyhtXHC
    • Stab the threaded needle of the awl through all the layers of fabric you are sewing.

    • Thick material is very hard to puncture. Be careful not to puncture yourself in the process.

    • If you are having difficulty puncturing the material, you can use a vice to hold the material in place, or place something on the backside of the material to puncture into. A rubber eraser works great.

  5. BtdQoSKtp1e6rEDC
    BtdQoSKtp1e6rEDC
    RGMOf2gK5t5Lbq1N
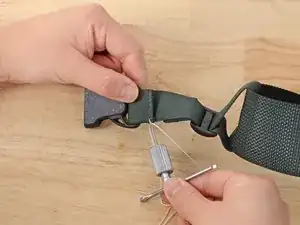
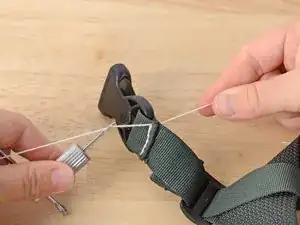
    • Pull the short end of the thread through the material, so that it dangles free on the other side of the material.

  6. ZBAB33xRgZGedYjj
    ZBAB33xRgZGedYjj
    wJVYe5kXWHiDlPhL
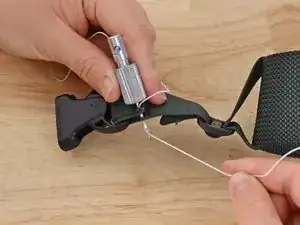
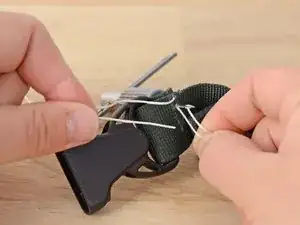
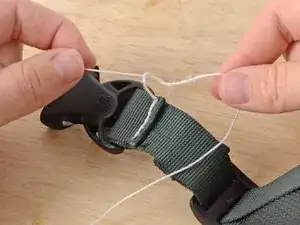
    • While holding on to the short, free end of the thread, carefully pull the awl back through the material.

    • The short, free end of the thread should stay on the other side of the material.

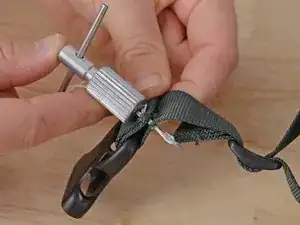
    • Continue holding the short, free thread, and puncture the material again a short distance away, moving along the material you are sewing.

    • This distance will become a stitch. Try to keep your stitch length short and even.

  7. nHFsAN6k1T2LxZN2
    nHFsAN6k1T2LxZN2
    ovdmgcuvL1bNYyds
    MOuoHV1ZydNWWAy5
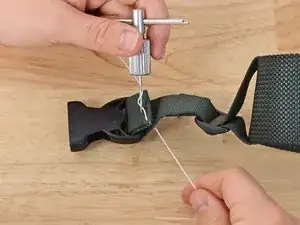
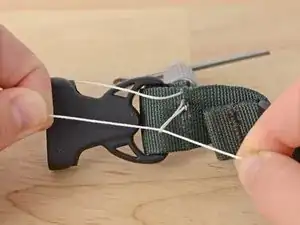
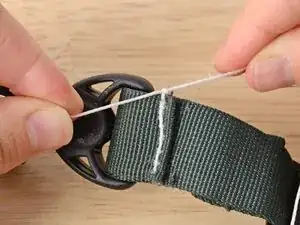
    • Pull the thread from the eye of the needle, creating a loop.

    • Put the short, free end of the thread through the loop you just created in the thread.

  8. LuUDqBBXbtPDme5i
    LuUDqBBXbtPDme5i
    rlTLLDUlhwEnTAfn
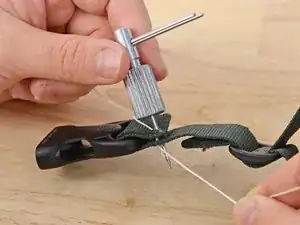
    • Holding the short, free end of the thread taught, pull the awl back out through the material.

    • Pull both ends of the thread taught.

  9. bX42RfIiMNZ436nC
    bX42RfIiMNZ436nC
    K5YxaqrVYWuK6Tgq
    gKIgJdXnWCXp3LPe
    • Continue reinserting the awl, creating a loop of thread from the eye of the needle, threading the short, free end, and removing the awl to create your stitches.

    • While you are getting the hang of it, refer back to steps 6-9 of this guide.

  10. 2BZ2nLkbXewd2tpQ
    2BZ2nLkbXewd2tpQ
    UD5qOAvNHpJZpJeV
    16WNQTdCmyNaNS5C
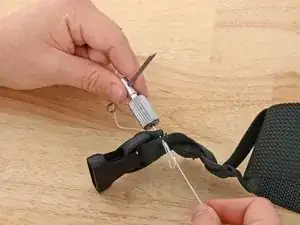
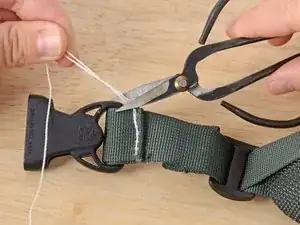
    • When you come to the end of your material, take one last stitch.

    • Clip the end of the thread that runs through the needle, leaving enough length to tie a couple of knots.

    • Remove the awl.

  11. DqaNyttTIdpmU1Cm
    DqaNyttTIdpmU1Cm
    HRZTLPfS3255c42o
    • Tie an overhand knot with the two ends of the thread.

    • Pull taught.

    • Tie another knot or two to secure the stitching.

  12. ef2TTSmqMARJDxaQ
    ef2TTSmqMARJDxaQ
    jpPFYJ2OiAUtkBvS
    • Clip the threads, and admire your handiwork.

Brittany McCrigler

Member since: 05/03/12

89748 Reputation

0 comments